M1series_ServiceManual_e.pdf - 第39页
3 Mechanical Section 3-11 Camera Cleaning of Lens Filter When components or obstacles get on the lens filter, remove them with a blower brush or tweezers. When the gr ease gets on the filter, use camera lens cleaner and …

3 Mechanical Section
3-10
Head Choke / Nozzle Choke and Solenoid Valve Failure
Perform the following checkups about once a week.
■ Solenoid Valve Failure
A dust or dirt may be caught in the switching valve of solenoid valves, which causes the air to leak. And the
leaking air may cause the [Suction OFF] state to be the [Suction ON] state. This problem will increase the
possibility of remaining components on the head.
● Checkup by "Manual > Air Pressure"
(1) Checking maximum air pressure
Press your finger on the tip of the head with "Vacuum On" state, then check the air pressure. The normal
value is 600 or more.
(2) Checking head choking
Check the air pressure without a nozzle on the head. The normal value is about 40 or less.
If the value is 120 or more, the error occurs at the time of nozzle changes.
(3) Checking nozzle choking
Check the air pressure with a nozzle on the head. "Choke Threshold" is specified for each nozzle. If the
value is larger than the specified one, the nozzle choke error occurs.
(4) Checking failure in switching valve
Check to see if the air pressure changes with the [Suction OFF] state.
- Press your finger on the tip of the head/nozzle, and check if the air pressure varies.
- Switch the ON/OFF state several times and check if the air pressure varies.
If the pressure varies when the solenoid valve is in the OFF state, there may be an air leakage.
NOTE: To check the air pressure precisely, you need to use a digital pressure gage.

3 Mechanical Section
3-11
Camera
Cleaning of Lens Filter
When components or obstacles get on the lens filter, remove them with a blower brush or tweezers.
When the grease gets on the filter, use camera lens cleaner and lens cleaning tissue.
If condensation occurs inside the protective filter, remove the filter to wipe off the moisture with lens
cleaning tissue.
Cleaning of Scan Camera
Remove dirt/dust in a gentle way from the lens and mirror of the scan camera, using a dry thing like a cotton
swab.
Avoid applying your finger pressure directly to the lens and mirror through the use of such things as tissues.
If you need to use liquid cleaner for a stubborn dirt, apply as little amount as possible and wipe it off
completely.
The surface of the scan camera mirror is very sensitive. Be sure to treat the
mirror with extra caution.
3 Mechanical Section
3-12
Lubrication
Lubrication Points
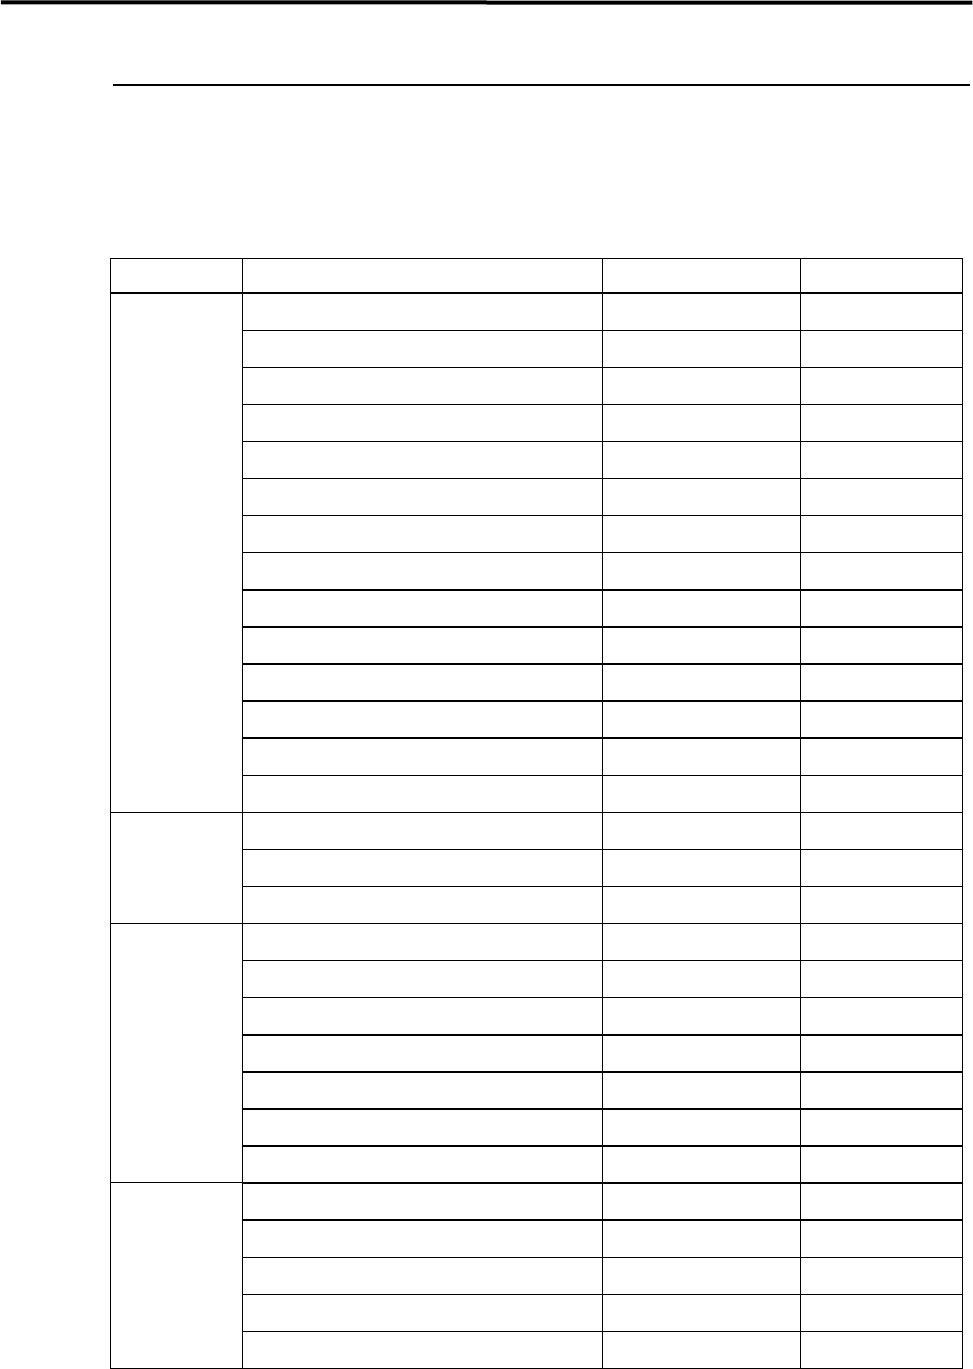
Lubricate the specified portions listed below with cotton swab soaked with lubricant.
UNIT PORTION LUBRICANT FREQ.
Mounter Ball Screw of X-axis Grease Every two weeks
LM Guide of X-axis (Upper and Lower) Grease Every two weeks
Ball Screw of Y-axis (Right and Left) Grease Every two weeks
LM Guide of Y-axis (Right and Left) Grease Every two weeks
Feeder Bank Plates Grease Every two weeks
Conveyor Width Adjusting Screw Grease Monthly
Conveyor Guide Shaft Grease Monthly
Ball Screw of Z-axis Grease Every two weeks
Spline Shaft of Z-axis Grease Every two weeks
Linear Way of Z-axis Grease Every two weeks
Ball Screw of S-axis Grease Every two weeks
LM Guide of S-axis Grease Every two weeks
Nozzle Holder Silicone Grease Monthly
Nozzle Silicone Grease Weekly
MX-20 Ball Screw Grease Monthly
(OPTION) Slide Pack Grease Monthly
Slide Pack (Shuttle Unit) Grease Monthly
MX-40 Shuttle Clamp Grease Monthly
(OPTION) V-Guide Track Grease Monthly
Ball Screw Grease Monthly
Slide Pack Grease Monthly
Slide Shaft Grease Monthly
Slide Shaft (Relay Unit) Grease Monthly
Spline Shaft (Relay Unit) Grease Monthly
MX-ST2 Shaft Grease Monthly
(OPTION) Parallel Pin Grease Monthly
Downside of cap Grease Monthly
Contact part of shaft and cap Grease Monthly
Contact part of shaft and bracket Grease Monthly
NOTE: Do not apply excessive oil/grease. This may cause oil/grease scattering when the mounter is in operation.