00196433-02_AI_Vakuumpumpe_X-Serie_70XDE+EN.pdf - 第108页
Assembly instructions: Vacuum pump for SIPLACE X-se ries 04/2009 Edition 108 : Switch the placement mach ine on at the main switch. The vacuum pump must switch on as well, although not necessarily as soon as the placemen…
Assembly instructions: Vacuum pump for SIPLACE X-series
04/2009 Edition
107
2.8.5 Vacuum pump connection
: Check that the vacuum pump was set to the right voltage for your power supply at the factory.
To do this, read the manufacturer's user manual. To change the voltage:
– Open the cover over the current input (4 screws).
– Set the right voltage as described in the manufacturer's user manual.
2
Depending on the country's voltage, it may also be necessary to convert the pump from a star to
a delta configuration:
Voltage 330V to 520V :
Star configuration
No conversion required - supplied as
standard
Voltage 190V to 300V :
Delta configuration
Current input
2
2
2
2
2
Assembly instructions: Vacuum pump for SIPLACE X-series
04/2009 Edition
108
: Switch the placement machine on at the main switch. The vacuum pump must switch on as
well, although not necessarily as soon as the placement machine is switched on.
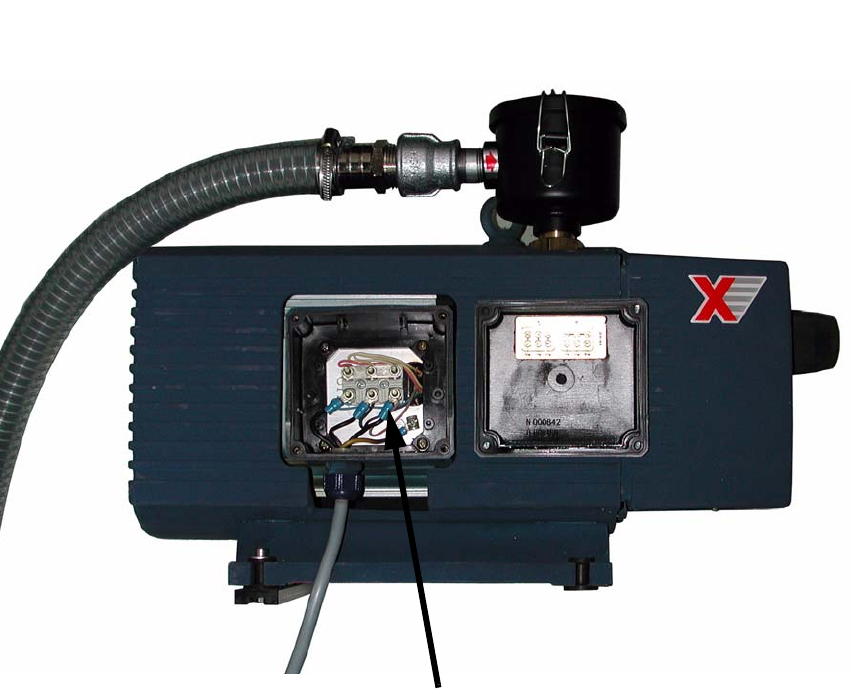
: Press button S1 (through an opening in the case) on the connection unit to start the vacuum
pump.
Button S1
2
2
: If the pump starts to turn incorrectly, switch off the entire system again. Disconnect the vacuum
pump from the supply voltage.
: If two connections for the vacuum pump exhibit the
same effect, you will have to rewire the con-
nection for the supply cable in the connection unit (swap
the two phases).
If only one vacuum pump is running incorrectly, rewire the motor contactor (by swapping the
two phases).
2
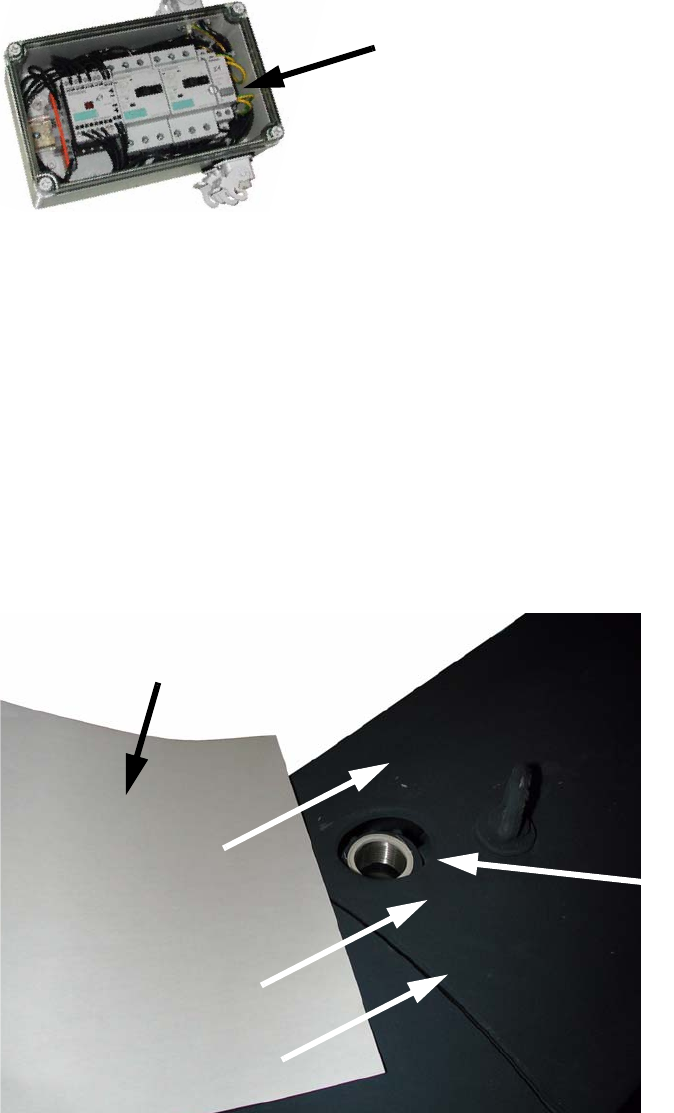
: Hold a sheet of paper over the intake opening of the vacuum pump to test whether the pump
is sucking or blowing. For vacuum pump operation, it must suck.
Intake opening
Intake opening
2
Assembly instructions: Vacuum pump for SIPLACE X-series
04/2009 Edition
109
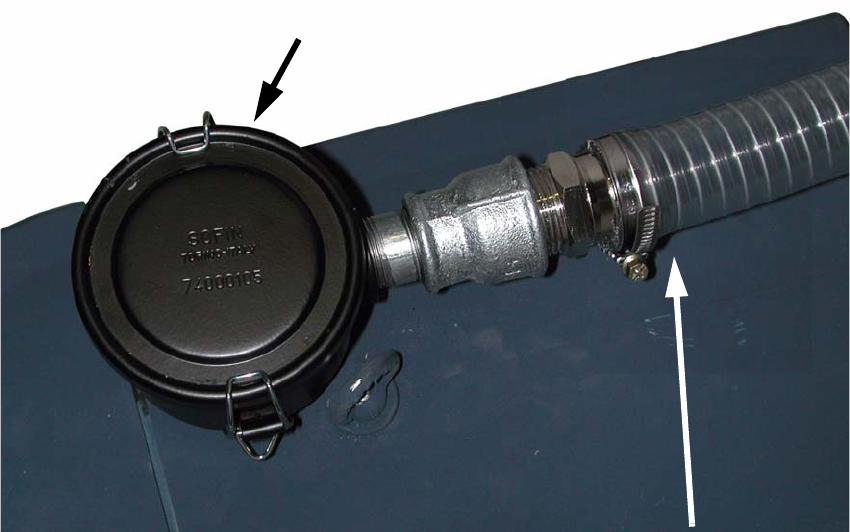
: Screw the filter cartridge onto the vacuum pump (see photograph below).
: Attach the hose to the output on the side of the filter
cartridge and fix the hose using the “Hose
clip DIN 3017 NW 32 - 50” (item no.: 00363127-xx).
Attach the hose and fix in place
Filter cartridge
2
2
2
2
2
2
2
2
2
2
2
2
2
2