00196433-02_AI_Vakuumpumpe_X-Serie_70XDE+EN.pdf - 第109页
Assembly instructions: Vacuum pump for SIPLACE X-series 04/2009 Edition 109 : Screw the filter cartridge onto the vacuum pump (se e photograph below). : Attach the hose to the outp ut on the side of the filter cartridge …
Assembly instructions: Vacuum pump for SIPLACE X-series
04/2009 Edition
108
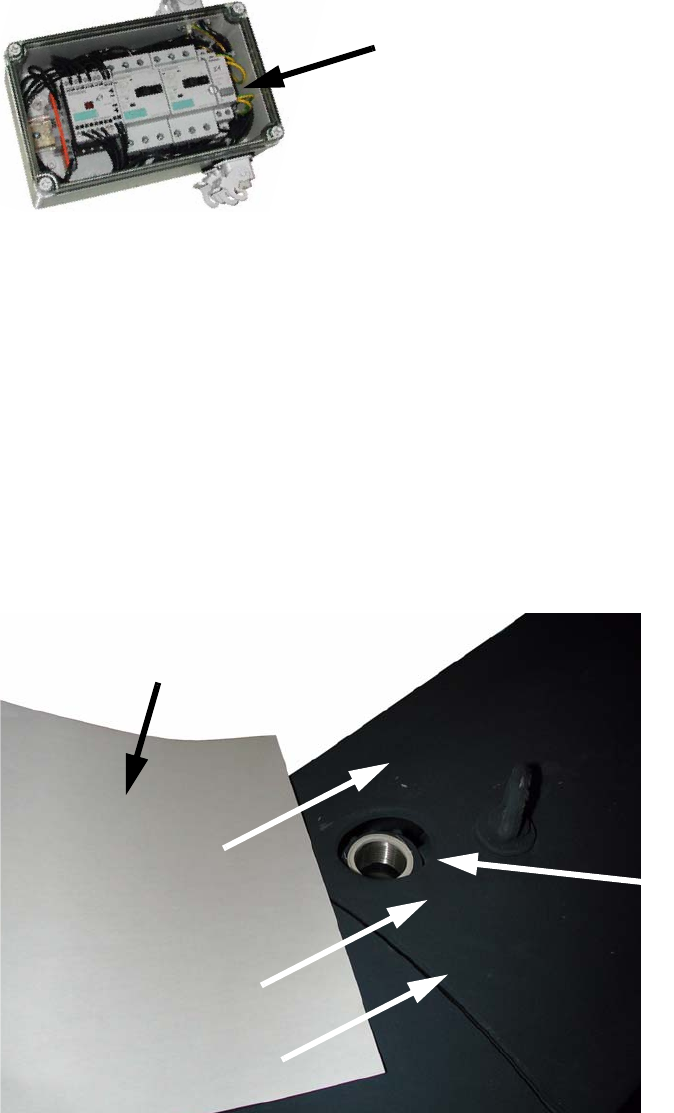
: Switch the placement machine on at the main switch. The vacuum pump must switch on as
well, although not necessarily as soon as the placement machine is switched on.
: Press button S1 (through an opening in the case) on the connection unit to start the vacuum
pump.
Button S1
2
2
: If the pump starts to turn incorrectly, switch off the entire system again. Disconnect the vacuum
pump from the supply voltage.
: If two connections for the vacuum pump exhibit the
same effect, you will have to rewire the con-
nection for the supply cable in the connection unit (swap
the two phases).
If only one vacuum pump is running incorrectly, rewire the motor contactor (by swapping the
two phases).
2
: Hold a sheet of paper over the intake opening of the vacuum pump to test whether the pump
is sucking or blowing. For vacuum pump operation, it must suck.
Intake opening
Intake opening
2
Assembly instructions: Vacuum pump for SIPLACE X-series
04/2009 Edition
109
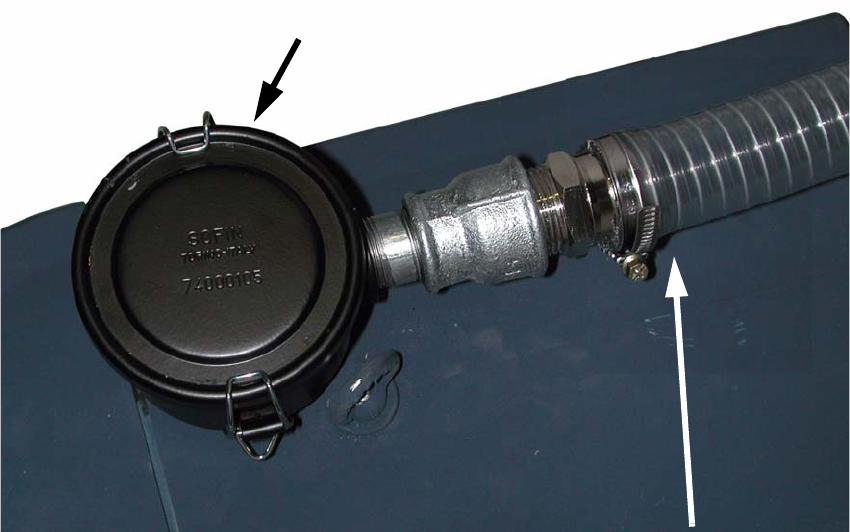
: Screw the filter cartridge onto the vacuum pump (see photograph below).
: Attach the hose to the output on the side of the filter
cartridge and fix the hose using the “Hose
clip DIN 3017 NW 32 - 50” (item no.: 00363127-xx).
Attach the hose and fix in place
Filter cartridge
2
2
2
2
2
2
2
2
2
2
2
2
2
2
Assembly instructions: Vacuum pump for SIPLACE X-series
04/2009 Edition
110
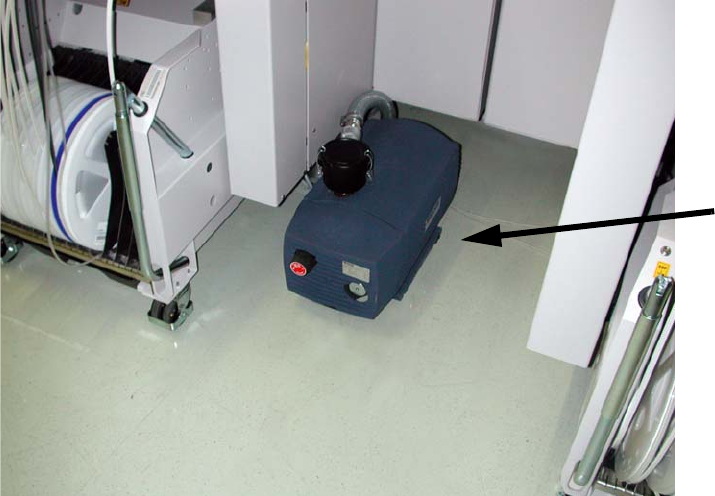
: Close the covers on the extension kits.
: Position the vacuum pump
– for
X2/X3/X4 at location 1/3 in the area beneath the nozzle changer or component trolley
docking un
it
– for X4I in front of the extension kit at locations 2 and 4.
Position
for X4I
2
2
2
2
2
2
2
2
2
2
2
2
2
2