00196433-02_AI_Vakuumpumpe_X-Serie_70XDE+EN.pdf - 第77页
Assembly instructions: Vacuum pump for SIPLACE X-series 04/2009 Edition 77 2 2 In the rest of th ese instruct ions, the conv ersion is explained with reference to versions before se - rial number D-001. 2 Air connections…

Assembly instructions: Vacuum pump for SIPLACE X-series
04/2009 Edition
76
2.8 Conversion
: Undock the component trolley at location 2 and 4.
: Switch the placement system off at the main switch and disconnect
from the power supply.
2
Before starting ANY work, 2
shut down the operating system correctly, then switch the machine OFF at th
e main power switch
and disconnect from the main power supply. In addition, the compressed air supply must be
switched off at the compressed air unit's main valve in the machine base and vented by actuating
the needle valve on the compressed air unit. 2
2.8.1 Connecting the gantry distributor
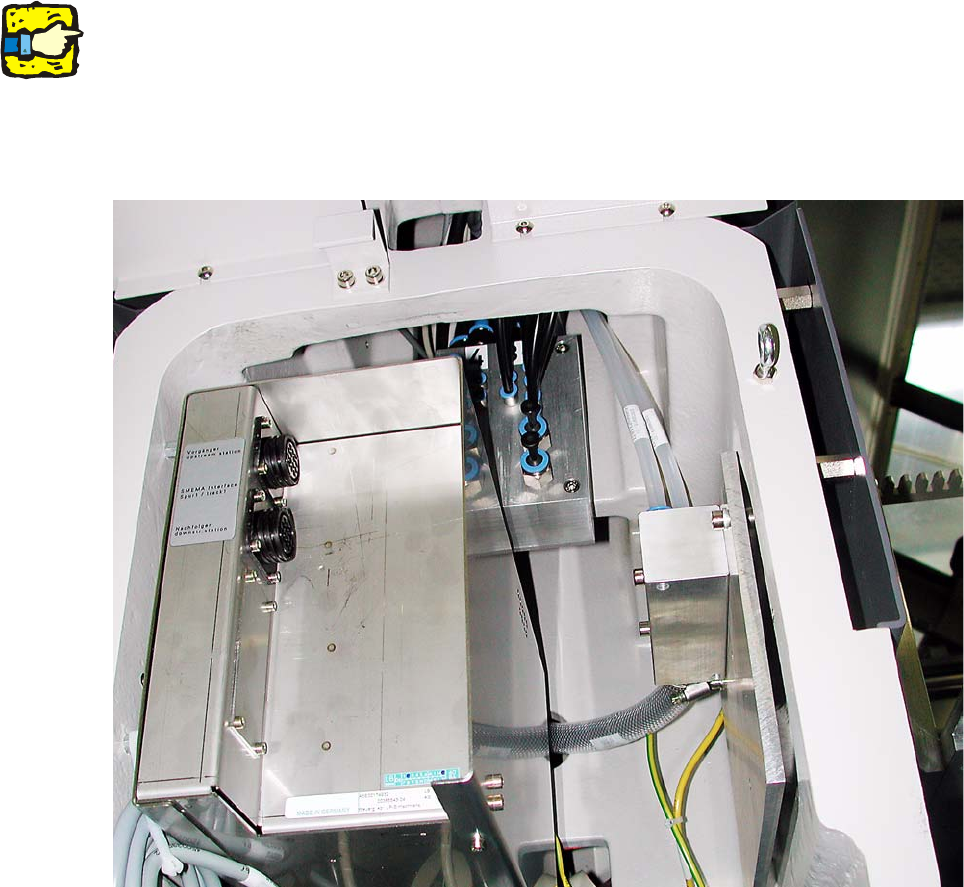
: Open the door to the compressed air supply
(where you will find the connections for gantry 3 and 4)
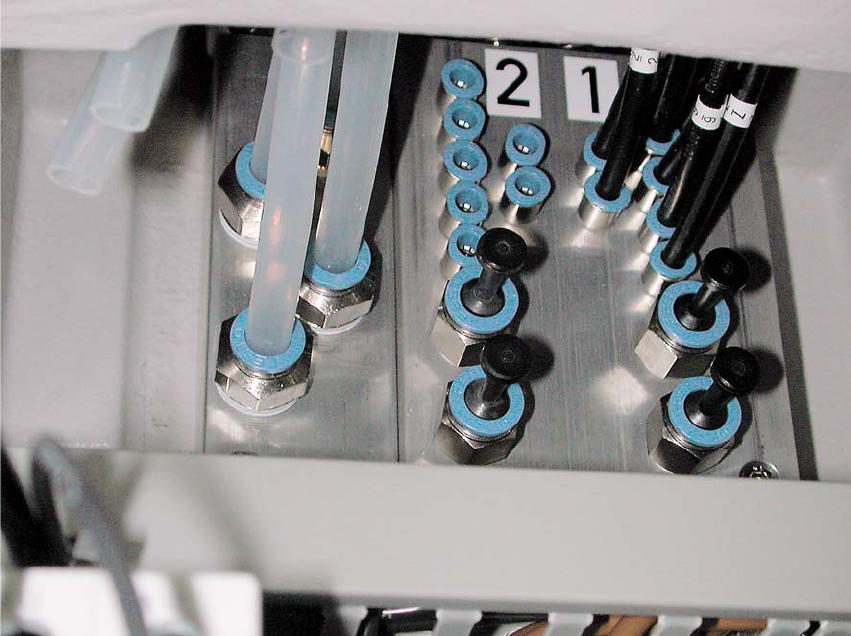
Air connections for machines with serial number D-001
Vacuum hoses
2
Assembly instructions: Vacuum pump for SIPLACE X-series
04/2009 Edition
77
2
2
In the rest of these instructions, the conversion is explained with reference to versions before se-
rial number D-001. 2
Air connections for machines with serial number B-079
2
Fig. 2.8 - 1 Gantry distributor on pneumatic side (with blanking plugs for gantry 3+4, initial state)
Assembly instructions: Vacuum pump for SIPLACE X-series
04/2009 Edition
78
: Open the door to the power supply
(where you will find the connections for gantry 1 and 2)
Fig. 2.8 - 2 Gantry distributor on power supply side (with blanking plugs for gantry 1+2, initial state)
: Close the compressed air main stop valve.
: Close the stop valve for the placement machine.
: Wait until the pressure has dissipated.