KE-2030使用说明书 - 第692页
13 − 3 13.1.2 Mov ing the head unit 3 2 Y X 1 ① Head unit ② X-axis unit ③ Grip Figure 13.1.2 WA RNING To prevent t he body from injury which can be caused by accidental activation of the machine, turn off the power of th…

13 − 2
Notes: 1. Lubrication is to be performed using the supplied oil. Besides the supplied
grease (EP2), SHELL Albania Grease 1 can be used for the parts to be
greased only.
2. Never apply any grease other than grease (C Grease) to the parts to be
lubricated with "Grease (C Grease)". For other parts, do not use any
grease not specified by JUKI.
3. Machine oil (No. 1): Class four, third petroleum
Grease (EP2): Not dangerous product regulated with the Fire-Defense law
Grease (C Grease): Not dangerous product regulated with the
Fire-Defense law.
13 − 3
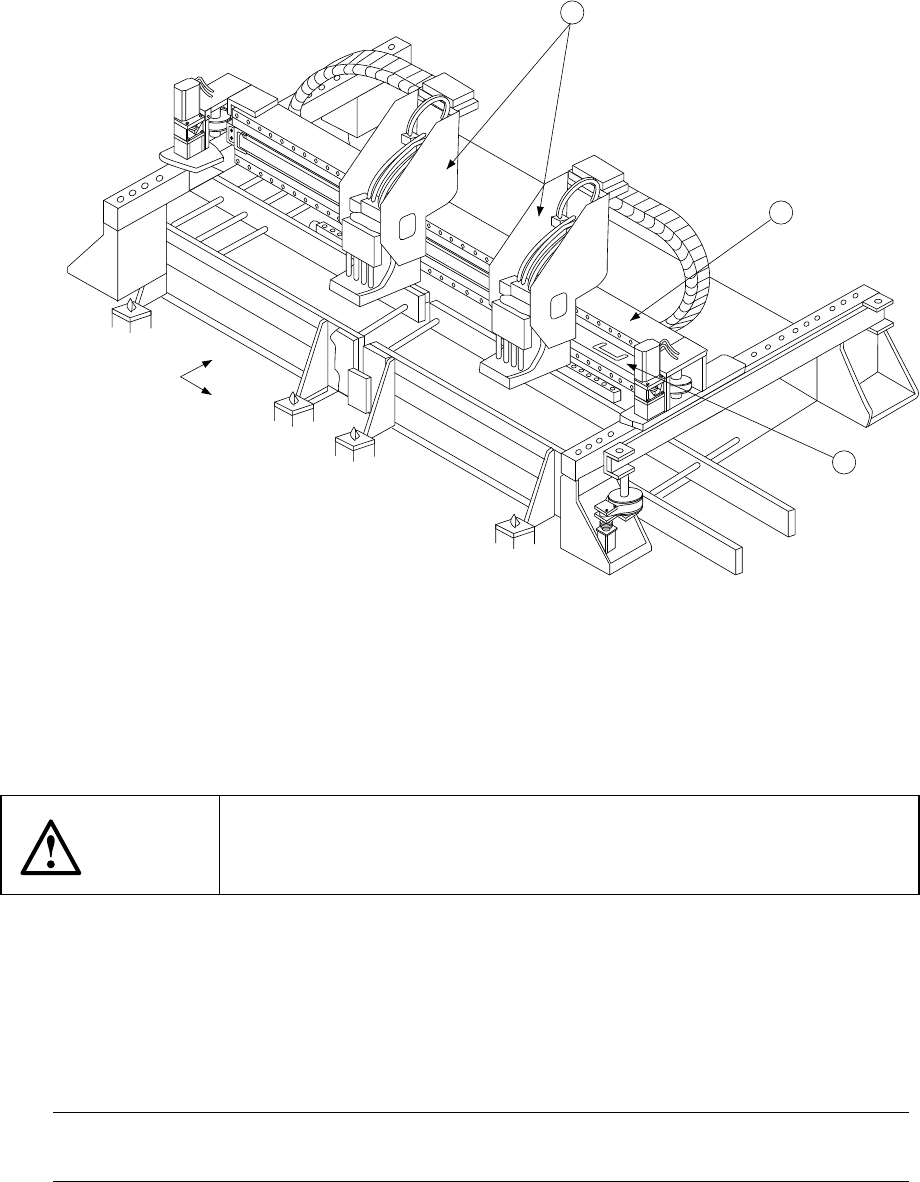
13.1.2 Moving the head unit
3
2
Y
X
1
① Head unit
② X-axis unit
③ Grip
Figure 13.1.2
WARNING
To prevent the body from injury which can be caused by accidental
activation of the machine, turn off the power of the machine before
following the operation above.
1. To move the head unit in the X direction with your hand, hold the holes located on
the side of the head unit ① with both your hands to move it.
2. To move the head unit in the Y direction with your hand, hold the grip ③ of the
X-axis unit ② to move it.
Note: Before moving the head unit manually, be sure to move four Z slide shafts of
the head unit upwards to the top.
13 − 4
13.2 Check
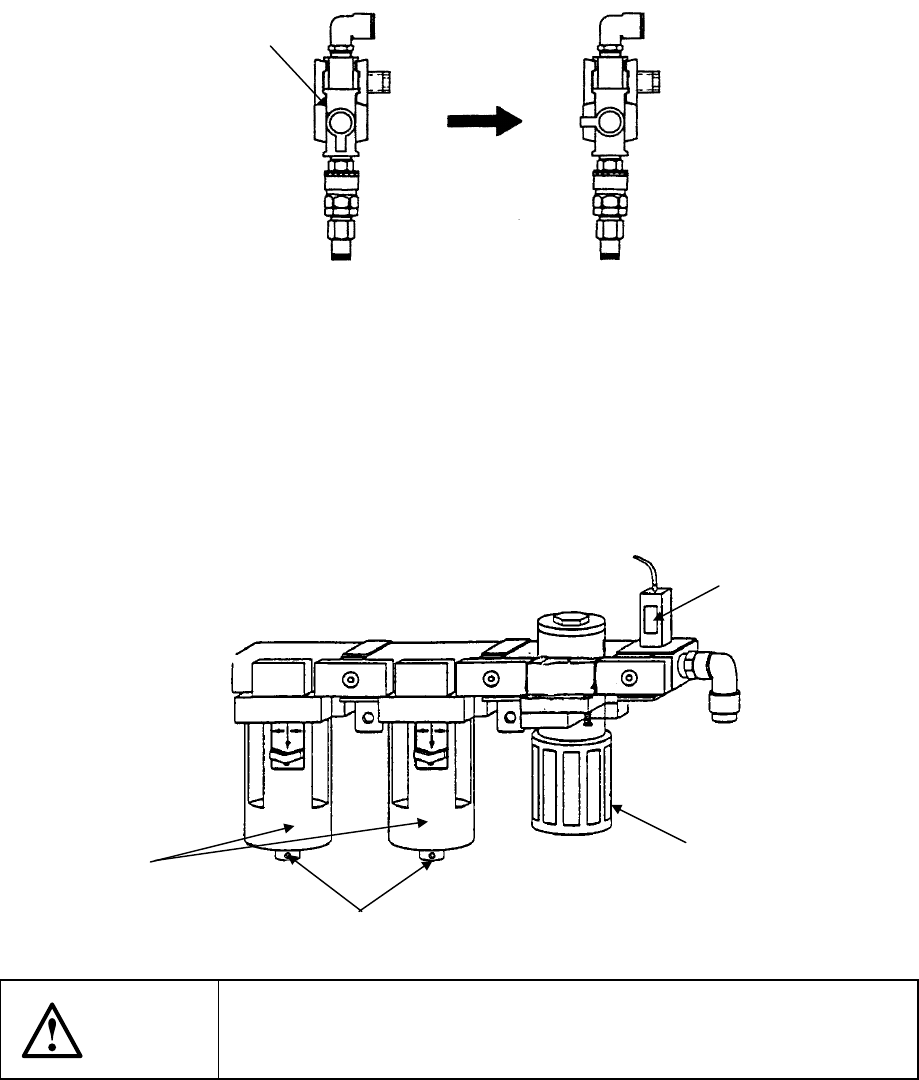
13.2.1 Air pressure
Checking to see if the air pressure is 0.49 Mpa.
How to adjust the air pressure
1) Set the control to the Open position as shown in Figure below.
2) Pull the knob of the regulator ② downward, then rotate it so that the pressure of
the used air can become 0.49 MPa.
3) Peep into the small window ③ located at the center of the pressure switch to
check to see if the pressure is 0.39 MPa (this value is set at the factory).
4) If there is any oil or water in the drain, push the control ④ to drain it out.
WARNING
To prevent the body from injury which can be caused by accidental
activation of the machine, turn off the power of the machine before
following the operation above.
①
CLOSE
OPEN
③
②
④
Drains