00198503-02_IM_SIPLACE_Pro_15.1_R18-1_EN - 第37页
SIPLACE Pro 15.1 (R18 - 1) / Installat ion Manual 05/2018 Edition 37 The next dialog dis plays the selected remote databa se instance. Figure 6-34: Selected remote dat abase instance The Show dialogs to cha nge the defau…
SIPLACE Pro 15.1 (R18-1) / Installation Manual 05/2018 Edition
36
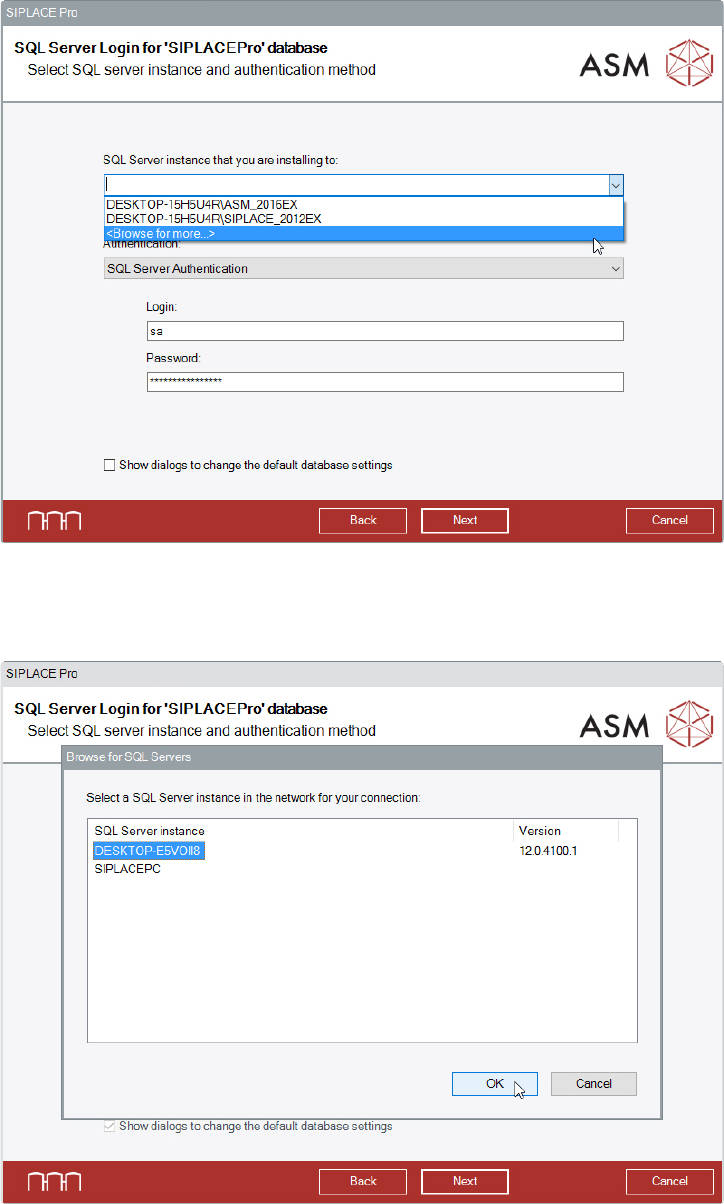
The default database settings can be changed in the SQL Server Login dialog.
Figure 6-32: Selecting database instance
► Click on <Browse for more…> in the dropdown list.
The following dialog displays a selection of the database instances found in the network.
Figure 6-33: Selecting database instance on remote computer
► Select the instance on the remote computer.
If the desired instance is not displayed:
► Click the Cancel button.
► Enter the name of the database instance manually in the dropdown list.
SIPLACE Pro 15.1 (R18-1) / Installation Manual 05/2018 Edition
37
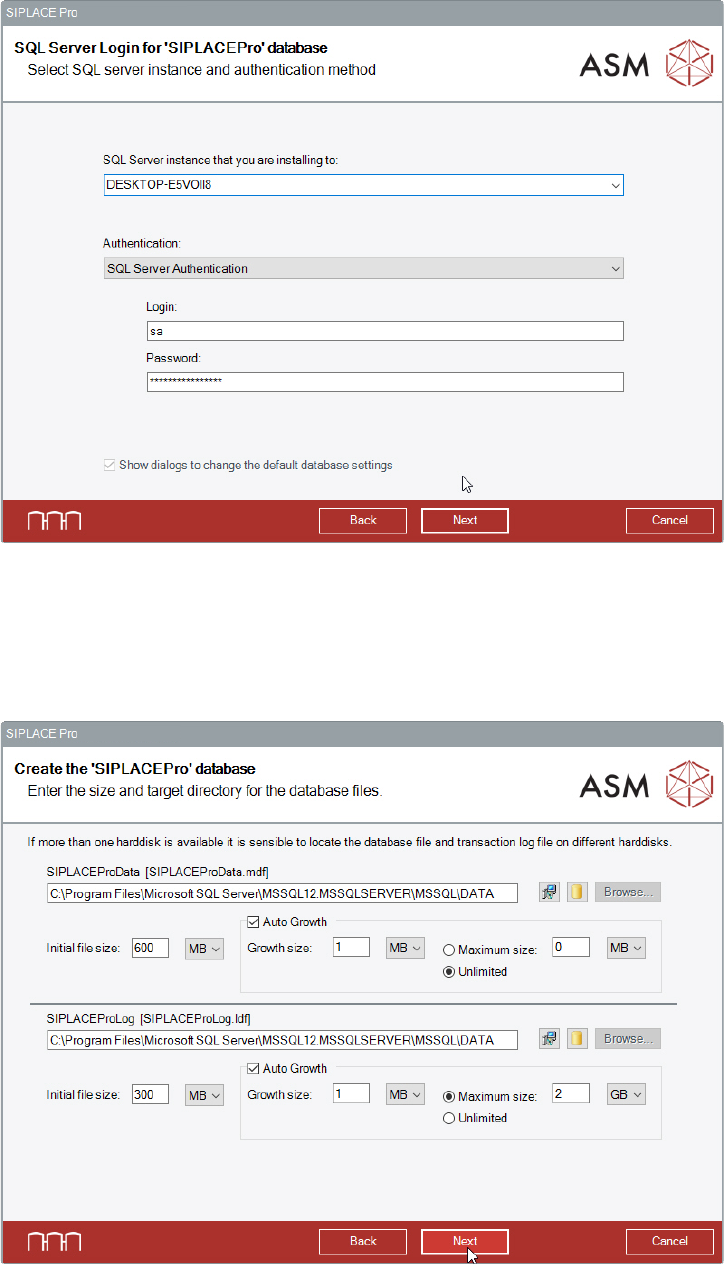
The next dialog displays the selected remote database instance.
Figure 6-34: Selected remote database instance
The Show dialogs to change the default database settings option is grayed out and
automatically selected.
► Click the Next button.
The following dialog is displayed in which a new database can be created for SIPLACE Pro.
Figure 6-35: Creating new database
The paths to the database files will be requested in this dialog. The corresponding directories must
exist on the remote computer!
SIPLACE Pro 15.1 (R18-1) / Installation Manual 05/2018 Edition
38
NOTICE
The paths to the remote database are only checked for correct spelling! It will not be
checked if:
– the defined drive exists
– the defined drive is writable
– the defined path exists
– a database file with the same name exists on the defined path
– there is enough disk space on the defined path
► Modify the default settings for database creation as required.
By clicking the yellow "Database" icon to the right, the entered directory is reset to the default
directory for databases as defined in your SQL installation.
The Browse... buttons are disabled in case of a remote database.
► After you have modified the settings as required, click the Next button to continue.
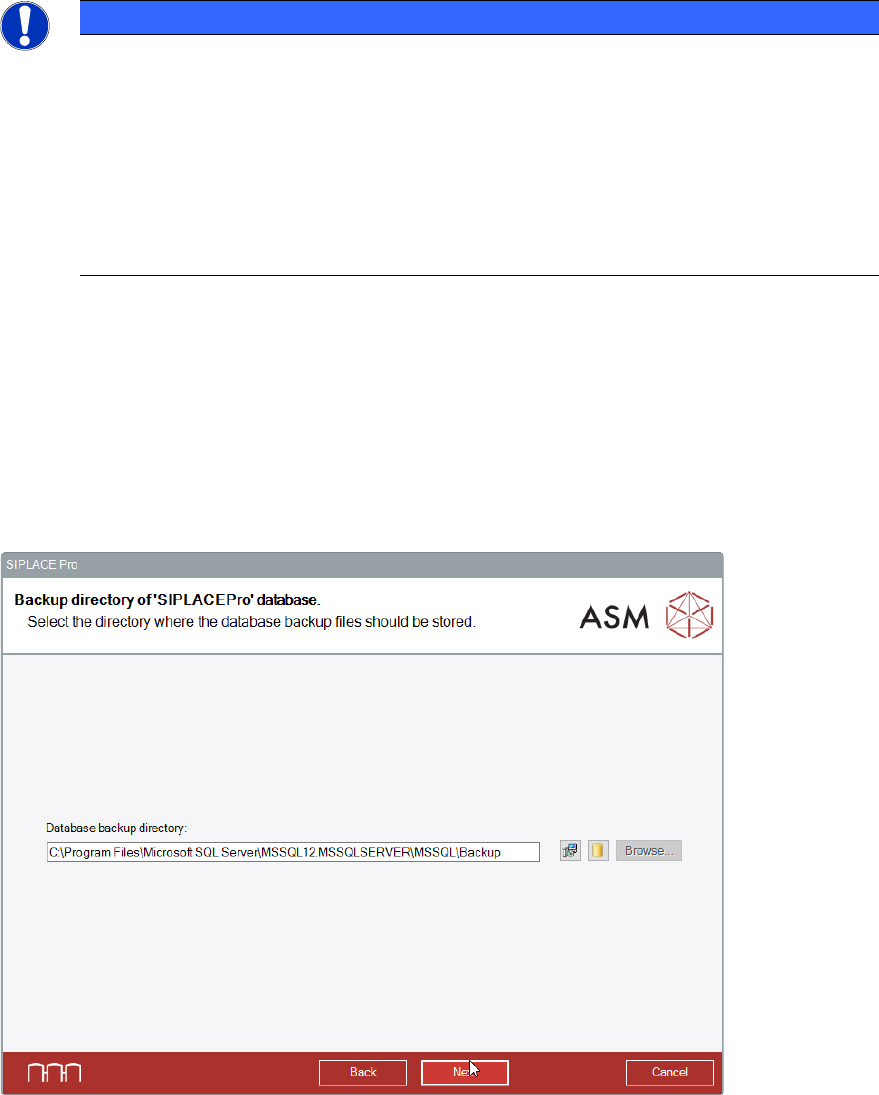
The following dialog is displayed in which you can select the backup directory for the SIPLACE Pro
database. For the backup path, the same rules apply as for the paths in the previous dialog.
Figure 6-36: Selecting backup directory
► Modify the settings as required.
By clicking the yellow "Database" icon to the right, the entered directory is reset to the default
directory for databases as defined in your SQL installation.
The Browse... buttons are disabled in case of a remote database.
► Click the Next button.