STM1-S_SDV_Maintenance(Eng_Ver1).pdf - 第53页
Mon thly Inspe ction Chap ter 5 Multi -Func tional Placer ST M1-S M ain ten an ce Ha nd bo ok 5 -2 Cleaning the Head Spindle Monthly Inspe ction Step 5. Put the c loth underneath the spi ndle Step 6 . Clea ning th e inte…
Monthly Inspection
Chapter 5
Multi-Functional Placer
STM1-S Maintenance Handbook
5-1
Cleaning the Head Spindle
Tool for Maintenance
Cloth, air gun
Measures
Step 1.
Move the X Frame to front by referring to "Forward
movement of the X-frame" on page 1-3.
Step 2.
Press the 'STOP' and 'RESET' buttons in order after
pressing the 'EMG' button on the OP panel to stop
operation.
For more details, refer to "How to perform emergency stop" on page
1-2.
Step 3.
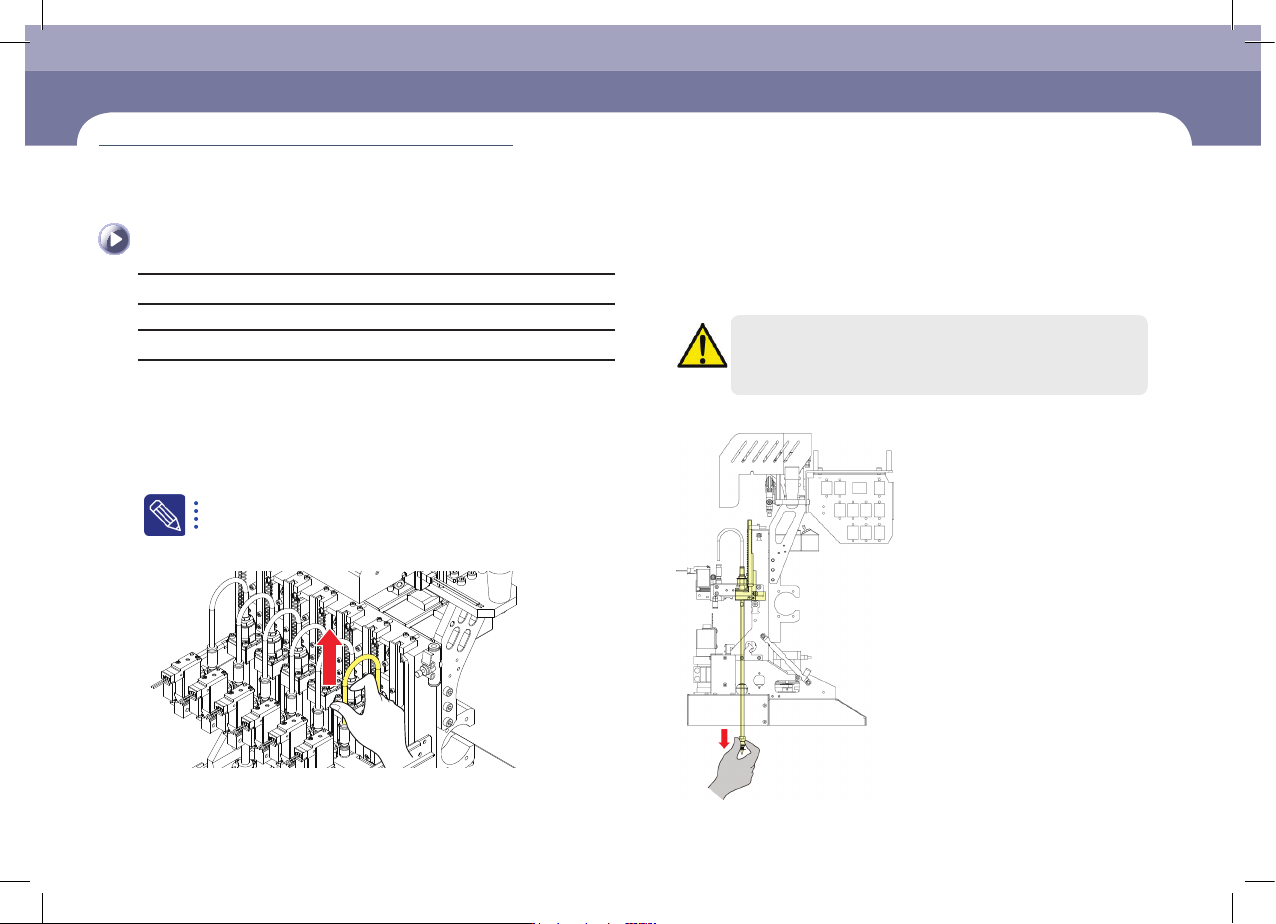
Remove the tube from the Vacuum Filter
Caution
Check the assembled state of the Vacuum Filter inspection or after
the exchange after the Filter and the Tube.
Step 4.
Remove the nozzle
Cleaning the Head Spindle
(Time required: 30min / No. M-1)
Chapter 5
Monthly Inspection
Monthly Inspection
Chapter 5
Multi-Functional Placer
STM1-S Maintenance Handbook
5-2
Cleaning the Head Spindle
Monthly Inspection
Step 5.
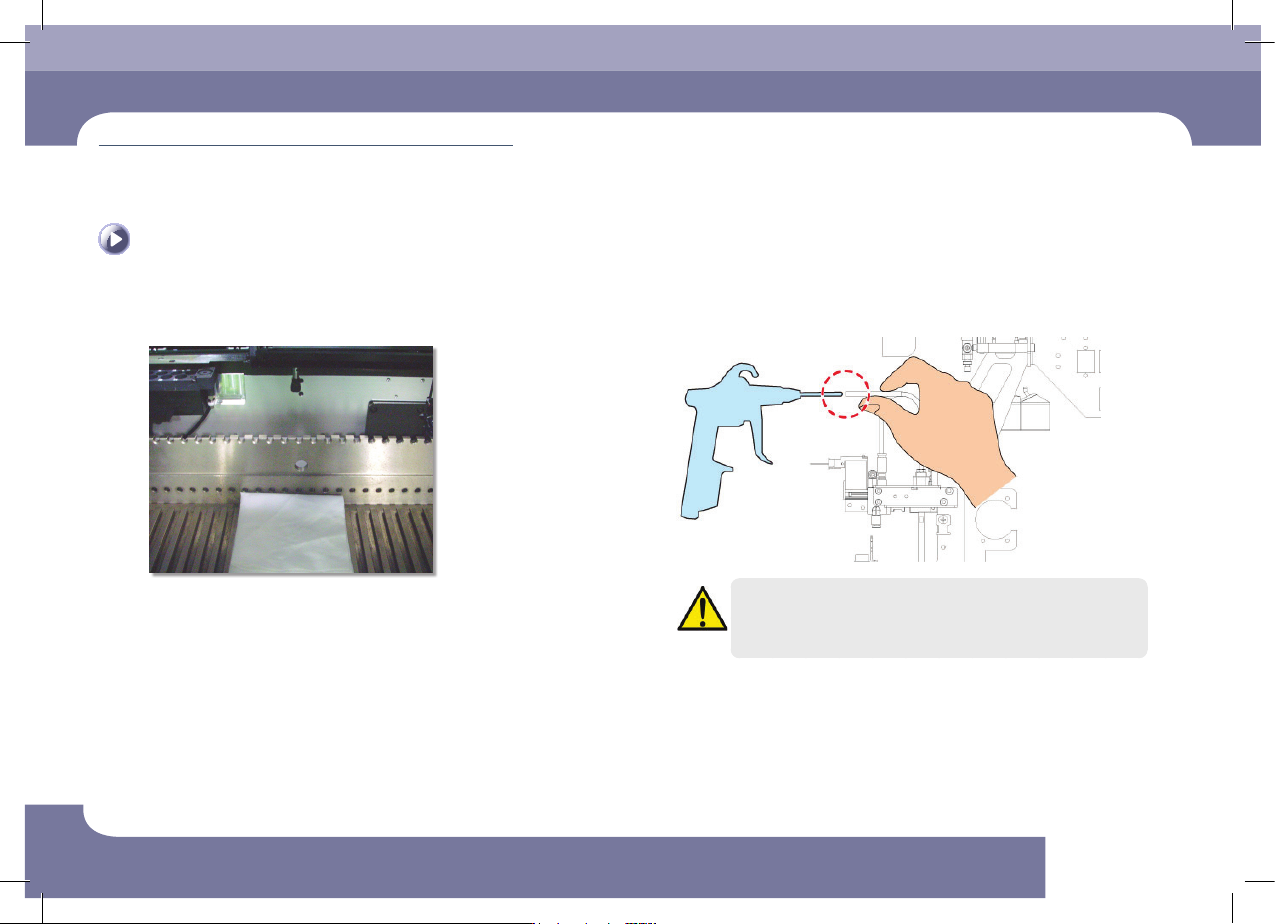
Put the cloth underneath the spindle
Step 6.
Cleaning the interior of the tube by an air gun.
Caution
Using the air gun without putting on goggles may cause injury to
operator's eyes. Be sure to wear goggles when using the air gun.
Step 7.
Release the emergency stop as described in "Releasing
'Emergency Stop' mode" on page 1-6 and perform the
operation again.
Monthly Inspection
Chapter 5
Multi-Functional Placer
STM1-S Maintenance Handbook
5-3
Inspection and cleaning conveyor sensor
Inspection and cleaning conveyor sensor
Tool for Maintenance
Cleaning liquid, ultra-fine fiber cloth, cotton swab
Measures
Step 1.
Move the X Frame to rear by referring to "Backward
movement of the X-frame" on page 1-4.
Step 2.
Press the 'STOP' and 'RESET' buttons in order after
pressing the 'EMG' button on the OP panel to stop
operation.
For more details, refer to "How to perform emergency stop" on page
1-2.
Step 3.
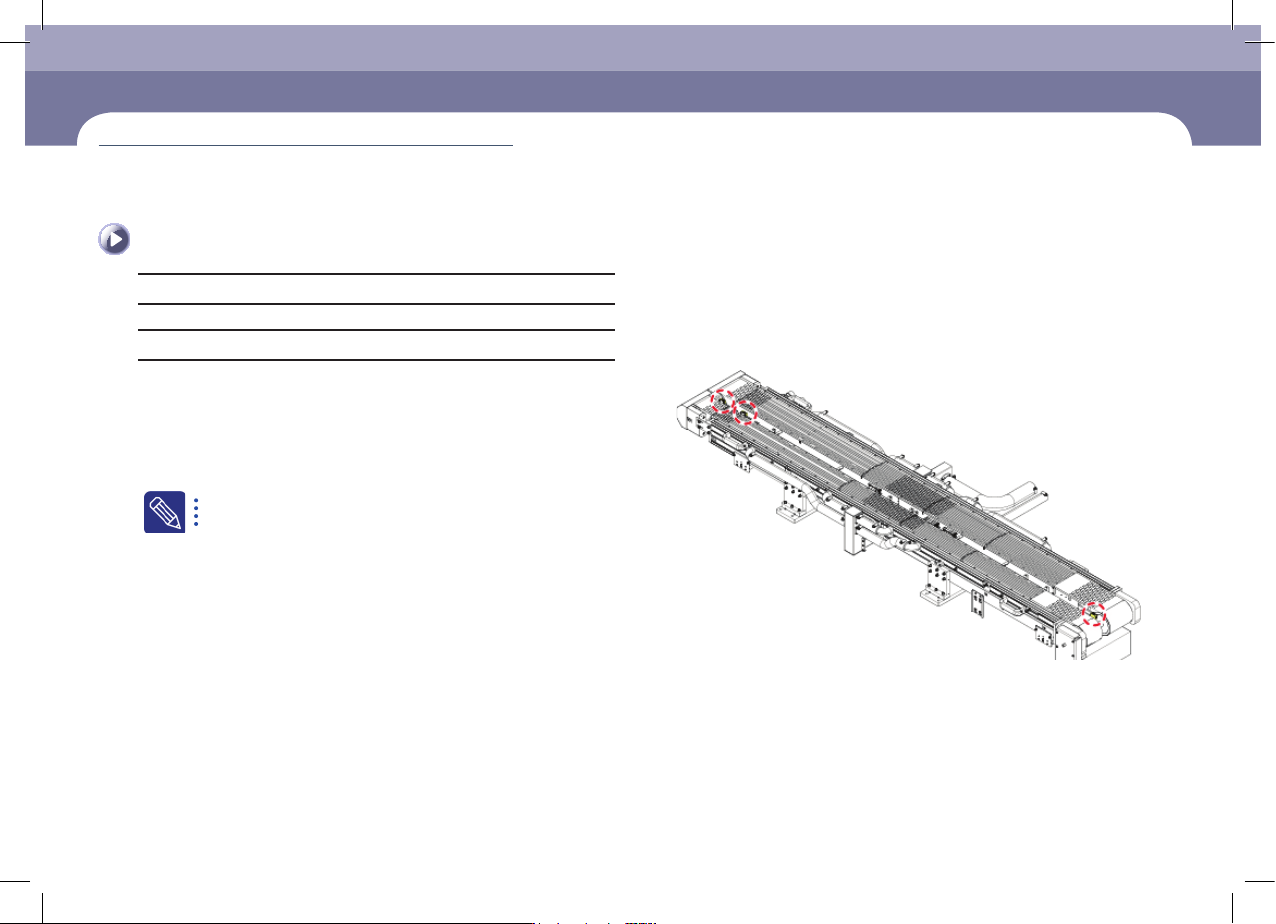
Check the recognition accuracy of the corresponding
photo sensor as shown in the following figure. (The red
LED is turned on when an object is recognized.)
(Time required: 10min / No. M-2)