00198124-02_JC_PM_WF4_TX_EN.pdf - 第34页
8 WF 4 TX-Series Maintenance Grease the guide bearing, clean the linear guide and scale of the Y-Axis 5 min 2 / 4 C A U T I O N ! R e f e r t o s a f e t y i n s t r u c t i o n s i n u s e r m a n u a l b e f o r e c …

8 WF 4 TX-Series Maintenance Grease the guide bearing, clean the linear guide and scale of the Y-Axis 5 min 1 / 4
CAUTION! Refer to safety instructions in user manual before commencing Maintenance
Machine Status OFF Conveyor Empty
NOTICE! ESD guidelines are to be followed Tool:
T89
Wear Part: Consumables:
C3, C5, C49
www.asm-smt.com
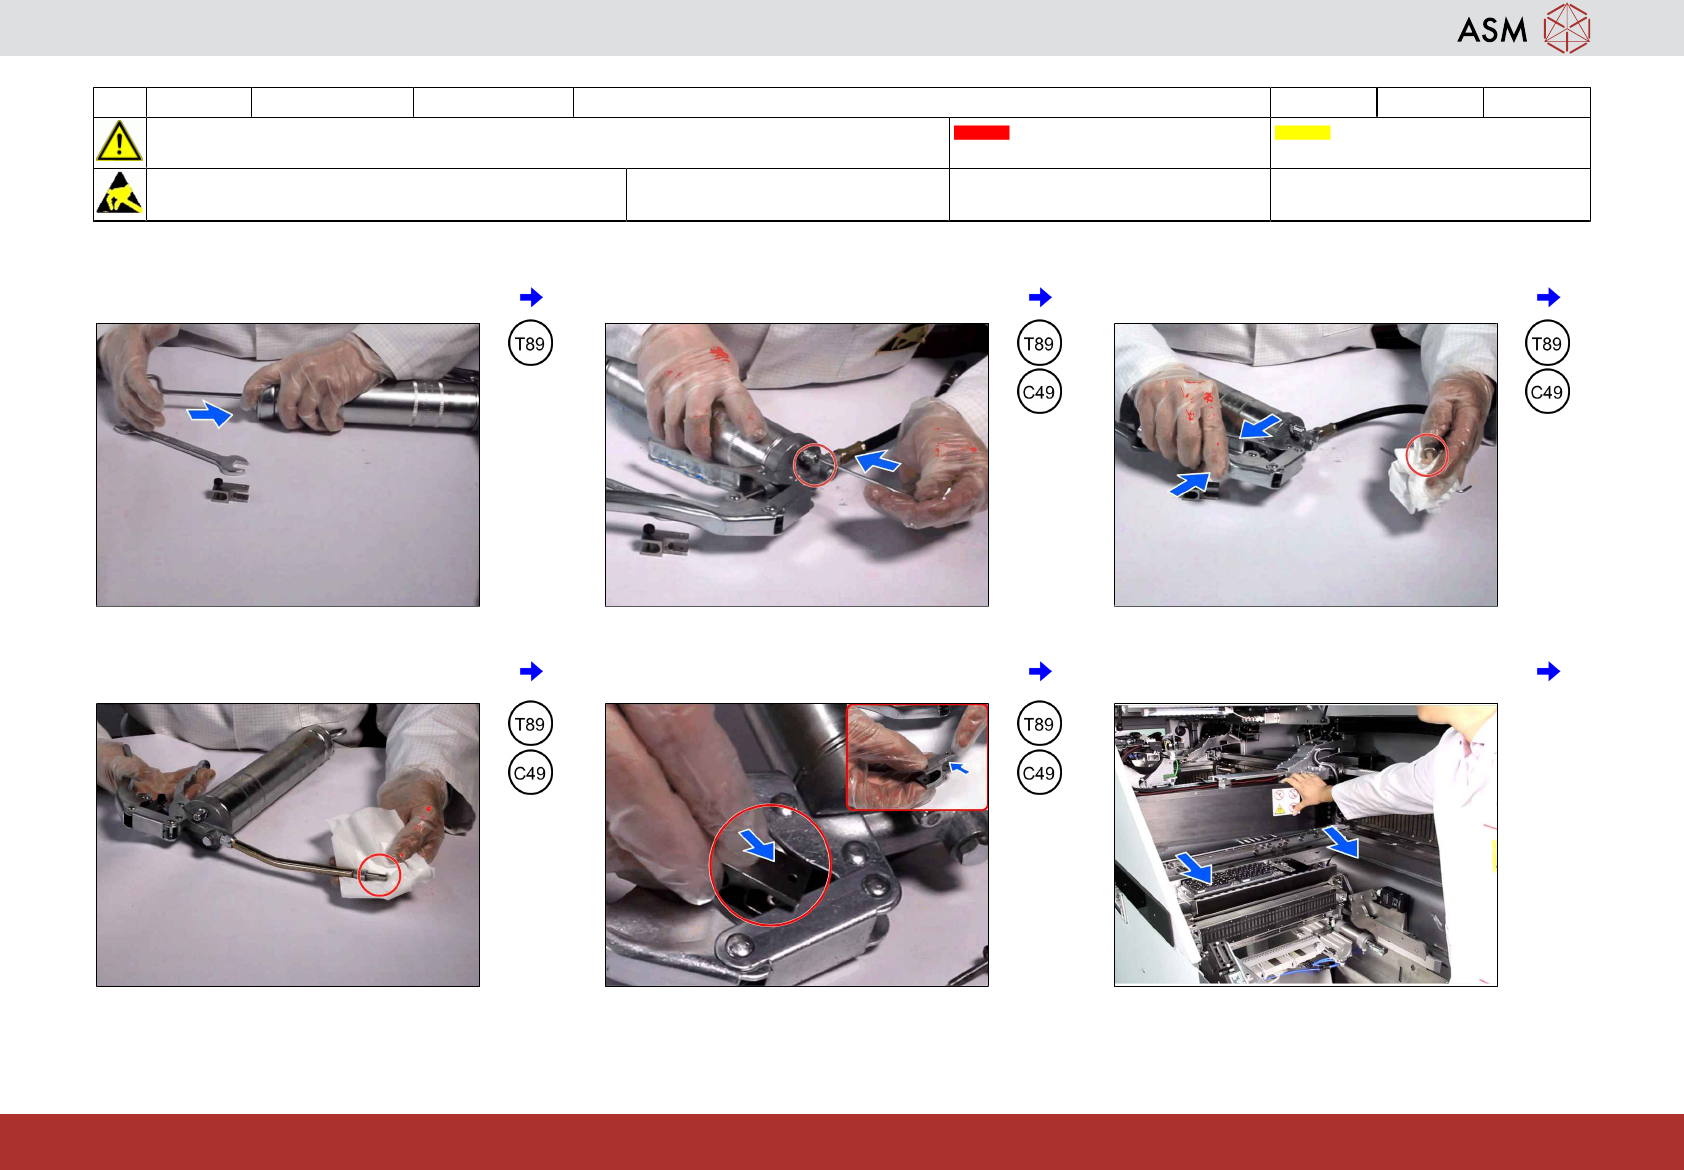
1 Pull back the plunger to the lock. 2 Unscrew the top section. 3 Prepare the grease cartridge (if required).
4 Insert the grease cartridge into the grease
gun (if required).
5 Close the grease gun. 6 Mount the hose with hydraulic mouthpiece
Y-Axis.
8 WF 4 TX-Series Maintenance Grease the guide bearing, clean the linear guide and scale of the Y-Axis 5 min 2 / 4
CAUTION! Refer to safety instructions in user manual before commencing Maintenance
Machine Status OFF Conveyor Empty
NOTICE! ESD guidelines are to be followed Tool:
T89
Wear Part: Consumables:
C3, C5, C49
www.asm-smt.com
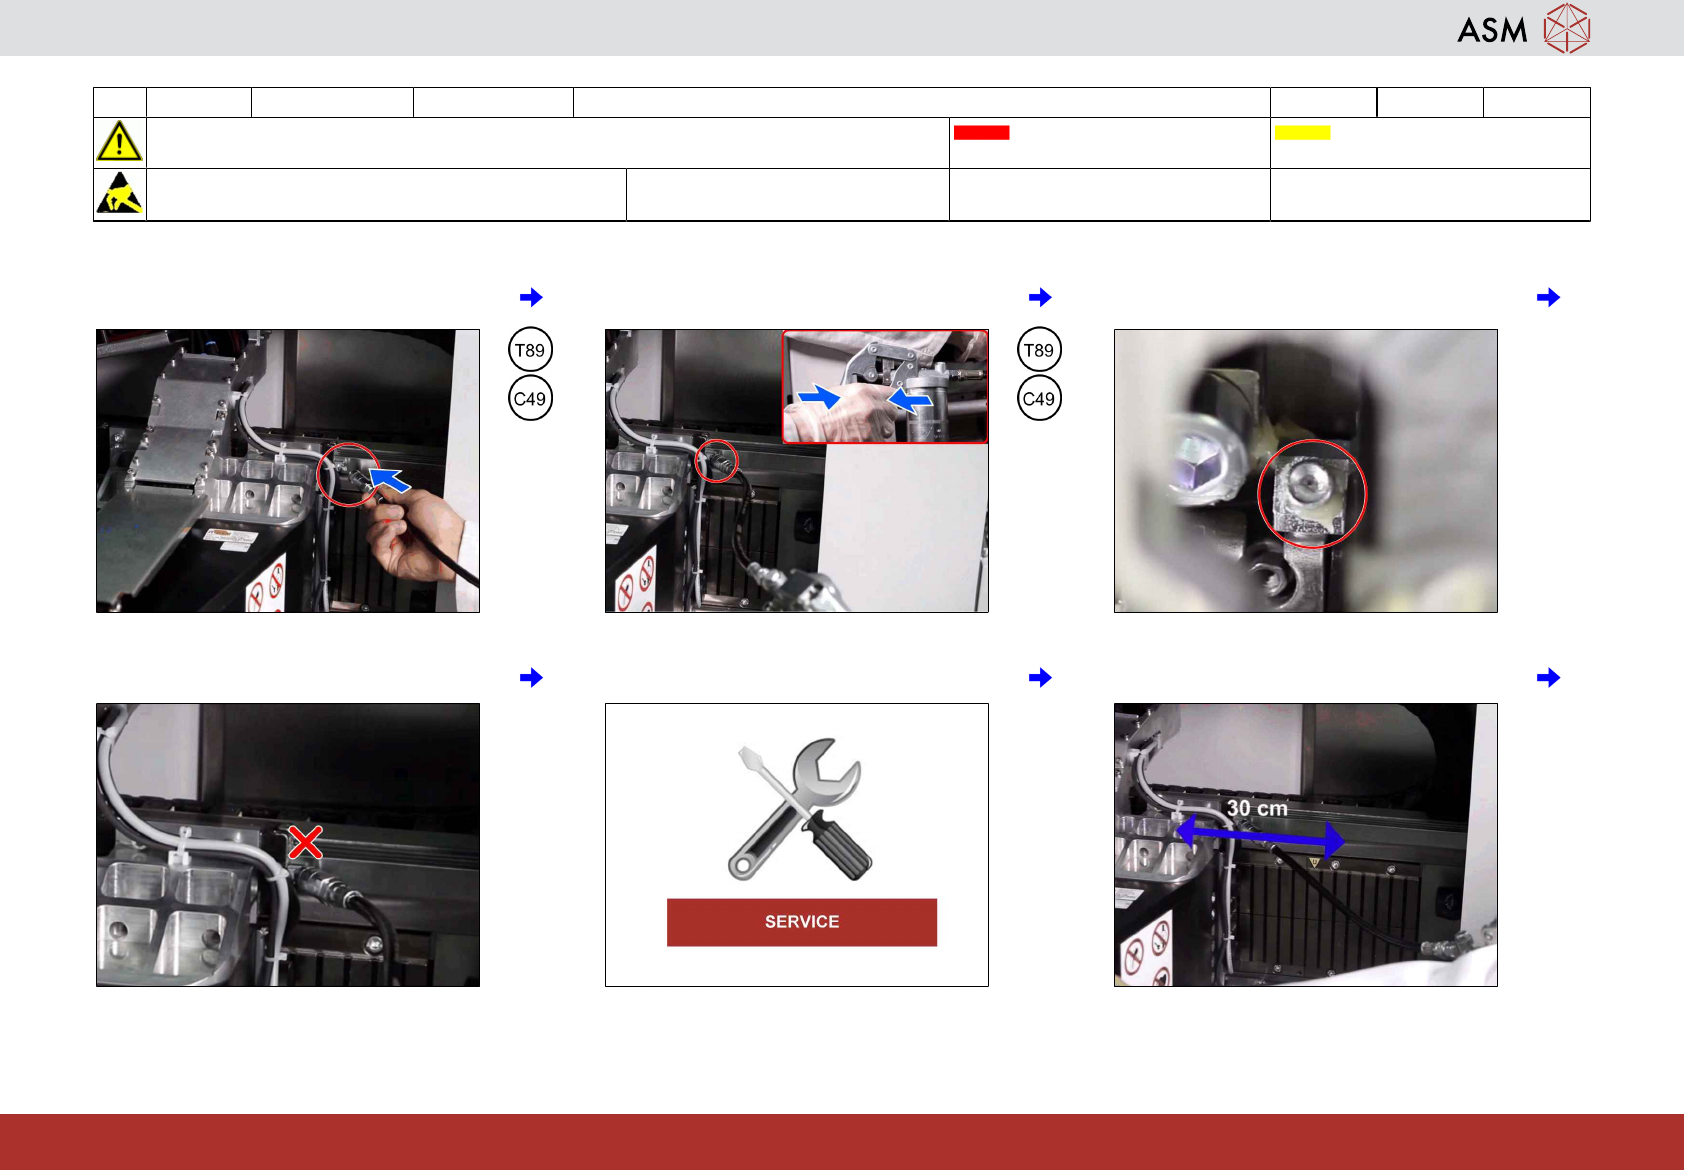
7 Loosen the lock. 8 Push back the ball on the vent screw. 9 Press the trigger until grease comes out.
10 Remove excess grease. 11 Mount the stroke limiter Y-Axis 0.4 gr side
of grease gun.
12 Move the gantry to possible working area.
8 WF 4 TX-Series Maintenance Grease the guide bearing, clean the linear guide and scale of the Y-Axis 5 min 3 / 4
CAUTION! Refer to safety instructions in user manual before commencing Maintenance
Machine Status OFF Conveyor Empty
NOTICE! ESD guidelines are to be followed Tool:
T89
Wear Part: Consumables:
C3, C5, C49
www.asm-smt.com
13 Position the hose straight onto the lubrica-
tion nipple.
14 Squeeze the grease gun on time. 15 Grease emerges at the grease nipple.
16 If NOT go to Step 18. 17 If YES contact service. 18 Move the Y-Axis 30 cm.