00197551-01_MM_CPP-CP-Twin_Kunde_en.pdf - 第51页
Maintenance Tasks for C&P20/A/M/P Head 4.6.6 Vacuum Operation: Maint enance Ta sks on Vacuum-Conducting Parts Performing Maintenance Tasks Maintenance Manual SIPLACE Placement Heads CPP, C &P20, Twin 51 4.6.6 4 .…
Maintenance Tasks for C&P20/A/M/P Head
Performing Maintenance Tasks 4.6.5 Oiling the DP Driver Bearing
50 Maintenance Manual SIPLACE Placement Heads CPP, C&P20, Twin
4.6.5
4.6.5 Oiling the DP Driver Bearing
Oiling the DP Driver Bearing
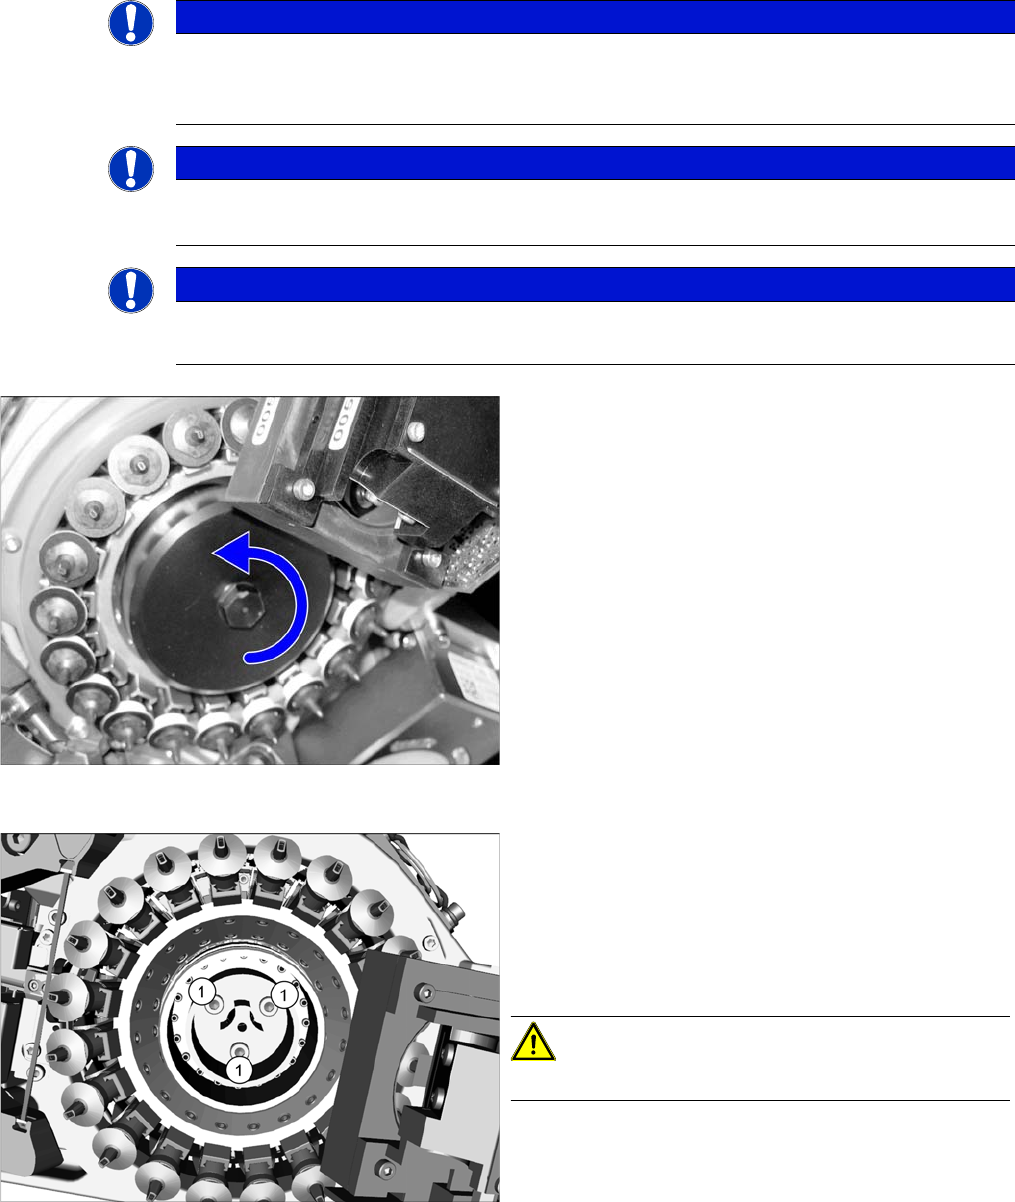
► C&P20: For this maintenance task, use the white combitip with Nye Synthetic Oil 200A.
► C&P20A/M/P: For this maintenance task, use the black combitip with Klüberalfa DH 3-100.
► Set the multipette to 1 µl.
► Rotate the star three times and wipe away any lubricant which appears with the blotting paper.
► Fit the removed nozzle back into place.
► Remove the blotting paper.
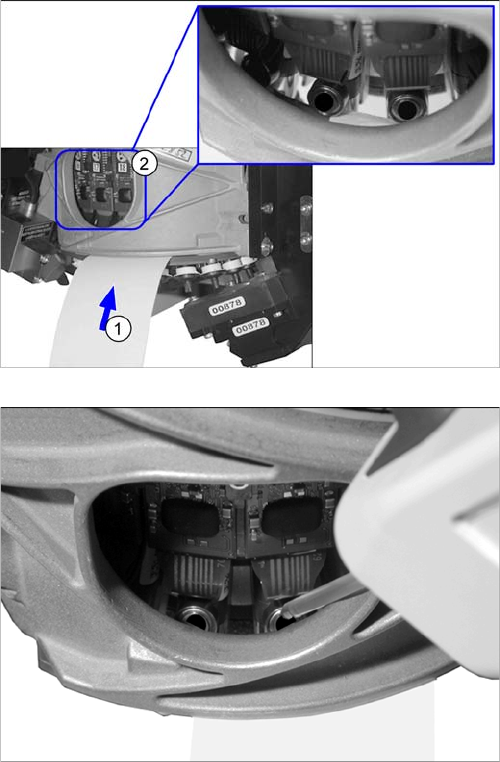
► Rotate the star so that segment 1 can be seen in the
center of the service hole.
► Carefully push a strip of blotting paper (1) under the
service hole (2) between the head housing and the
raceway. The blotting paper should soak up any ex-
cess oil.
► Mark the first segment by removing a nozzle.
► Clean the bearing with a cleaning stick.
► Position the multipette on the top edge of the locking
pin and apply 1 µl of lubricant.
Repeat this step for all segments.
Maintenance Tasks for C&P20/A/M/P Head
4.6.6 Vacuum Operation: Maintenance Tasks on Vacuum-Conducting Parts Performing Maintenance Tasks
Maintenance Manual SIPLACE Placement Heads CPP, C&P20, Twin 51
4.6.6
4.6.6 Vacuum Operation: Maintenance Tasks on Vacuum-Conducting Parts
Vacuum Operation: Maintenance Tasks on Vacuum-Conducting Parts
NOTICE
Vacuum test
► When carrying out the following tasks, especially check the segments that were noticeable
during the vacuum test.
NOTICE
Camera lens system
► Make sure that you do not damage or contaminate the camera lens system.
NOTICE
Silencer or reflecting ring
A reflecting ring is fitted in place of the silencer for vacuum pump operation.
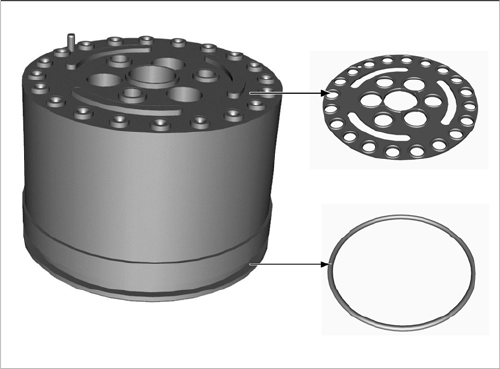
Cover (C&P20 P shown as example)
► Loosen the screw fastening the cover and remove the
cover.
Reflecting ring (C&P20 P shown as example)
► Remove the three protruding screws (1) from the re-
flecting ring.
► Carefully lever the reflecting ring off the locating pins.
Make sure that the O-ring is not damaged.
► Clean the seat of the reflecting ring with a lint-free
cloth, if required.
CAUTION!
DO NOT use compressed air!
Maintenance Tasks for C&P20/A/M/P Head
Performing Maintenance Tasks 4.6.6 Vacuum Operation: Maintenance Tasks on Vacuum-Conducting Parts
52 Maintenance Manual SIPLACE Placement Heads CPP, C&P20, Twin
Sealing disk and O-ring on reflecting ring (example of
C&P20 P shown)
► Check the reflecting ring for dirt and damage. Re-
place if necessary.
► Check the sealing disk on the reflecting ring for con-
tamination and damage and replace this if necessary.
► Check that the O-ring is positioned correctly on the
reflecting ring.
► Insert the reflecting ring again. Make sure you posi-
tion the sealing disk and centering pin correctly.
► Tighten the three screws fastening the reflecting ring
with a torque of 0.25 Nm.
► Do not refit the cover yet.