ServiceInstruction_Vision XP - 第47页
Vision XP+ V AC Page 43 2 Maintenance 2.8 V acuum Unit Operating Instructions V ersion 1.5 2.8.13 Clean the vacuum pump Fig. 2-6 1 filter car tridges in t he vacuum pump Fig. 2-6 2 Pump Fig. 2-6 3 Pump 1 Material: • Filt…
Page 42 Vision XP+ VAC
2 Maintenance
2.8 Vacuum Unit
Operating Instructions
Version 1.5
2.8.12 Maintenance intervals for the vacuum pump
The times indicated in the maintenance schedule are approximate under
normal operating conditions for the pump. Poor environmental conditions
and/or the pumping of aggressive media can significantly shorten
maintenance intervals.
To make maintenance work easier, we recommend that individual
processes are carried out together in an appropriate manner.
Note!
Any work/servicing involving the pump must be carried out by trained per-
sonnel. Improper maintenance or repair work significantly jeopardises ser-
vice life/usability and leads to difficulties in the event of any guarantee
claims.
Attention!
Never install used seals. Always install new seals.
MAINTENANCE WORK
INTERVAL
Check the Fomblin/medium level 1 month
Replace exhaust strainer
Replace 2 filter cartridges bi-annually
or annually
(depending on Fomblin consumption)
Clean the filter suction side vacuum path
1 month
Vision XP+ VAC Page 43
2 Maintenance
2.8 Vacuum Unit
Operating Instructions
Version 1.5
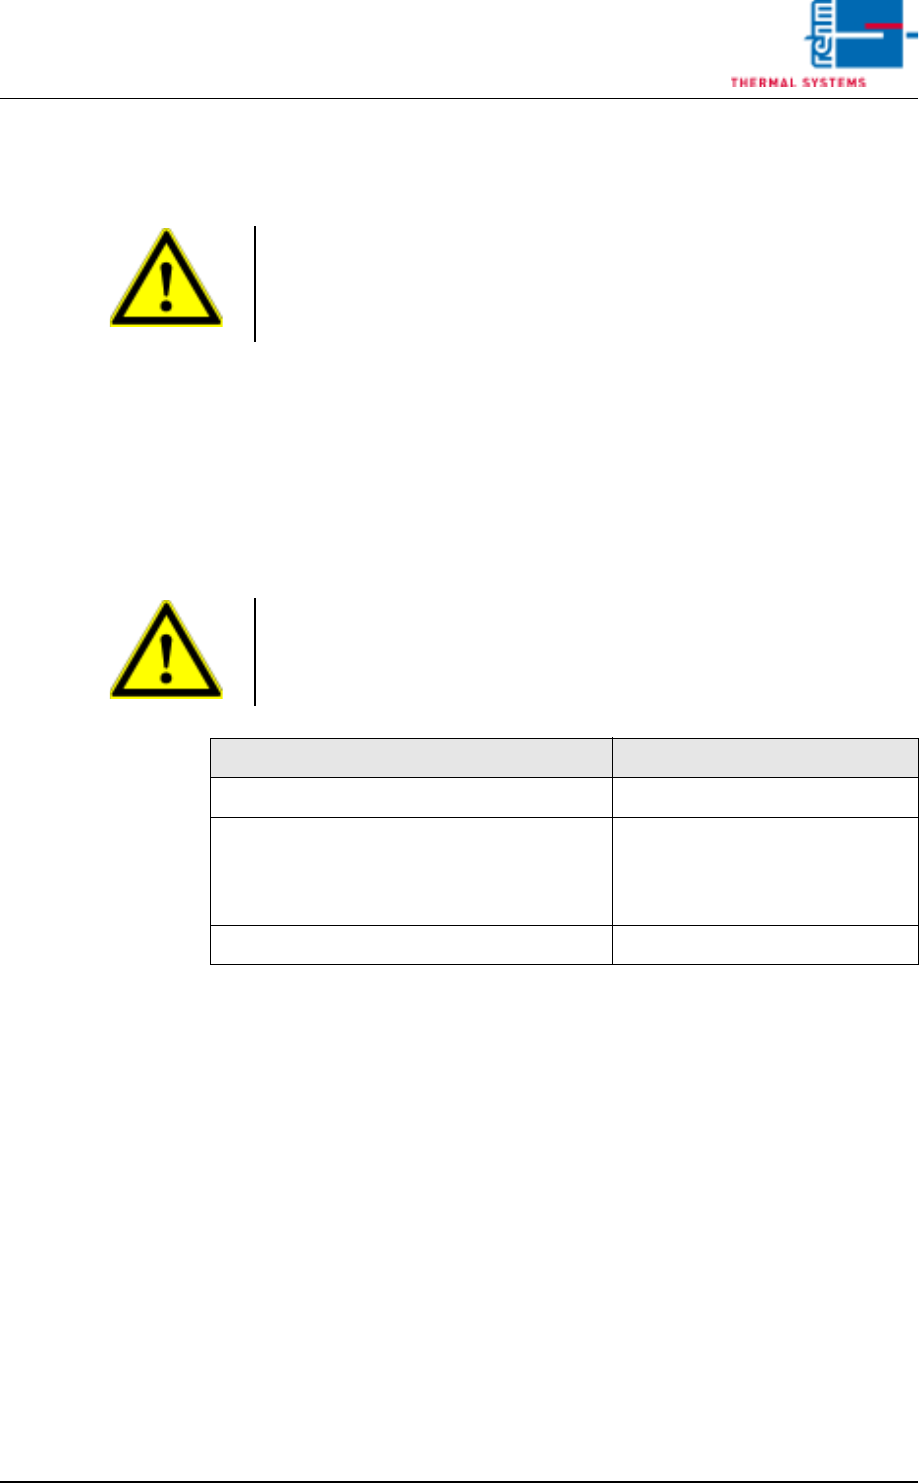
2.8.13 Clean the vacuum pump
Fig. 2-61 filter cartridges in the vacuum pump
Fig. 2-62 Pump
Fig. 2-63 Pump 1
Material:
• Filter cartridge 2 x
• Filter 1 x
1. Loosen the indicated screws to
replace the filter cartridges in
the vacuum pump.
2. Simply remove the covers to re-
place the cartridges.
3. Another filter is located in the in-
take connection.
4. Loosen the KF circlip, push the
tube aside and check the filter.
5. If heavily soiled, replace this fil-
ter also.
6. After replacement, reassemble
everything in reverse order.
Note!
Check the Fomblin filling level
every 4 weeks if the consumption
is high.
Page 44 Vision XP+ VAC
2 Maintenance
2.9 Cleaning the Exhaust Filters at the Inlet and the
Outlet
Operating Instructions
Version 1.5
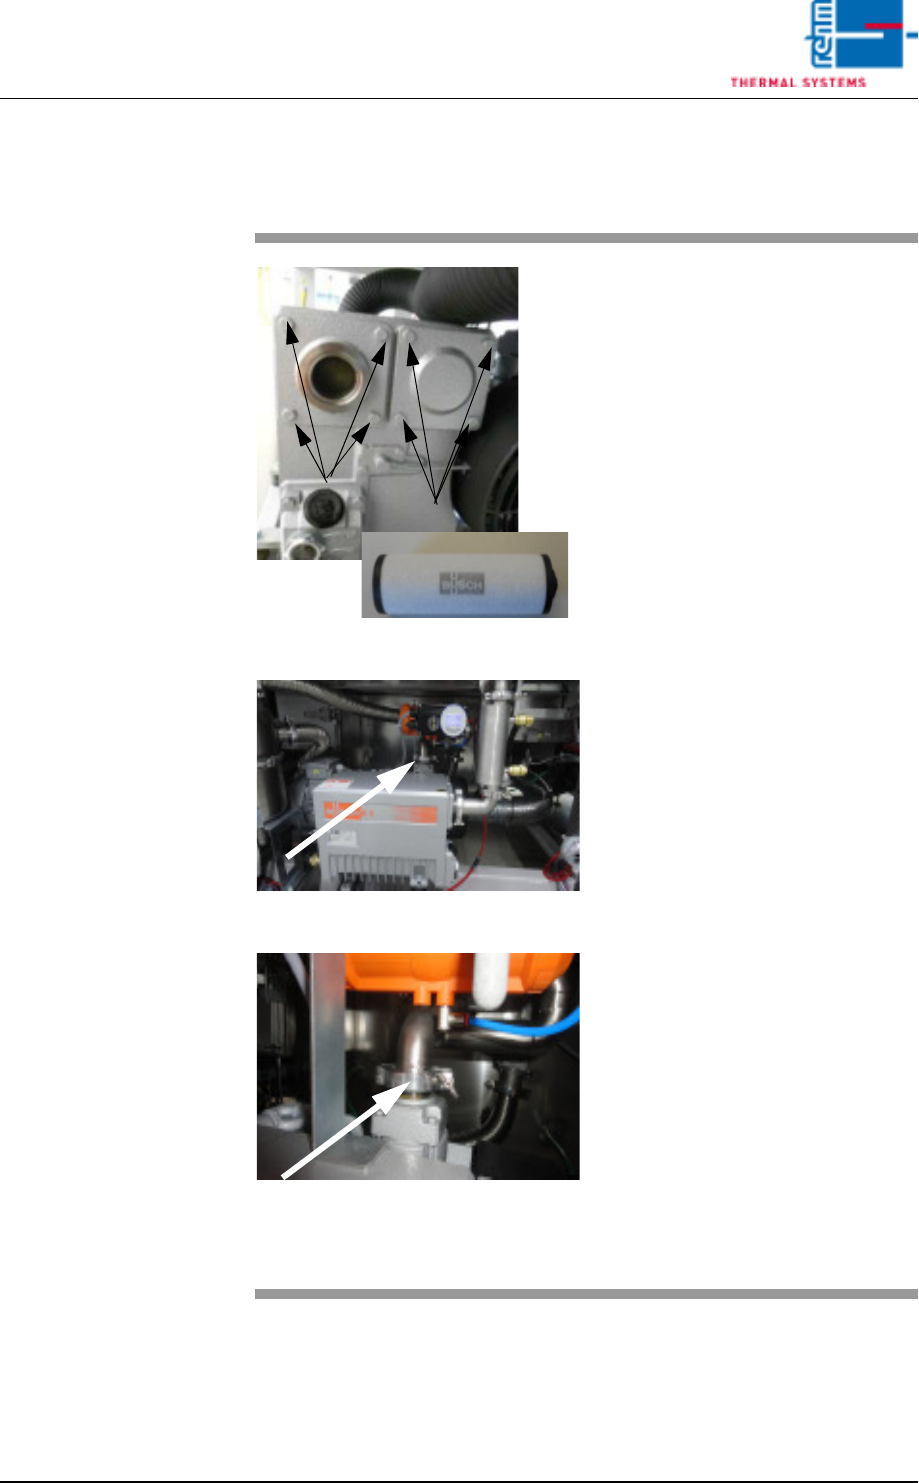
2.9 Cleaning the Exhaust Filters at the Inlet and the Outlet
Fig. 2-64 Pulling Out the Filter Housing
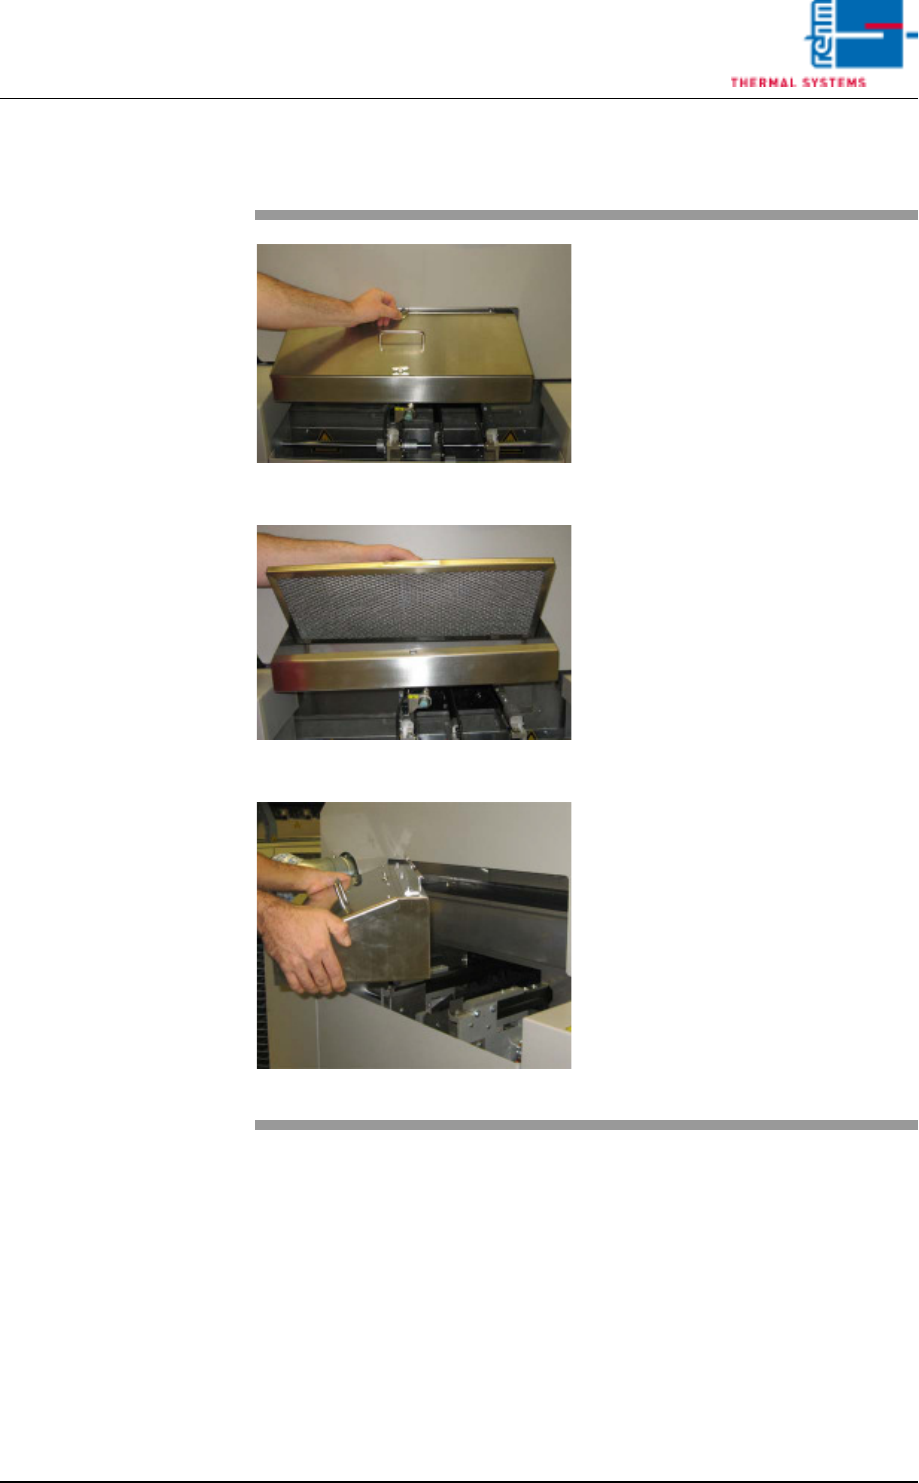
Fig. 2-65 Lifting the Filter Out of the Housing
Fig. 2-66 Lifting the Filter Housing
Consumable materials, tools:
• Oven cleaner
• Rags
• Or rinsing bath
Procedure:
1. Pull out the filter housing along
with the metallic gauze filter.
2. Loosen the wing screws and lift
the filter out of the filter housing.
3. Set the metallic gauze filter into
a rinsing bath. If a rinsing bath is
not available, the filter can be
cleaned with oven cleaner and
rags.
4. Lift the filter housing and set it
into a rinsing bath as well, or
clean it with oven cleaner and
rags.
5. After cleaning the filter, set it
back into the filter housing and
reinstall it into the system