ServiceInstruction_Vision XP - 第55页
Vision XP+ V AC Page 51 2 Maintenance 2.12 Pyrolysis Operating Instructions V ersion 1.5 2.12 Pyrolysi s 2.12.1 Replacing the Granulate Fig. 2-8 1 Py rolysis Uni t The pyrolysis unit is located at the back of the system …
Page 50 Vision XP+ VAC
2 Maintenance
2.11 Condensate Trap
Operating Instructions
Version 1.5
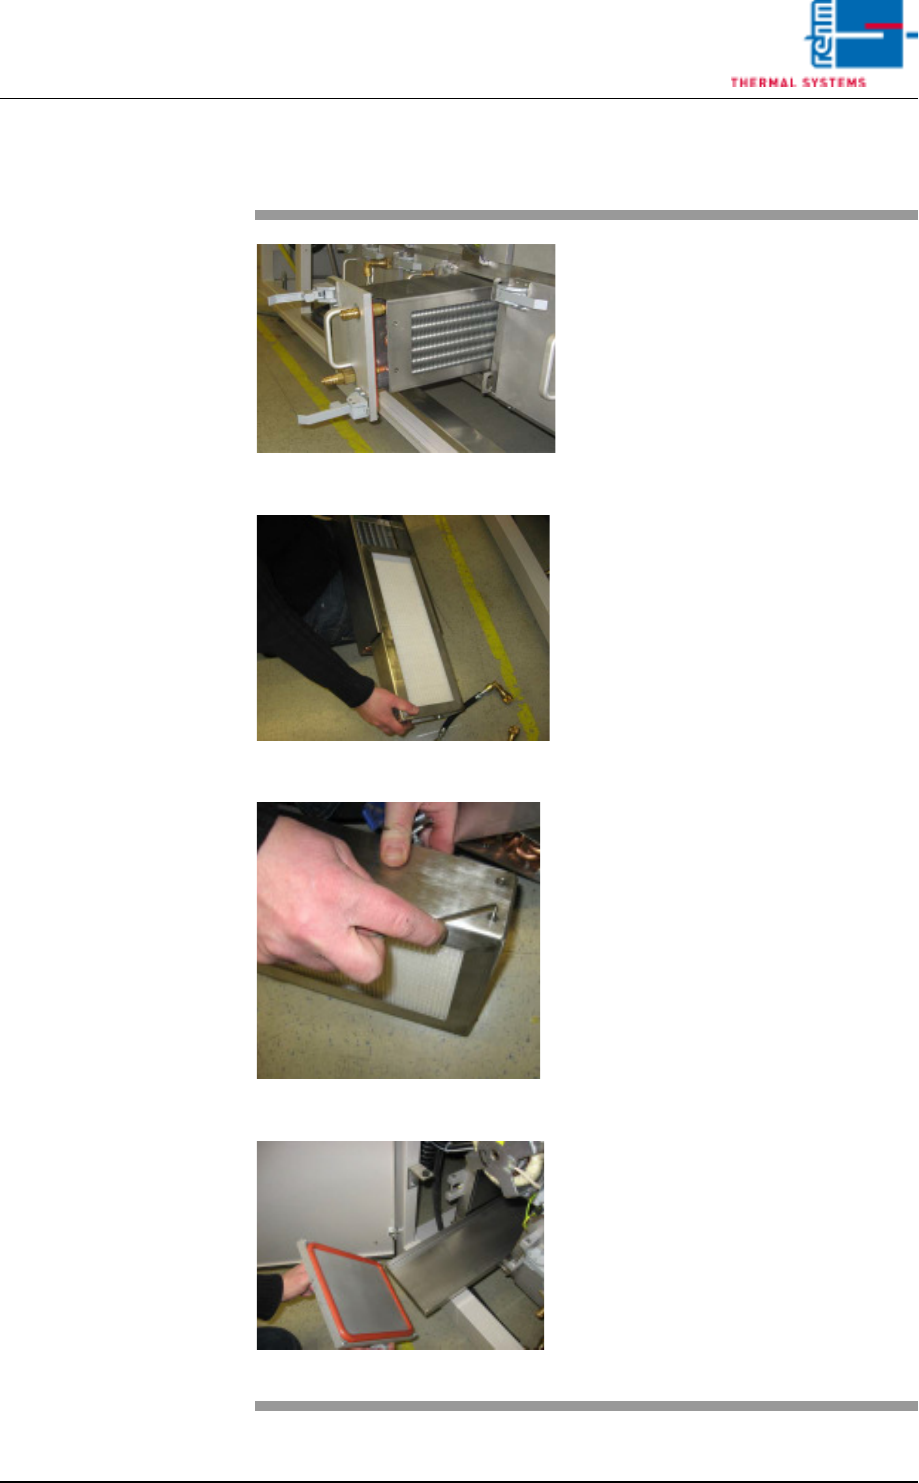
2.11.5 Cleaning Work at the Cooler Units (D)
Fig. 2-77 Pulling Out the Cooler Unit
Fig. 2-78 Pulling Out the Filter unit F9
Fig. 2-79 Metal Frame
Fig. 2-80 Drip pan
The cooler units are located in the
bottom row of the condensate trap.
Consumable materials, tools:
• Oven cleaner
• Rags
• Rinsing bath
• Allen wrench 2,5 mm
Procedure:
1. Open both locking levers and
pull out the cooler unit.
2. Pull the filter (F9) out of the
cooler unit.
3. Lift the cooler out of the cooler
unit and set it into the rinsing
bath as well
4. Open the metal frame of the fil-
ter (F9) with a 2,5 mm allen
wrench and replace the paper
filter (one-way).
Caution!
The seals must protrude from
the bath. Otherwise they will be
damaged.
5. Clean the seals with Appropri-
ate cleaning agent and rags.
6. Pull out the catch pan, empty it
an set it into the rinsing bath.
7. Clean the opening for the cooler
unit at the condensate trap with
oven cleaner and rags.
8. Reassemble cleaned parts and
insert them into the condensate
trap.
9. All connections restore.
Vision XP+ VAC Page 51
2 Maintenance
2.12 Pyrolysis
Operating Instructions
Version 1.5
2.12 Pyrolysis
2.12.1 Replacing the Granulate
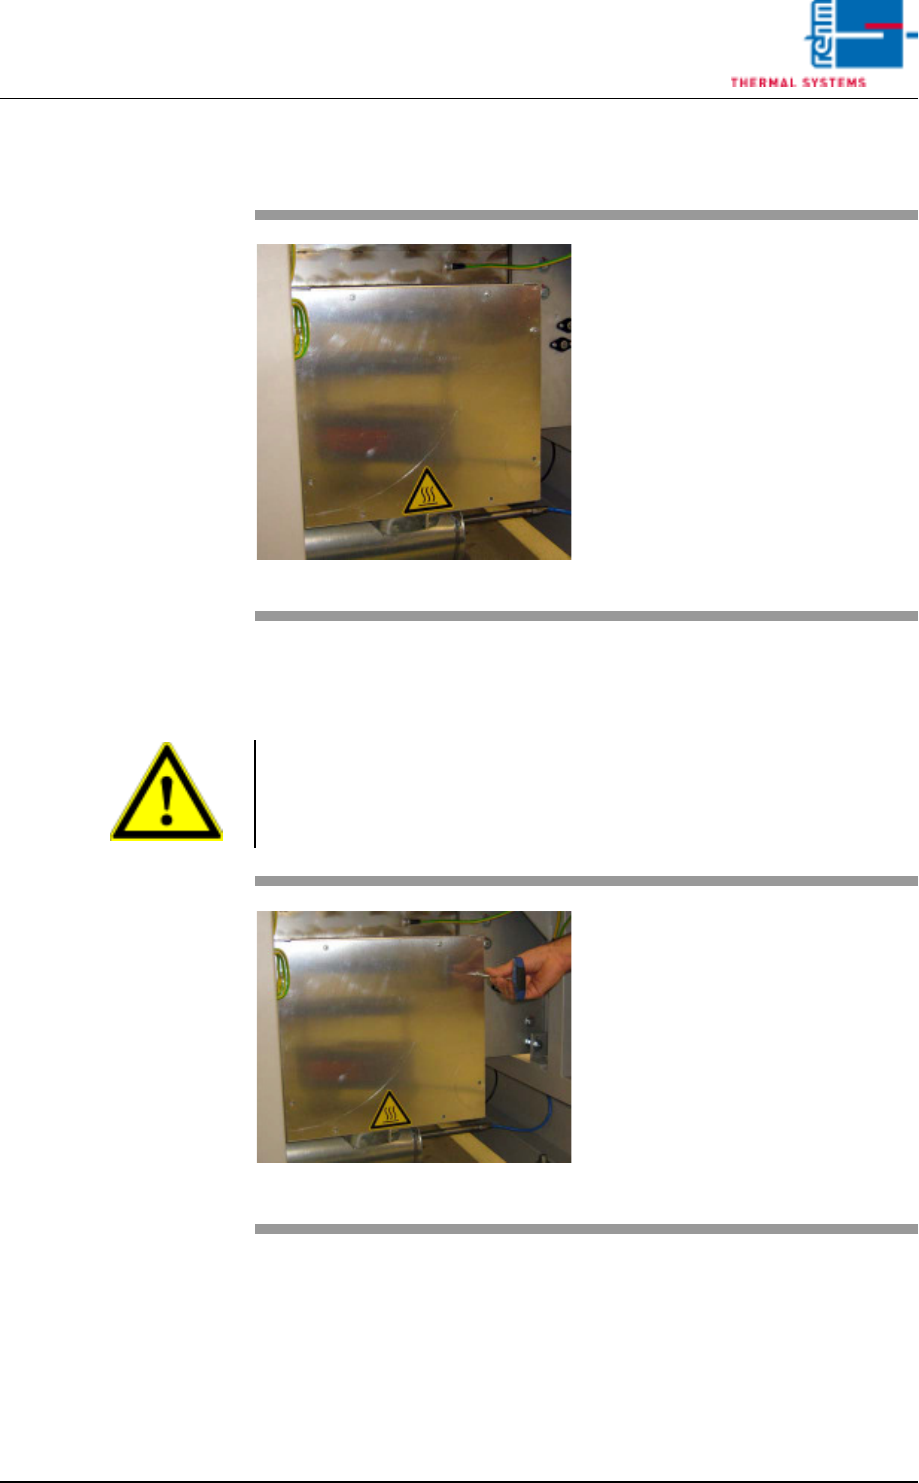
Fig. 2-81 Pyrolysis Unit
The pyrolysis unit is located at the
back of the system at the oven inlet.
Note!
The system must be cooled down before replacing the granulate, because
the granulate has a temperature of at least 500° C when the system is
running.
Fig. 2-82 Unscrewing the Door
Consumable materials, tools:
• Open-end wrench and hex key
• Granulate
• Cartridge seal
Procedure:
1. Remove the screws from the
cover and set them aside.
2. Loosen the nuts at the pyrolysis
unit and remove the cover.
Page 52 Vision XP+ VAC
2 Maintenance
2.12 Pyrolysis
Operating Instructions
Version 1.5
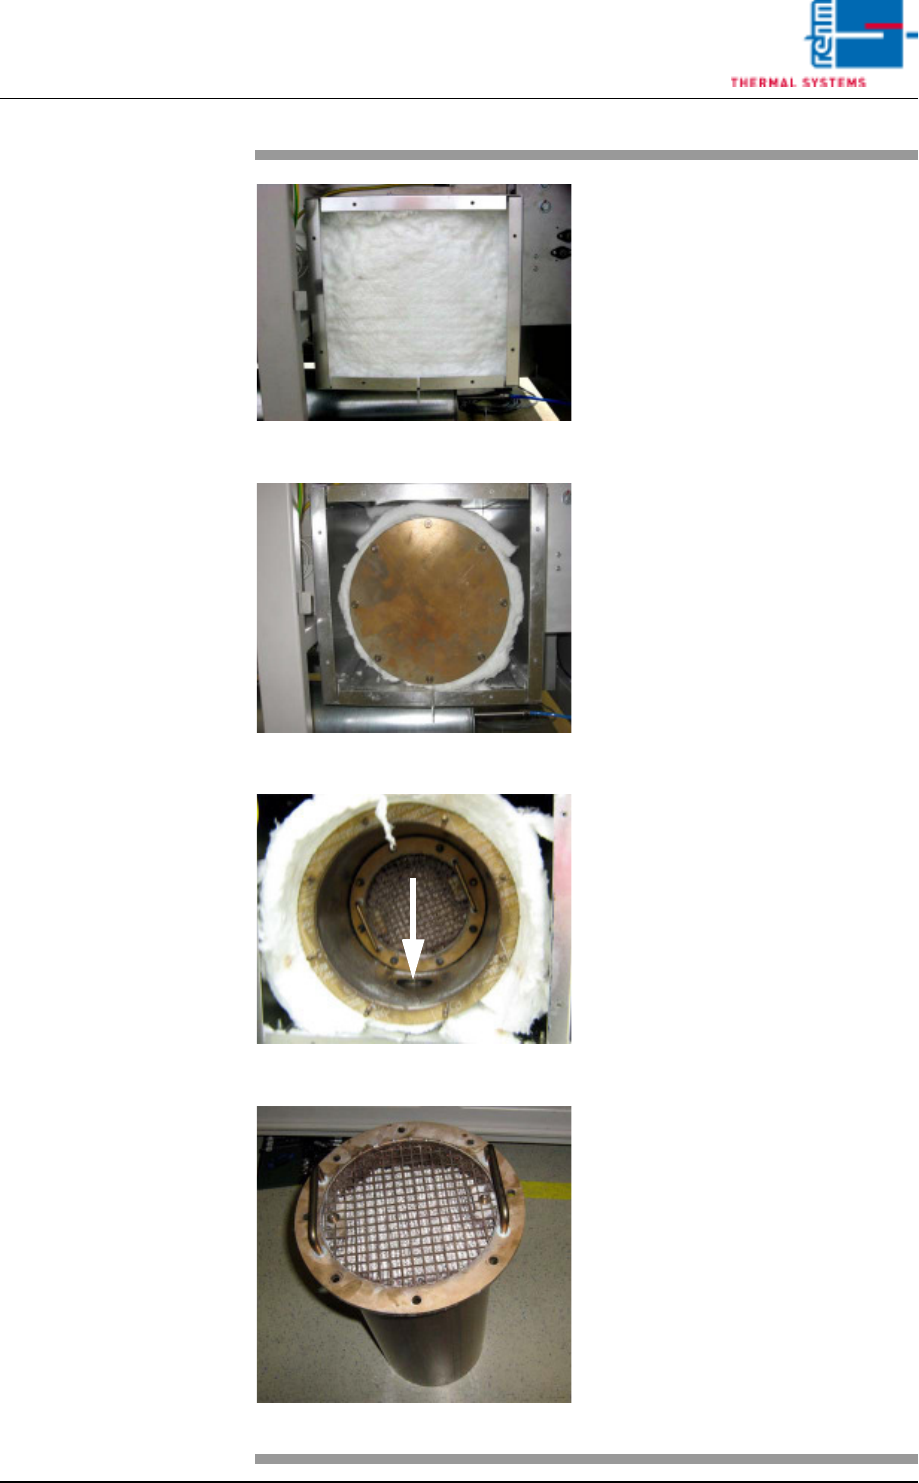
Fig. 2-83 Removing the Insulation
Fig. 2-84 Loosening the Nuts
Fig. 2-85 Removing the Insulation
Fig. 2-86 Lifting off the Grate
3. Remove the white insulation
which now becomes visible (see
Fig. 2-83). The cover of the py-
rolysis unit becomes visible as
well.
4. Loosen the nuts on the granu-
late container (see
Fig. 2-84) and lift it out along
with the granulate (see
Fig. 2-85). It must be assured
that the nuts and the washers
do not fall into the pipe connec-
tion.
5. Remove the screws which se-
cure the grate and lift the grate
and Gauze Filter off (see Fig. 2-
86).
6. Inspect the granulate for con-
tamination by breaking open
several pellets. If the granulate
is dark colored all the way
through, it has become saturat-
ed and must be replaced.
7. Fill the container with new gran-
ulate under dust-free condi-
tions.
8. Apply copper paste to the
threads. Copper paste is heat-
resistant up to 1000° C.
If the old nuts need are no lon-
ger usable, do not replace them
with stainless steel or zinc plat-
ed nuts.
9. Reinstall the granulate contain-
er by following the above in-
structions in reverse order,
insert the insulation and the
seals (or replace if damaged)
and secure the cover with the
screws.