EdisonStandardOwnersManual-RevA-20170818B.pdf - 第115页
Edison Printer User Manual (Part Number 1023838) P RINTER O PERATIONS Rev. A 115 Copyright © 2017 ITW EAE All rights reserved. No part of the contents of this manual ma y be reproduced, copied or transmitted in any form …
PRINTER OPERATIONS Edison Printer User Manual (Part Number 1023838)
114 Rev. A
Copyright © 2017 ITW EAE
All rights reserved. No part of the contents of this manual may be reproduced, copied or transmitted in any form or by any
means including graphic, electronic, or mechanical methods or photocopying, recording, or information storage and
retrieval systems without the written permission of ITW EAE, unless for purchaser's personal use.
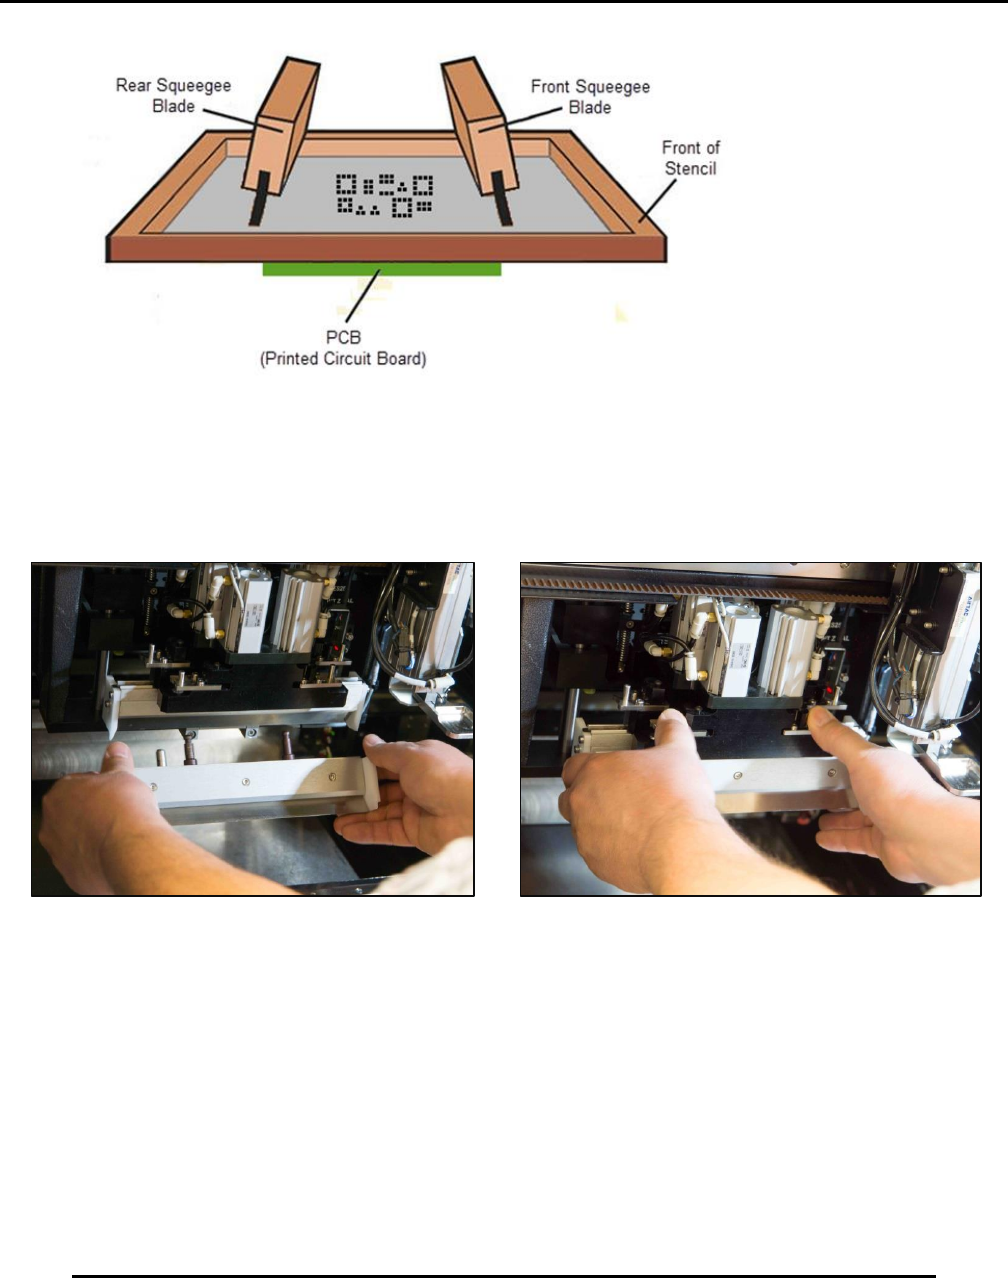
Figure 102. Rear blade placement.
2. Close the quick-release to the holder (Figure 103).
3. Repeat steps for the front blade, being careful to angle the front blade toward the front of the
stencil.
Figure 103. Position and insert front blades, then close quick-release.
Edison Printer User Manual (Part Number 1023838) PRINTER OPERATIONS
Rev. A 115
Copyright © 2017 ITW EAE
All rights reserved. No part of the contents of this manual may be reproduced, copied or transmitted in any form or by any
means including graphic, electronic, or mechanical methods or photocopying, recording, or information storage and
retrieval systems without the written permission of ITW EAE, unless for purchaser's personal use.
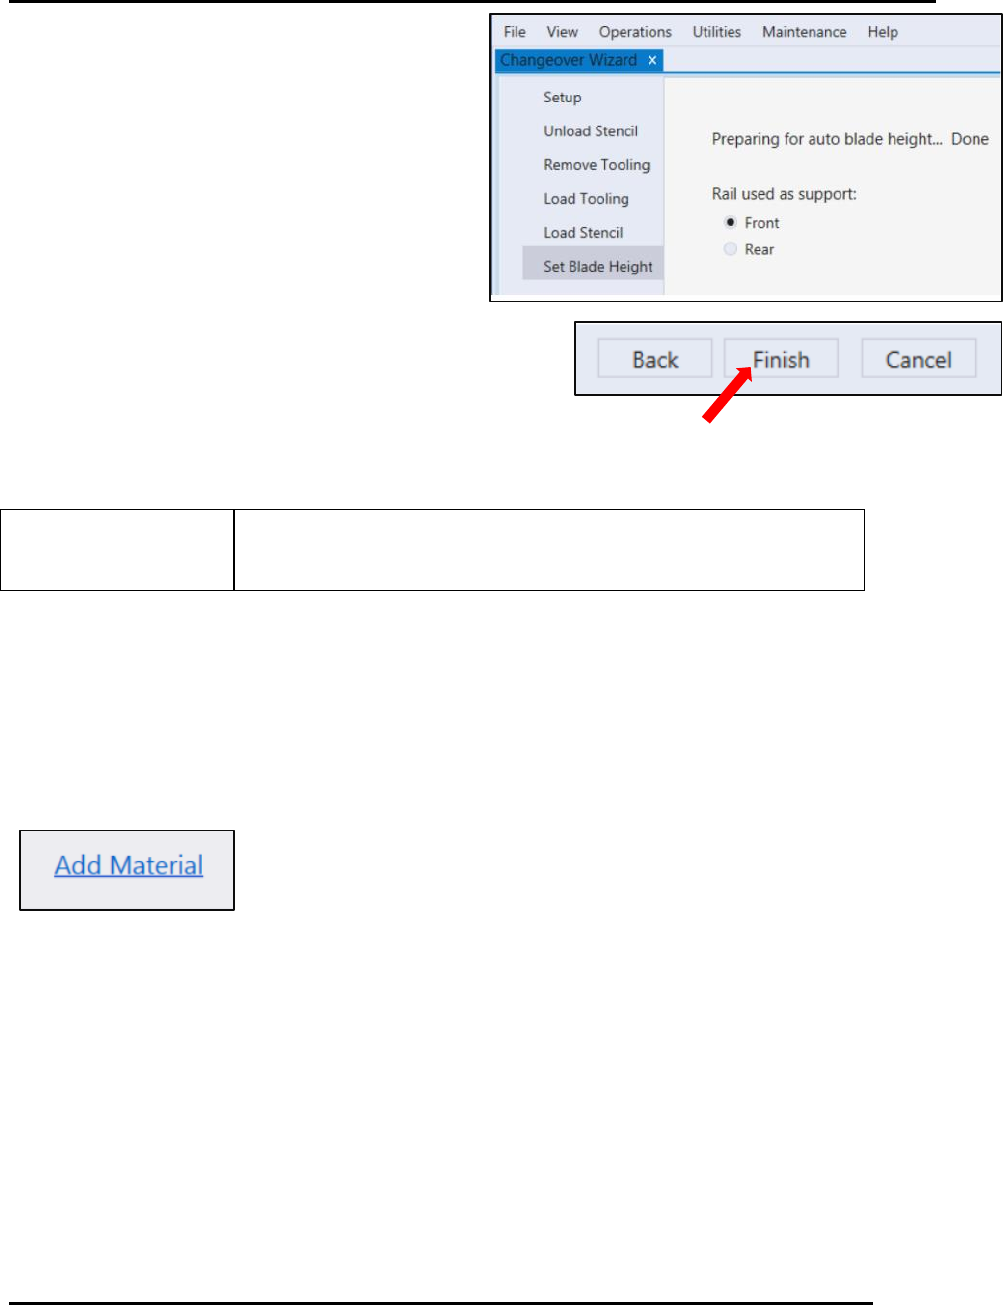
5.5.2.5.2. Set Blade Height
Use Set Blade Height to automatically set blade
height after the desired blade location is selected
(Figure 104).
Select the rail to be used as support during
the blade height routine.
Select Finish.
The Edison printer Set Blade Height routine automatically sets
the height for the front and rear blades
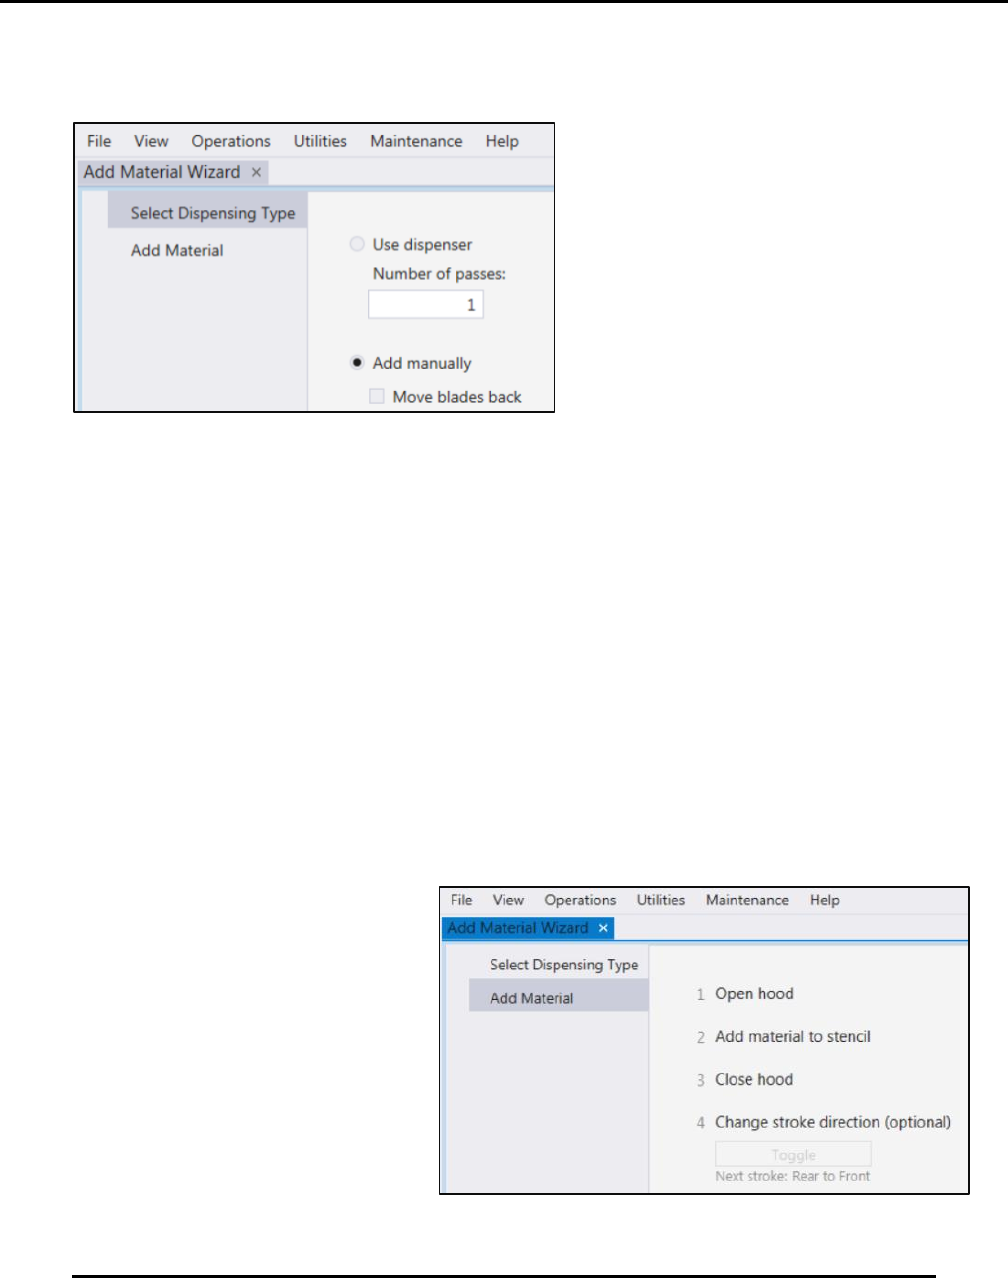
5.5.2.5.3. Add Material
After setting blade height, the Edison printer prompts with Add Material (Figure 105). Select
Add Material to start the Add Material Wizard.
Figure 104. Set Blade Height screen.
Figure 105. Select Add
Material prompt to begin
the Add Material wizard.
PRINTER OPERATIONS Edison Printer User Manual (Part Number 1023838)
116 Rev. A
Copyright © 2017 ITW EAE
All rights reserved. No part of the contents of this manual may be reproduced, copied or transmitted in any form or by any
means including graphic, electronic, or mechanical methods or photocopying, recording, or information storage and
retrieval systems without the written permission of ITW EAE, unless for purchaser's personal use.
The Add Material wizard prompts for selection of the type of dispensing to be used (Figure 106):
Automatic paste dispenser (Use dispenser).
Add paste by hand (Add manually).
Use Dispenser
1. Select Use Dispenser.
2. Set the number of times the dispenser passes across the stencil.
3. Select Next.
4. The system displays Ready for dispense.
5. Select Finish at the Ready for dispense to starts the dispense process.
Add Manually
1. Select Add Manually.
2. Choose to move the blades to the back of the stencil, as necessary for convenience
3. Choose Toggle to move squeegee to the front or rear print stroke position to use as reference
when manually adding material to the stencil (Figure 107).
4. Open the hood and add material to the stencil.
5. Close the hood.
6. Select Finish.
Figure 106. Add Material Wizard
Figure 107. Manually adding material screen.