EdisonStandardOwnersManual-RevA-20170818B.pdf - 第117页
Edison Printer User Manual (Part Number 1023838) P RINTER O PERATIONS Rev. A 117 Copyright © 2017 ITW EAE All rights reserved. No part of the contents of this manual ma y be reproduced, copied or transmitted in any form …
PRINTER OPERATIONS Edison Printer User Manual (Part Number 1023838)
116 Rev. A
Copyright © 2017 ITW EAE
All rights reserved. No part of the contents of this manual may be reproduced, copied or transmitted in any form or by any
means including graphic, electronic, or mechanical methods or photocopying, recording, or information storage and
retrieval systems without the written permission of ITW EAE, unless for purchaser's personal use.
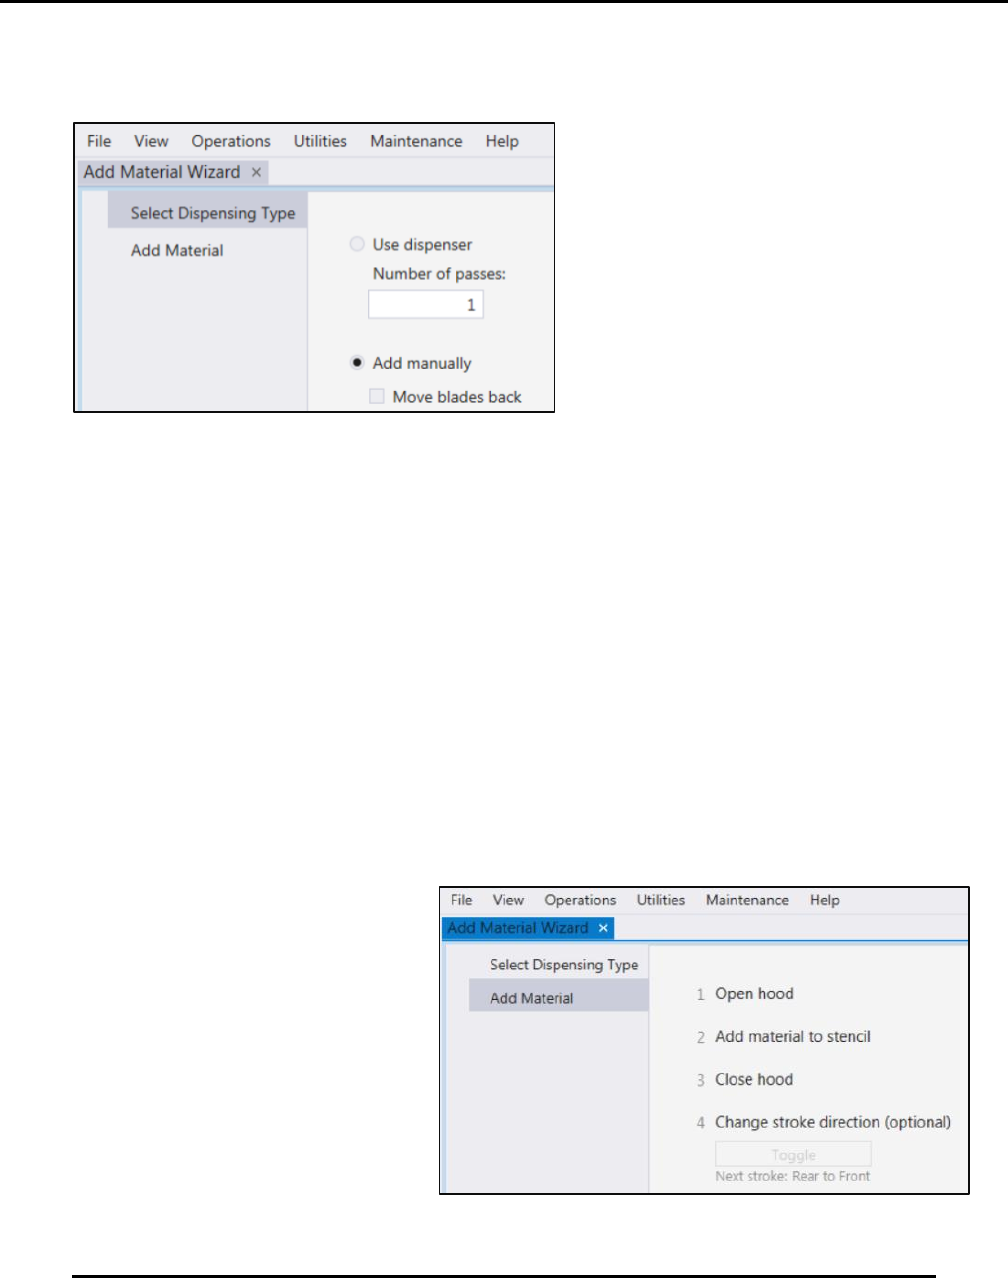
The Add Material wizard prompts for selection of the type of dispensing to be used (Figure 106):
Automatic paste dispenser (Use dispenser).
Add paste by hand (Add manually).
Use Dispenser
1. Select Use Dispenser.
2. Set the number of times the dispenser passes across the stencil.
3. Select Next.
4. The system displays Ready for dispense.
5. Select Finish at the Ready for dispense to starts the dispense process.
Add Manually
1. Select Add Manually.
2. Choose to move the blades to the back of the stencil, as necessary for convenience
3. Choose Toggle to move squeegee to the front or rear print stroke position to use as reference
when manually adding material to the stencil (Figure 107).
4. Open the hood and add material to the stencil.
5. Close the hood.
6. Select Finish.
Figure 106. Add Material Wizard
Figure 107. Manually adding material screen.
Edison Printer User Manual (Part Number 1023838) PRINTER OPERATIONS
Rev. A 117
Copyright © 2017 ITW EAE
All rights reserved. No part of the contents of this manual may be reproduced, copied or transmitted in any form or by any
means including graphic, electronic, or mechanical methods or photocopying, recording, or information storage and
retrieval systems without the written permission of ITW EAE, unless for purchaser's personal use.
5.5.2.5.4. Ready to Print
After successfully completing the Changeover routine and the Add Material wizard, the system
indicates it is Ready to print (Figure 108).
5.6. Production
Production cycle for the Edison Printer includes printing boards and supporting functions.
5.6.1. Printing
Printing a circuit board involves setting a print mode, setting a print limit and then initiating
printing.
5.6.1.1. Initiate Printing
1. Ensure that you have loaded the proper process program and stencil.
2. Ensure that you have installed the proper squeegee blades.
3. Set the blade height (Utilities > Printhead >
Set Blade Height).
4. Ensure that the proper board support (tooling
and fixtures) are installed on the worknest.
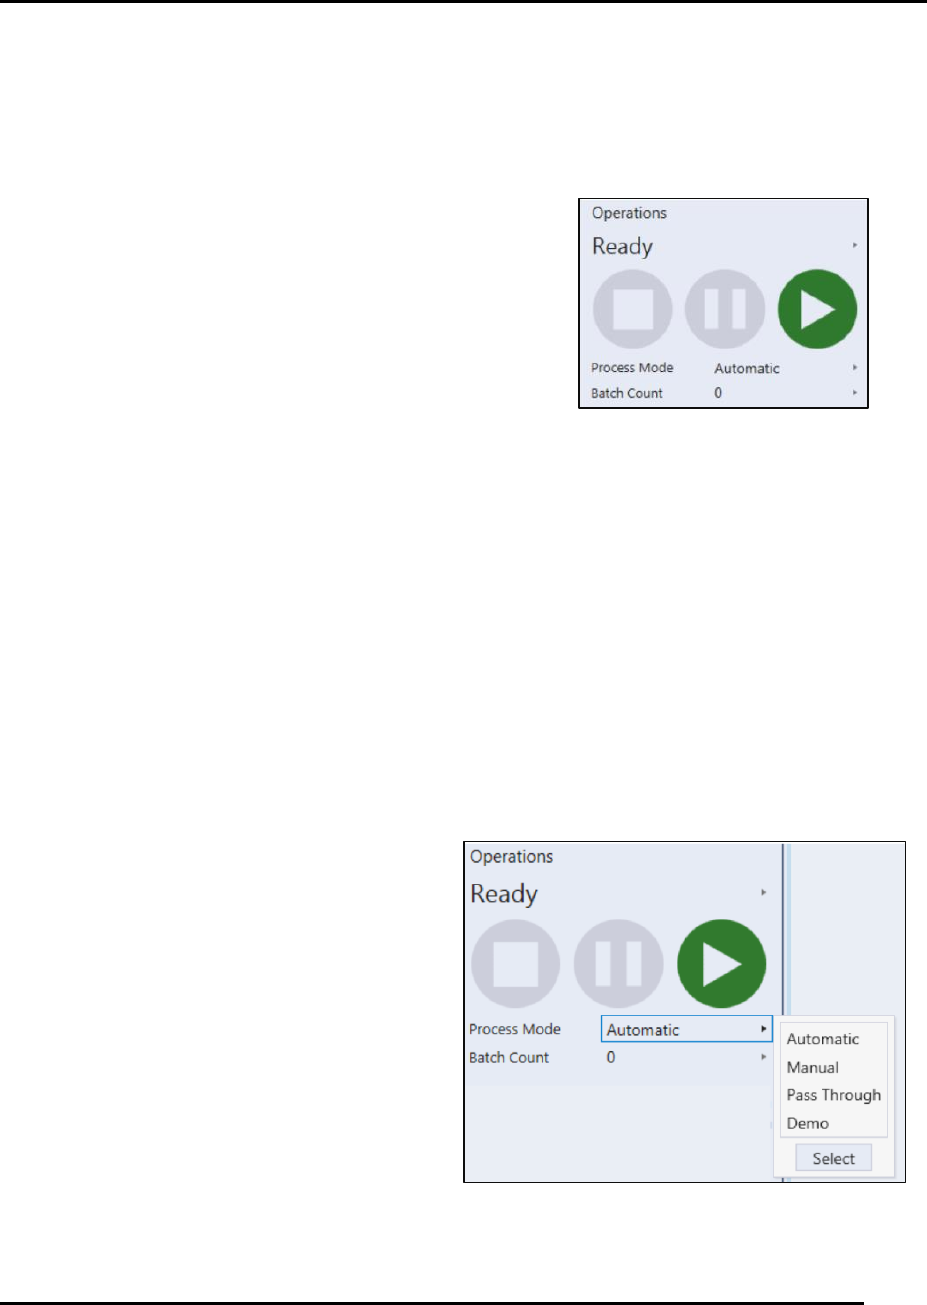
5. Select the process mode from within the
Operations section of the user interface
(Figure 109).
5.6.1.2. Set a Print Limit
A print limit is the maximum number of panels
to print.
If desired, set a print limit using the Batch Count
control within the Operations section of the user interface (Figure 110).
Figure 108. Ready to print prompt.
Figure 109. Select the desired process mode.
PRINTER OPERATIONS Edison Printer User Manual (Part Number 1023838)
118 Rev. A
Copyright © 2017 ITW EAE
All rights reserved. No part of the contents of this manual may be reproduced, copied or transmitted in any form or by any
means including graphic, electronic, or mechanical methods or photocopying, recording, or information storage and
retrieval systems without the written permission of ITW EAE, unless for purchaser's personal use.
5.6.1.3. Start Production
Start production using one of these methods:
Select Operations from the top menu and
press Start
Click the Green Start button (Figure 110).
Follow system prompts as necessary.
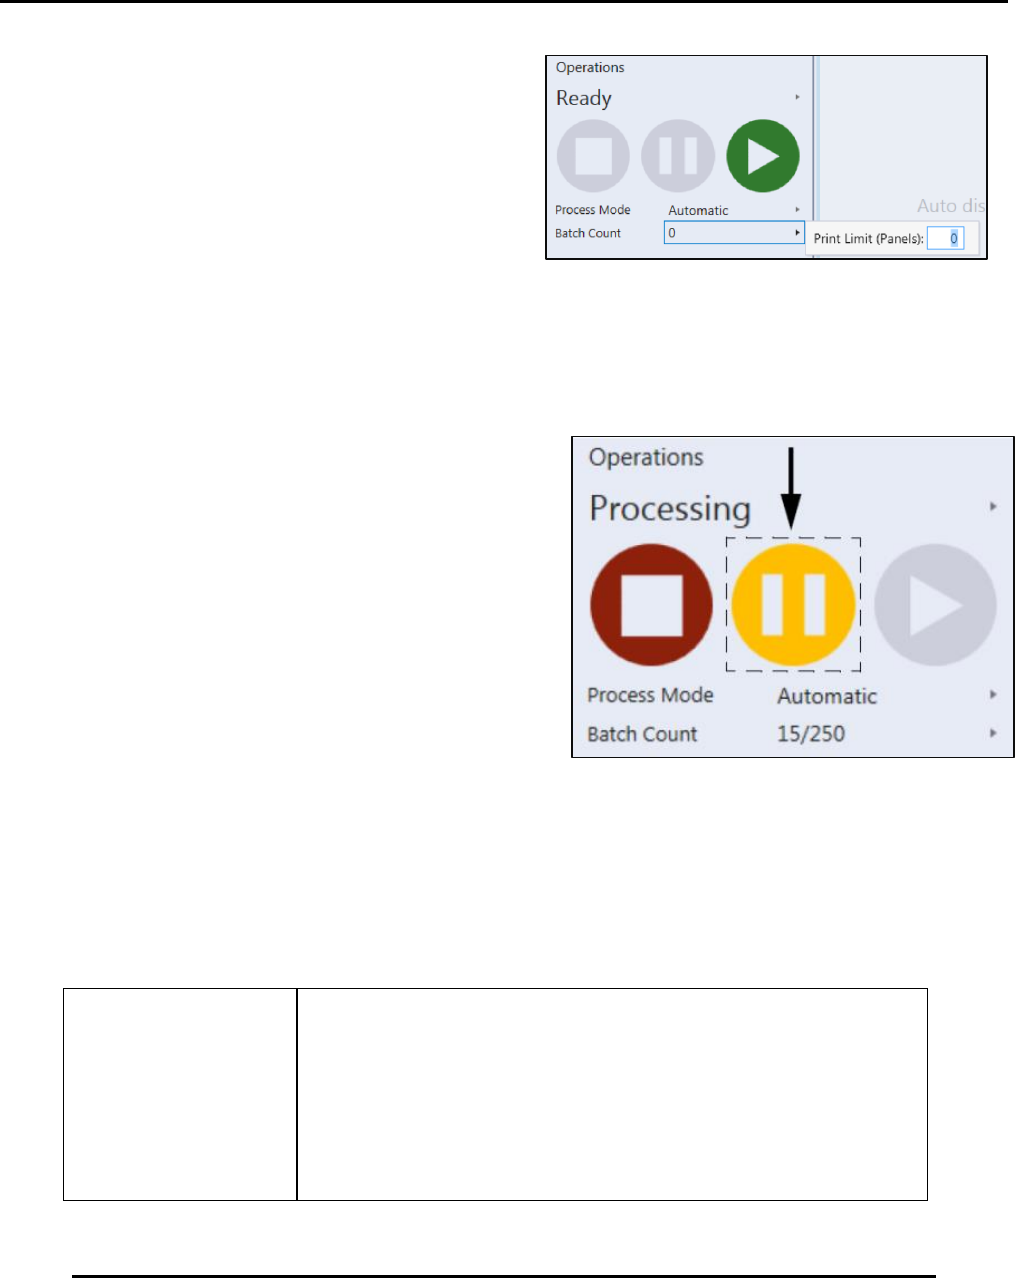
5.6.1.4. Edit Process Program While in Production Mode
Note that editing may not be available for some users, depending on security privileges.
1. Select Pause in the Operations section of the
user interface (Figure 111).
2. Navigate to View and select Process Program.
3. Edit the program as required.
4. Save the changes and return to production.
5.6.2. Initiating a Manual Wipe Cycle
Stencil wipe sequences are typically configured and
scheduled as part of the process program. However, you can also initiate a wipe cycle manually at
any time using controls located on the graphical user interface
This procedure assumes a process program and matching stencil are loaded.
1. Navigate to Utilities, select Wiper > Manual Wipe to display the manual wipe screen.
Wipe Stencil Choices
Choose to wipe the stencil using the profile designed
specifically for the manual wipe function
Choose another profile loaded to the process program
Choose a profile previously created but NOT loaded to the
process program.
Figure 110. Set printer limits using batch control.
Figure 111. Select Pause to edit the production
program.