EdisonStandardOwnersManual-RevA-20170818B.pdf - 第128页
P RINTER O PERATIONS Edison Printer User Manual (Part Number 1023838) 128 Rev. A Copyright © 2017 ITW EAE All rights reserved. No part of the contents of thi s manual may be reproduced, copied or transmitted in any form …
Edison Printer User Manual (Part Number 1023838) PRINTER OPERATIONS
Rev. A 127
Copyright © 2017 ITW EAE
All rights reserved. No part of the contents of this manual may be reproduced, copied or transmitted in any form or by any
means including graphic, electronic, or mechanical methods or photocopying, recording, or information storage and
retrieval systems without the written permission of ITW EAE, unless for purchaser's personal use.
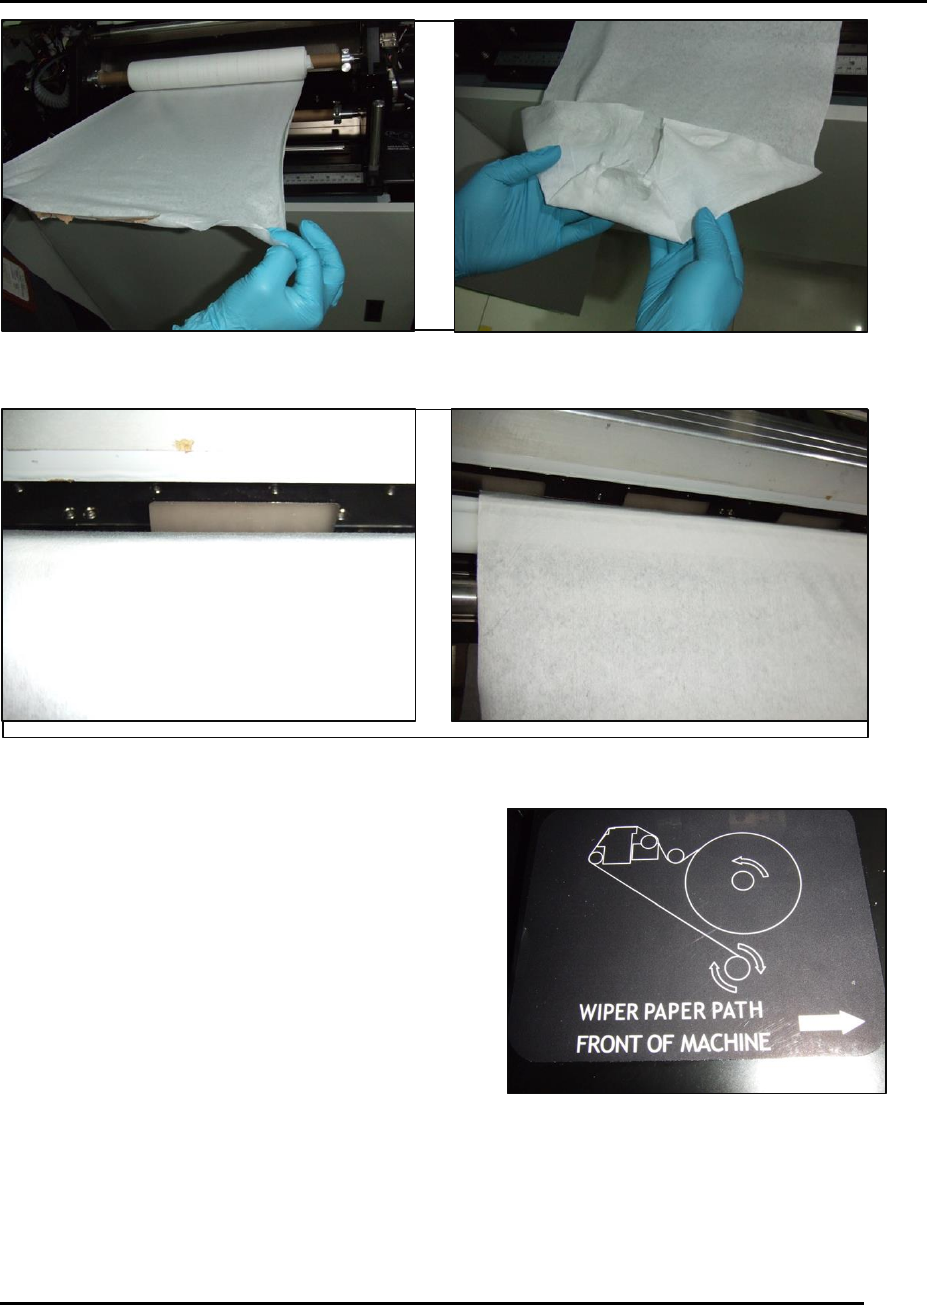
Figure 128. Spool and feed wiper paper.
Figure 129. If wiper paper is properly routed, the notches of the back splash will be visible.
16. Secure the paper to the take-up roll cardboard
using either the pre-adhesive strip attached or
tape.
17. Re-install the roller shaft with the diamond knurl
pattern.
18. Verify the wiper paper is routed in accordance
with the routing label affixed near the wiper
assembly (Figure 130).
Figure 130. Wiper paper path label.
PRINTER OPERATIONS Edison Printer User Manual (Part Number 1023838)
128 Rev. A
Copyright © 2017 ITW EAE
All rights reserved. No part of the contents of this manual may be reproduced, copied or transmitted in any form or by any
means including graphic, electronic, or mechanical methods or photocopying, recording, or information storage and
retrieval systems without the written permission of ITW EAE, unless for purchaser's personal use.
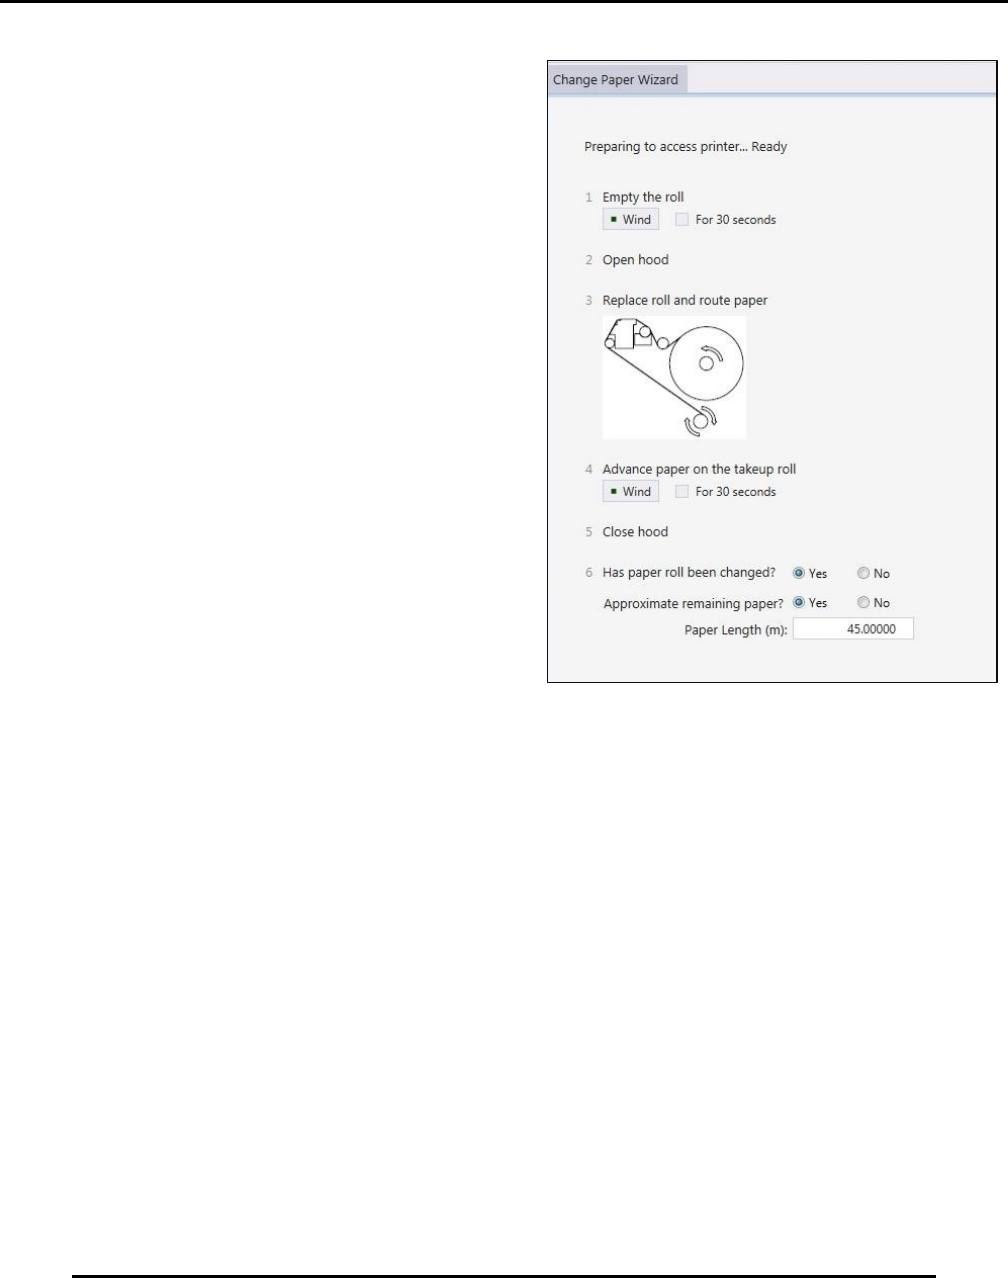
5.7.8. Final Steps
19. Using the Change Paper Wizard, use 4
Advance paper on the takeup roll to ensure
proper winder payout/take up action (Figure
131).
20. Close the hood.
21. Verify radio buttons (Figure 131):
a. Has paper roll been changed?
b. Approximate remaining paper? Enter
approximate remaining paper length.
22. Click Finish
Figure 131. Advance paper on the takeup roll to ensure
proper payout/takeup action.

Edison Printer User Manual (Part Number 1023838) PRINTER OPERATIONS
Rev. A 129
Copyright © 2017 ITW EAE
All rights reserved. No part of the contents of this manual may be reproduced, copied or transmitted in any form or by any
means including graphic, electronic, or mechanical methods or photocopying, recording, or information storage and
retrieval systems without the written permission of ITW EAE, unless for purchaser's personal use.
5.8. Replenish the Stencil Cleaner
Replenish the stencil cleaner by adding solvent and/or wiper paper when instructed through low
level alerts.
5.8.1. Adding Solvent
Add solvent when the solvent system is empty, including no solvent in the solvent lines or in the
solvent bath reservoir at the wiper assembly. While adding solvent, it is critical to determine that
solvent is making its way through the system by observing
that solvent is visible at the solvent bath reservoir when the
line is primed.
1. Navigate to Utilities, select Wiper > Prime Solvent
2. Follow the onscreen directions.
3. Access the solvent tank by opening the lower left
drawer at the front of the printer (Figure 132).
Caution!
Solvent may cause skin irritation or eye injury. Always wear
protective gloves and safety glasses when handling solvent,
and be careful not to spill the solvent when filling the solvent
tank. Review solvent’s Safety Data Sheet before use. Failure to
comply may result in personal injury and/or damage to the
environment.
Warning!
Isopropyl alcohol is extremely flammable and must not be used
in your solvent system. Use ONLY approved solvents. Failure
to comply could result in personal injury and equipment
damage. Contact ITW EAE for a current list of approved
solvents.
Figure 132. Solvent Reservoir.