EdisonStandardOwnersManual-RevA-20170818B.pdf - 第133页
Edison Printer User Manual (Part Number 1023838) M AINTENANCE Rev. A 133 Copyright © 2017 ITW EAE All rights reserved. No part of the contents of this manual ma y be reproduced, copied or transmitted in any form or by an…
MAINTENANCE Edison Printer User Manual (Part Number 1023838)
132 Rev. A
Copyright © 2017 ITW EAE
All rights reserved. No part of the contents of this manual may be reproduced, copied or transmitted in any form or by any
means including graphic, electronic, or mechanical methods or photocopying, recording, or information storage and
retrieval systems without the written permission of ITW EAE, unless for purchaser's personal use.
Table 17. Preventive Maintenance Timing and Procedures.
Preventive Maintenance
Days
Time
Required
(Minutes)
Activity
See
Section
(Click
hyperlink
below)
1
7
30
120
180
360
Paste Dispenser
Inspect Paste Dispenser Cartridge Latch
6.2.1.1
X
5
Inspect Paste Dispenser Empty Sensor
6.2.1.2
X
5
Verify Switch Functionality
Verify E-Stop (EMO) Operator Switch
Functionality
6.2.4.1
X
5
Verify Motion Power Off Operator Switch
Functionality
6.2.4.2
X
5
Verify Power On Operator Switch Functionality
6.2.4.3
X
5
General
Inspect Hood Gas Springs
6.2.2
X
5
Light Tower Lights and Audible Alarm
6.2.3
X
5
Verify Cover Interlock Active/Bypass Key Switch
Operator Switch Functionality
6.2.5
X
5
Verify Hood Lock Cylinder Functionality
6.2.6
X
5
Inspect and Clean the Anti-Static Brushes
6.2.7
X
5
Inspect Wiper Paper Shafts
6.2.8
X
5
Inspect the Knurled Shaft
6.2.9
X
5
Inspect Vacuum Hose
6.2.10
X
5
Inspect Trackball Condition
6.2.11
X
5
Inspect and Clean Keyboard
6.2.12
X
5
Inspect Stencil Stager Clamp Plates
6.2.13
X
5
Inspect Stencil Alignment Clamp Plates
6.2.14
X
5
Inspect Paste Height Monitor
6.2.15
X
5
Inspect Quik Release Squeegee Side Plates
6.2.16
X
5
Inspect and Drain Incoming Air Filter Bowls
6.2.17
X
10
Inspect Tooling Pins
6.2.18
X
10
Inspect Tooling Bridge Kits
6.2.19
X
10
Inspect Locating Pins and Bushings
6.2.20
X
5
Inspect Stencil Frame Clamps
6.2.21
X
5
Inspect Roller Plates
6.2.22
X
5
Inspect Inlet Filters
6.2.23
X
5
Inspect EdgeLoc+ System Springs
6.2.24
X
5
Inspect Solvent Return Trough
6.2.25
X
5

Edison Printer User Manual (Part Number 1023838) MAINTENANCE
Rev. A 133
Copyright © 2017 ITW EAE
All rights reserved. No part of the contents of this manual may be reproduced, copied or transmitted in any form or by any
means including graphic, electronic, or mechanical methods or photocopying, recording, or information storage and
retrieval systems without the written permission of ITW EAE, unless for purchaser's personal use.
Preventive Maintenance
Days
Time
Required
(Minutes)
Activity
See
Section
(Click
hyperlink
below)
1
7
30
120
180
360
Inspect Vacuum Plenum and Chamber
6.2.26
X
5
Inspect, Clean, and Verify Functionality of the
Hard Stop
6.2.27
X
5
Inspect Front and Rear Transport Belts
6.2.28
X
30
Inspect Squeegee Z Belt and Tensioners
6.2.29
X
5
Inspect Squeegee Z Springs
6.2.30
X
5
Inspect Vision X Motor Drive Belt
6.2.31
X
5
Inspect Hood To Hoop Roll Ground Strap
6.2.32
X
5
Clean Work Table
6.2.33
X
5
Clean Stencil Shelves
6.2.34
X
5
Clean Solvent Pan
6.2.35
As Necessary
30
MAINTENANCE Edison Printer User Manual (Part Number 1023838)
134 Rev. A
Copyright © 2017 ITW EAE
All rights reserved. No part of the contents of this manual may be reproduced, copied or transmitted in any form or by any
means including graphic, electronic, or mechanical methods or photocopying, recording, or information storage and
retrieval systems without the written permission of ITW EAE, unless for purchaser's personal use.
6.2. Preventive Maintenance Procedures
6.2.1. Paste Dispenser Preventive Maintenance
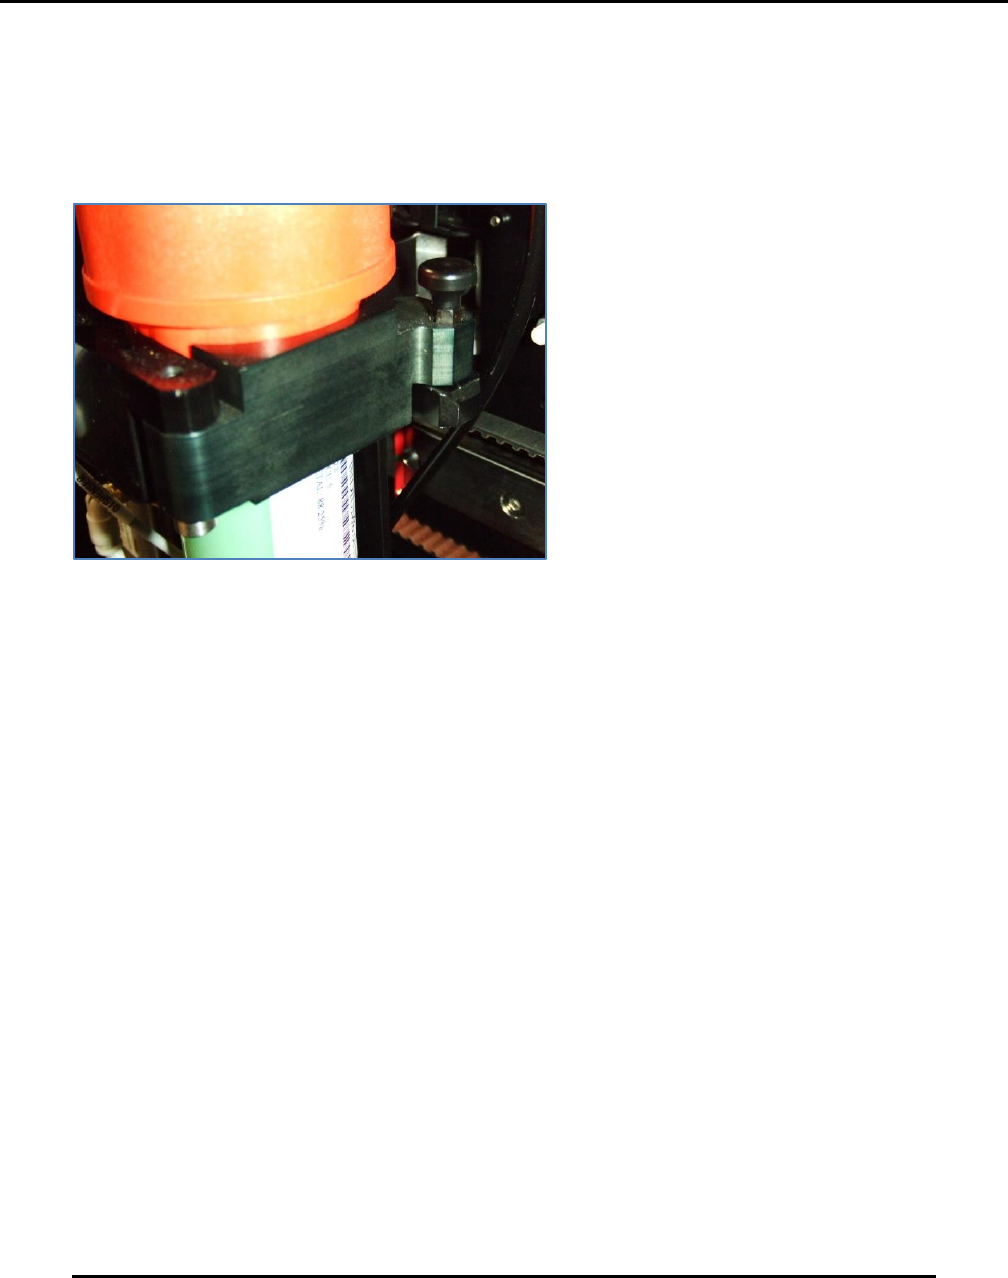
6.2.1.1. Inspect Paste Dispenser Cartridge Latch—Maintain Monthly
Figure 134. Inspect Paste Dispenser Cartridge Latch.
Introduction
Inspect and clean the paste dispenser cartridge latch monthly (Figure 134).
Estimated Completion Time
Less than 5 minutes.
Procedure
The paste dispenser cartridge latch is an area where paste build up can cause latch failure.
Remove any solder paste present.
Remove the cartridge from the paste dispenser assembly.
Examine the swing latch assembly
o Open and close the assembly to ensure proper security to the cartridge when
installed.
Clear using isopropyl alcohol.
Apply two drops of light oil (such as 3-in-One oil) to the latch pivot for smooth operation.