EdisonStandardOwnersManual-RevA-20170818B.pdf - 第144页
M AINTENANCE Edison Printer User Manual (Part Number 1023838) 144 Rev. A Copyright © 2017 ITW EAE All rights reserved. No part of the contents of thi s manual may be reproduced, copied or transmitted in any form or by an…
Edison Printer User Manual (Part Number 1023838) MAINTENANCE
Rev. A 143
Copyright © 2017 ITW EAE
All rights reserved. No part of the contents of this manual may be reproduced, copied or transmitted in any form or by any
means including graphic, electronic, or mechanical methods or photocopying, recording, or information storage and
retrieval systems without the written permission of ITW EAE, unless for purchaser's personal use.
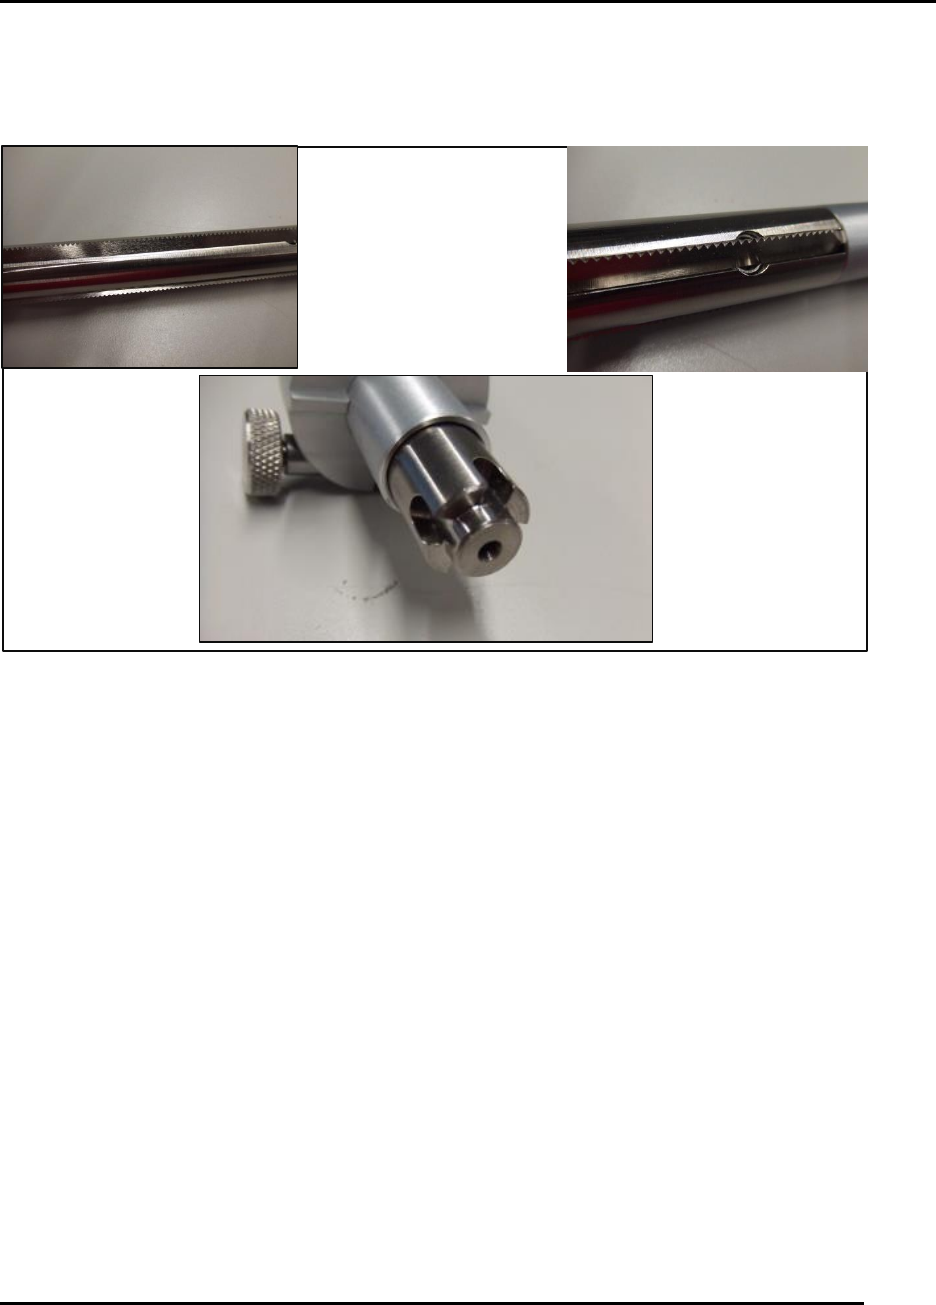
6.2.8. Inspect Wiper Paper Shafts–Monthly
Figure 142. Inspect the drive shaft end for wear or damage.
Introduction
Inspect the wiper paper shafts for function of the toothed spurs and condition of the drive end.
Estimated Completion Time
Less than 5 minutes
Procedure
Remove the two shafts from the wiper assembly.
o Verify the toothed spurs (three per shaft) have freedom of movement and are not
clogged with paper.
o The toothed spurs are spring-loaded and should be able to return to position easily
Inspect the drive end to ensure for wear or damage would affect shaft performance (Figure
142).
Clean with a stiff brush and solvent as required.
NOTE: Take care when handling these assemblies to prevent injury, as the toothed spurs are
sharp.
MAINTENANCE Edison Printer User Manual (Part Number 1023838)
144 Rev. A
Copyright © 2017 ITW EAE
All rights reserved. No part of the contents of this manual may be reproduced, copied or transmitted in any form or by any
means including graphic, electronic, or mechanical methods or photocopying, recording, or information storage and
retrieval systems without the written permission of ITW EAE, unless for purchaser's personal use.
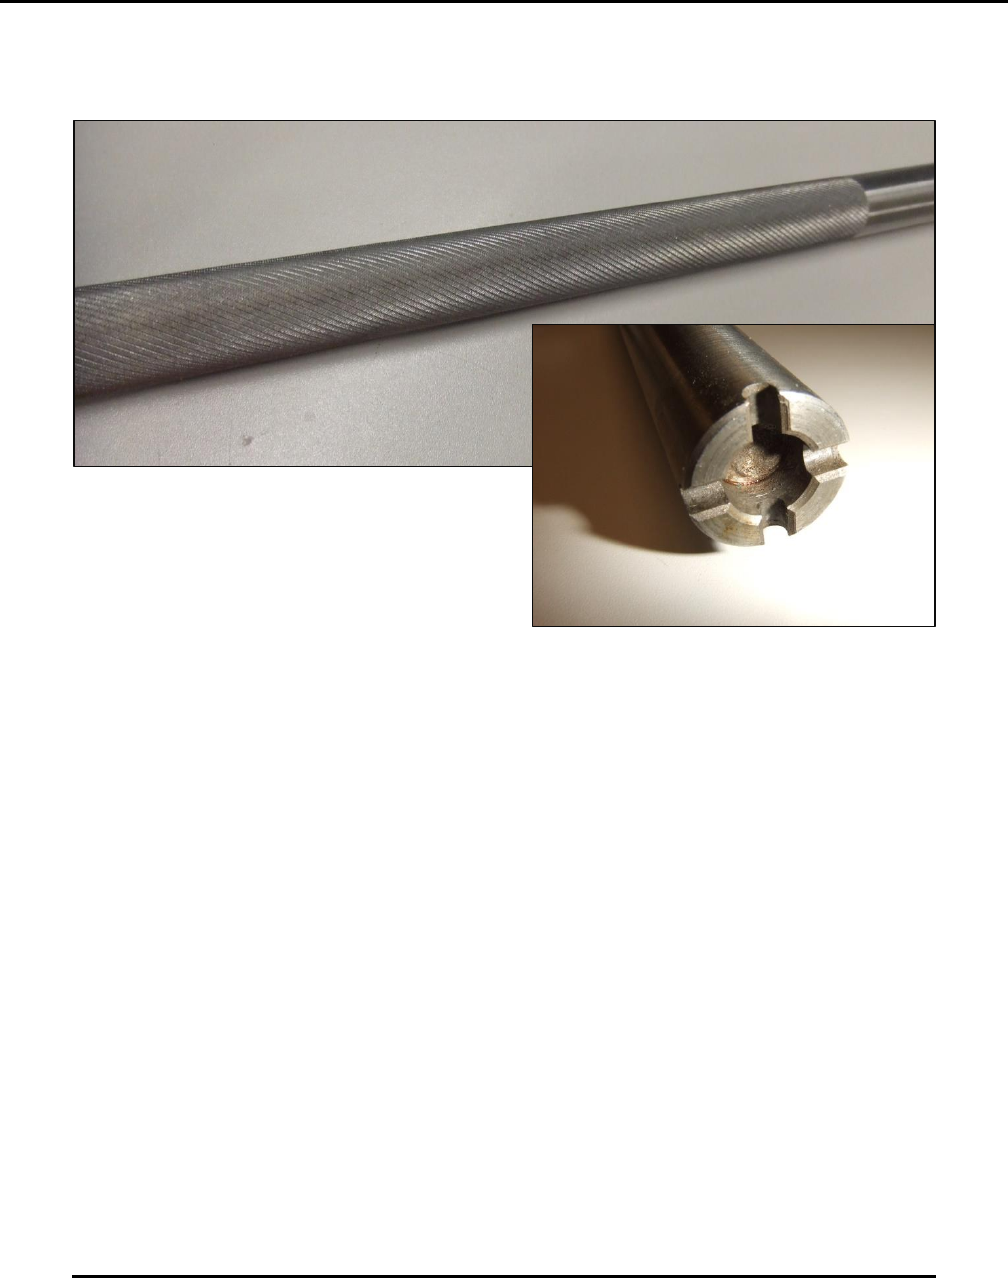
6.2.9. Inspect the Knurled Shaft–Monthly
Figure 143. Inspect the knurled shaft and the drive end.
Introduction
Inspect the knurled shaft for cleanliness and for the condition of the knurl and drive end.
Estimated Completion Time
Less than 5 minutes
Procedure
Remove the shaft from the wiper assembly.
Inspect the diamond knurl pattern (Figure 143).
o If contaminated with solder paste, clean the surface.
o It may be necessary to soak the shaft or use an ultrasonic cleaning method to properly
condition the surface.
o The condition of this diamond knurl patter surface is important for the wiper paper
tensioning system to work effectively.
Check the condition of the drive end to ensure no excess wear.
Edison Printer User Manual (Part Number 1023838) MAINTENANCE
Rev. A 145
Copyright © 2017 ITW EAE
All rights reserved. No part of the contents of this manual may be reproduced, copied or transmitted in any form or by any
means including graphic, electronic, or mechanical methods or photocopying, recording, or information storage and
retrieval systems without the written permission of ITW EAE, unless for purchaser's personal use.
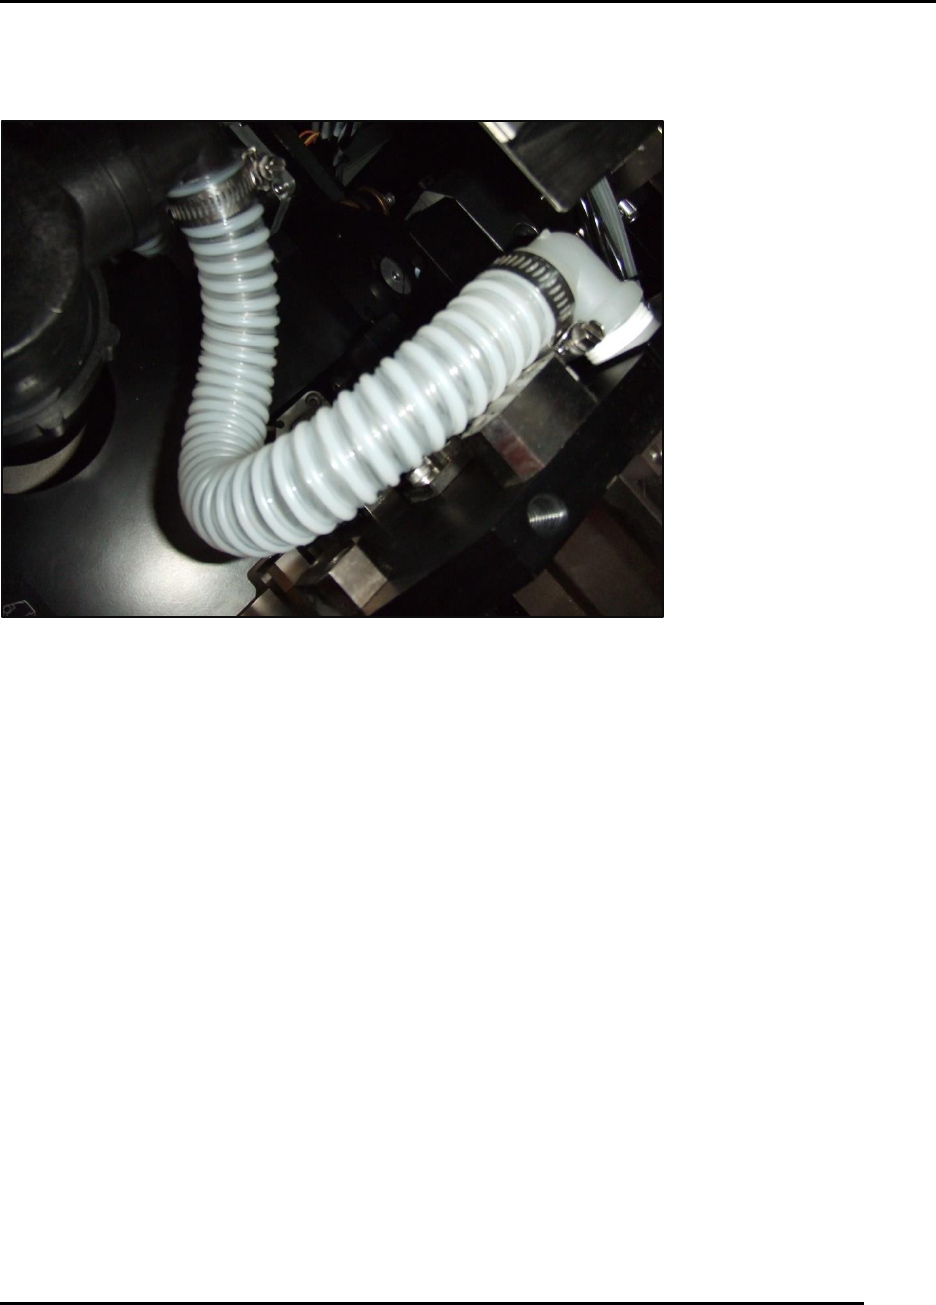
6.2.10. Inspect Vacuum Hose–Monthly
Figure 144. Inspect Vacuum Hose.
Introduction
Inspect the condition of the vacuum hose of the venturi vacuum
Estimated Completion Time
Less than 5 minutes
Procedure
The vacuum hose is subject to wear and attack by solvents.
Using the I O screen actuate the wiper up and down and check for any restriction of hose
movement.
o The hose should be pliable and move smoothly with wiper motion.
Inspect for cracks or deterioration—there should be no evidence of either.
Check that hose clamps are properly secured onto the fittings.
Inspect for solvent on the base frame assembly.
o Solvent indicates a leak from either the clamp area or a compromised hose.