TX_V2_年保养英文.pdf - 第23页
4 WF 4 TX-Series V2 Maintenance Remove the TH to be maintained 6 min 1 / 2 C A U T I O N ! R e f e r t o s a f e t y i n s t r u c t i o n s i n u s e r m a n u a l b e f o r e c o m m e n c i n g M a i n t e n a n c e…

www.asm-smt.com
4 WF 4 TX-Series V2 Maintenance Remove the TH to be maintained 6 min 1 / 2
CAUTION! Refer to safety instructions in user manual before commencing Maintenance
Machine Status OFF Conveyor Empty
NOTICE! ESD guidelines are to be followed Tool:
T7, T8, T9, T31, T87
Wear Part: Consumables:
www.asm-smt.com
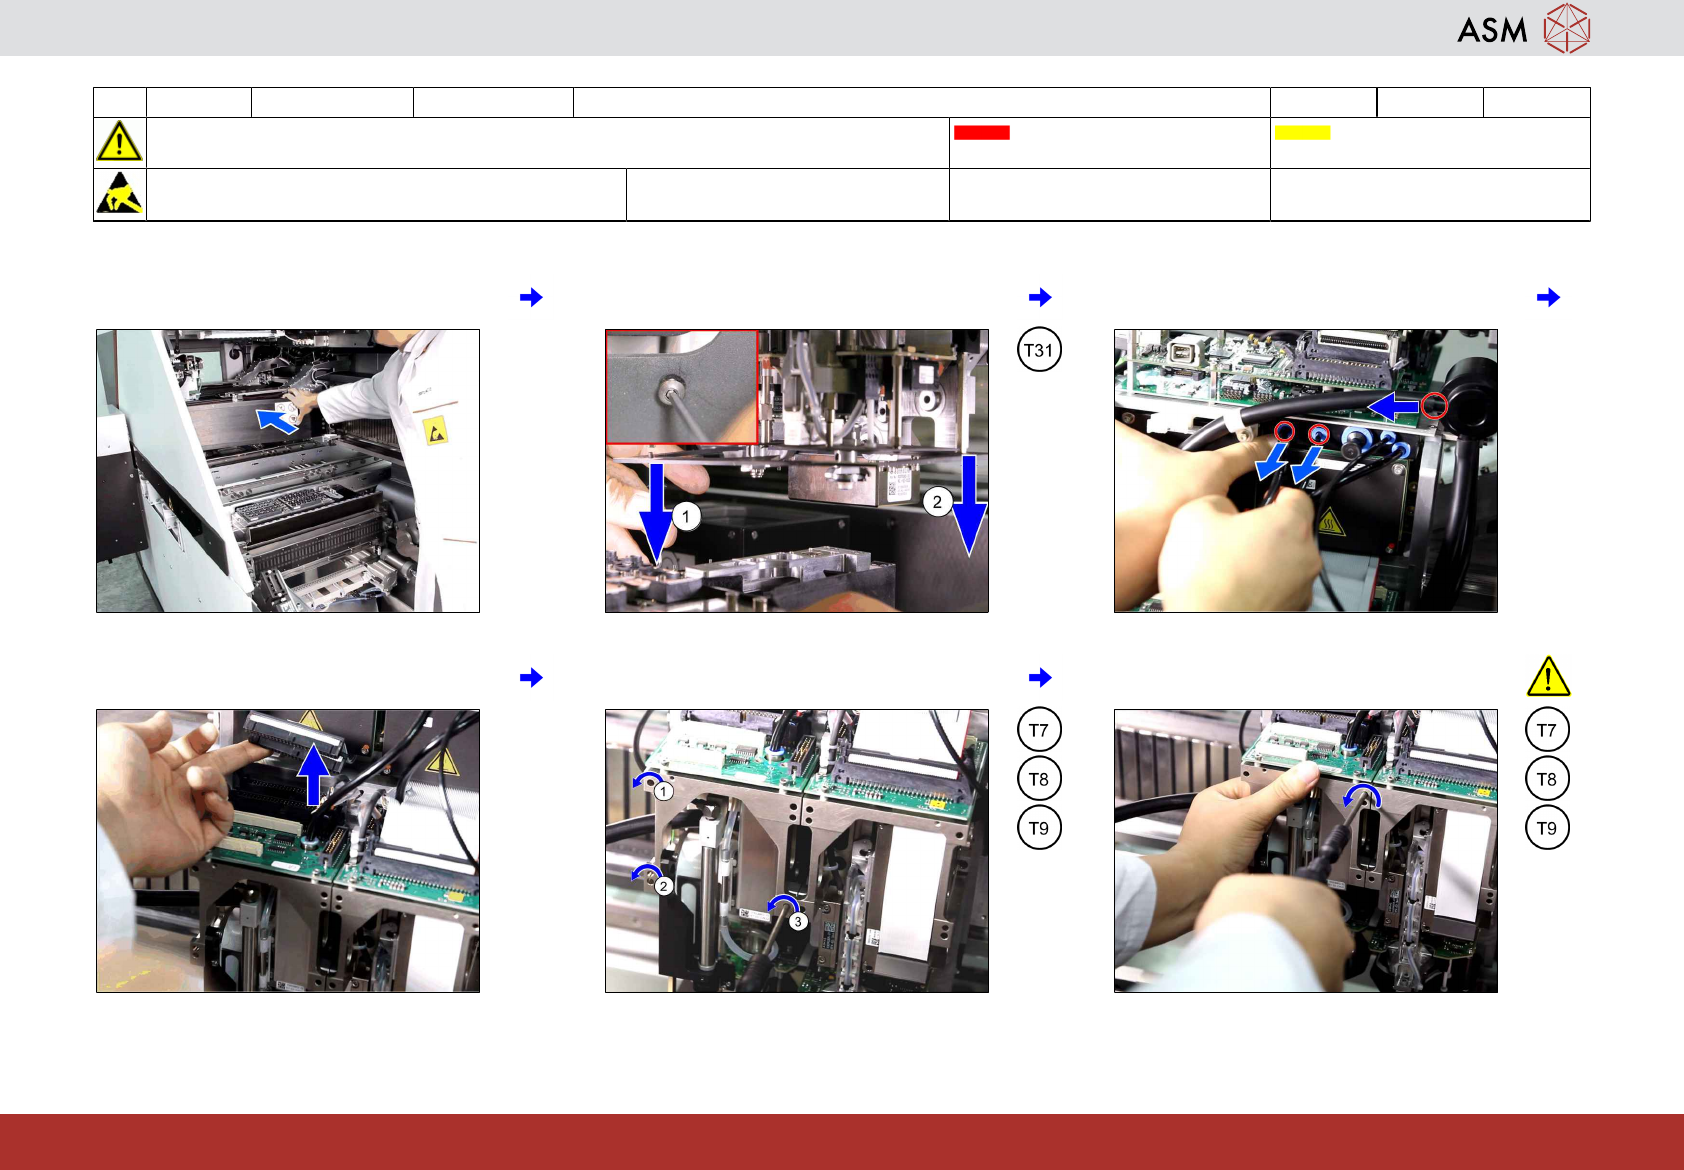
1 Move the gantry with the head to be main-
tained to a good working position.
2 Remove the two screws fastening the
camera visual shield.
3 Unplug the three compressed air connec-
tions from the left TH segment.
4 Unplug the two ribbon cables from the TH
segment.
5 Remove the three screws fixing the TH
segment (1) to (3).
6 Hold the TH segment and remove the last
screw before taking it off.

4 WF 4 TX-Series V2 Maintenance Remove the TH to be maintained 6 min 2 / 2
CAUTION! Refer to safety instructions in user manual before commencing Maintenance
Machine Status OFF Conveyor Empty
NOTICE! ESD guidelines are to be followed Tool:
T7, T8, T9, T31, T87
Wear Part: Consumables:
www.asm-smt.com
7 Put the head segment into the transport
container.
8 Unplug the three compressed air connec-
tions from the right TH segment.
9 Unplug the two ribbon cables from the TH
segment.
10 Remove the three screws fixing the TH
segment (1) to (3).
11 Hold the TH segment and remove the last
screw before taking it off.
12 Put the head segment into the transport
container.