TX_V2_年保养英文.pdf - 第57页
18 WF 4 TX-Series V2 Maintenance Calibrate the maintained TH 13 min 3 / 9 C A U T I O N ! R e f e r t o s a f e t y i n s t r u c t i o n s i n u s e r m a n u a l b e f o r e c o m m e n c i n g M a i n t e n a n c e …

18 WF 4 TX-Series V2 Maintenance Calibrate the maintained TH 13 min 2 / 9
CAUTION! Refer to safety instructions in user manual before commencing Maintenance
Machine Status ON Conveyor Empty
NOTICE! ESD guidelines are to be followed Tool:
T5
Wear Part: Consumables:
www.asm-smt.com
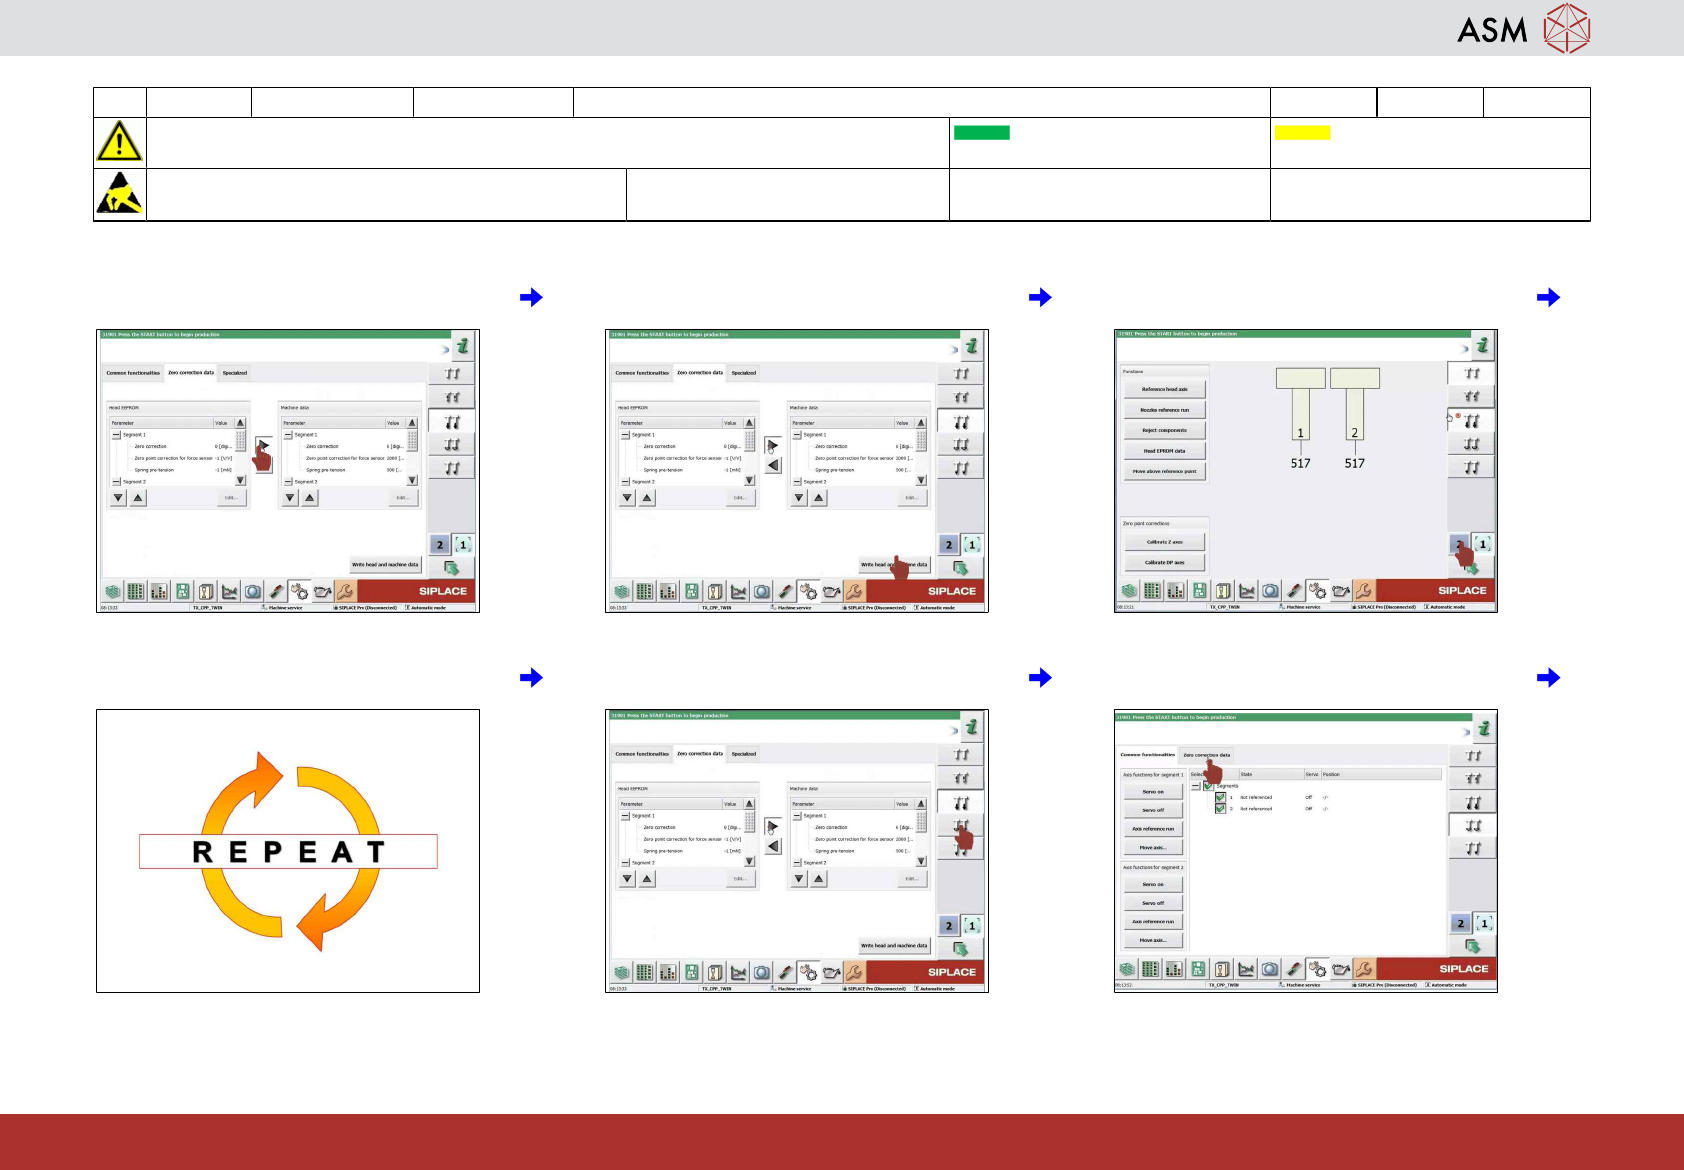
7 If you mount the same heads continue
with step 23.
8 Click on "Check sensor and options". 9 Click on "Check sensors function of spe-
cific components".
10 Click on "Twin head". 11 Click on "Check positions and functions of
the Z-Axis".
12 Click on "Zero correction data".
18 WF 4 TX-Series V2 Maintenance Calibrate the maintained TH 13 min 3 / 9
CAUTION! Refer to safety instructions in user manual before commencing Maintenance
Machine Status ON Conveyor Empty
NOTICE! ESD guidelines are to be followed Tool:
T5
Wear Part: Consumables:
www.asm-smt.com
13 Click on the "arrow" to transfer the data to
the machine.
14 Click on "Write head and machine date". 15 Select the second TH if required.
16 Repeat steps 12 to 14. 17 Click on "Check position and function DP
axis".
18 Click on "Zero correction data".
18 WF 4 TX-Series V2 Maintenance Calibrate the maintained TH 13 min 4 / 9
CAUTION! Refer to safety instructions in user manual before commencing Maintenance
Machine Status ON Conveyor Empty
NOTICE! ESD guidelines are to be followed Tool:
T5
Wear Part: Consumables:
www.asm-smt.com
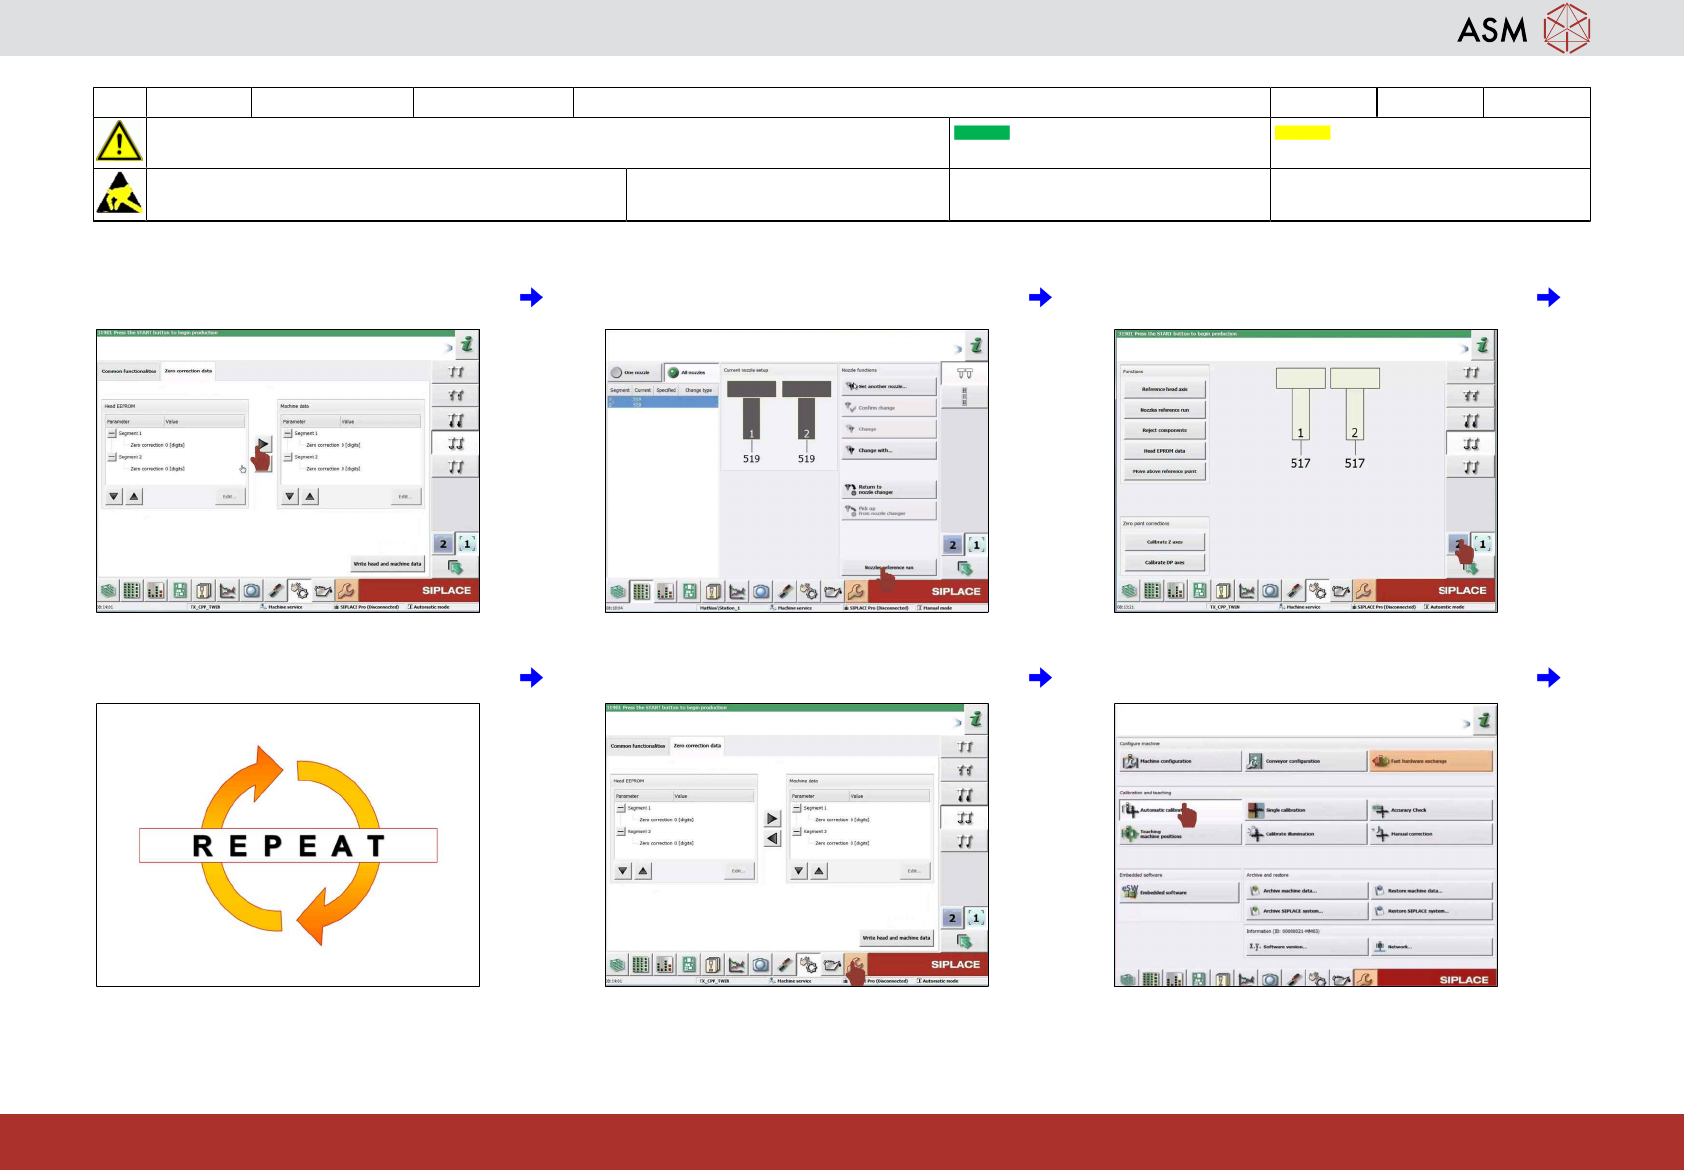
19 Click on the "arrow" to transfer the data to
the machine.
20 Click on "Write head and machine date". 21 Select the second TH if required.
22 Repeat steps 19 and 20. 23 Click on "Calibration". 24 Click on "Automatic calibration".