PPS Pro version 8.2 - 第135页
4022 591 98 247 User Manual 05.07 P PS-Pro v8.2 131 Guidelines for using PPS-Pro SCREEN 80 PCB Mount Opti ons settings I n t h e t a b , a s s h o w n i n screen 80, PCB M ount Options setting s : Camera alignment is set…
User Manual 4022 591 98247
130 PPS-Pro v8.2 05.07
Guidelines for using PPS-Pro
NOTE: To use manual optimization see 3.4.14 on page 132.
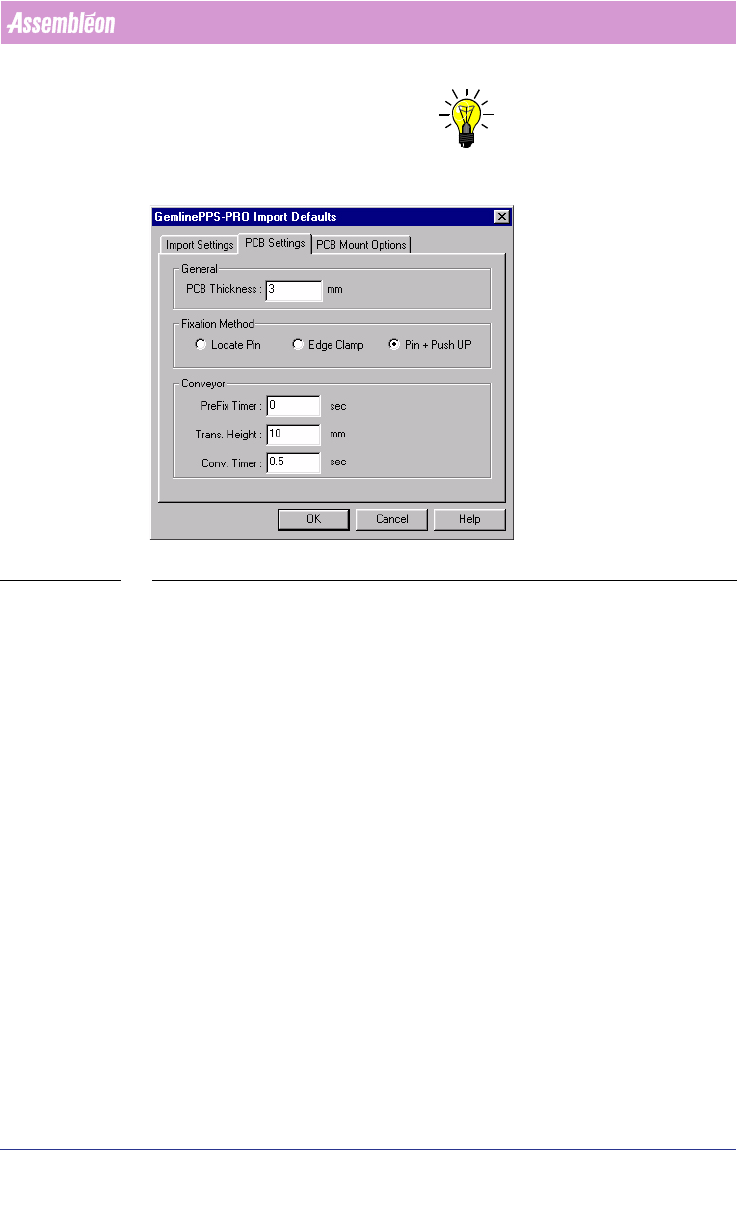
SCREEN 79 PCB settings
In screen 79, PCB settings the PCB Thickness has to be set. Default setting
for PCB thickness is 3.0 mm.
The Fixation Method of the PCB has to be set. Default fixation method is Pin
and Push-up.
The Conveyor parameters have to be set. Default settings; for PreFix Timer is
0 sec, for Trans. Height is 10 mm and for Conv. Timer is 0.5 sec.
4022 591 98247 User Manual
05.07 PPS-Pro v8.2 131
Guidelines for using PPS-Pro
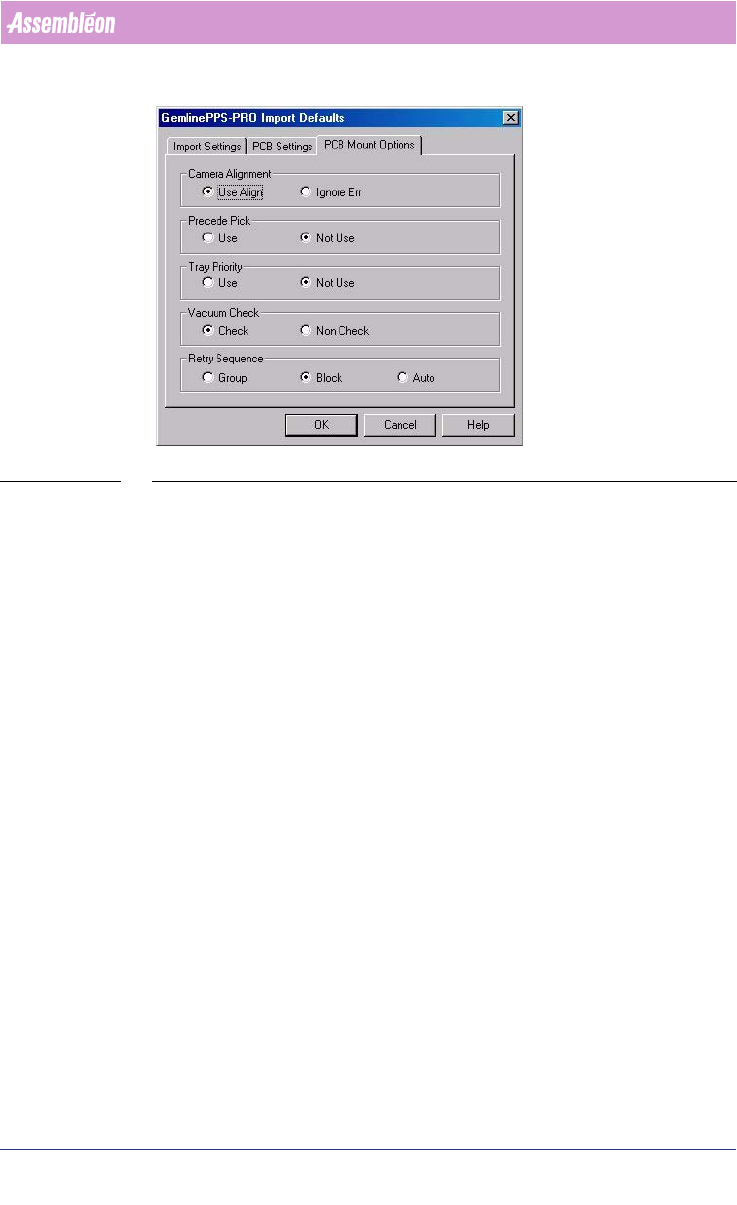
SCREEN 80 PCB Mount Options settings
In the tab, as shown in screen 80, PCB Mount Options settings: Camera
alignment is set. Default is set to Use Align.
Also Precede Pick is set in this tab, default set to Not Use.
The Vacuum check is set in the Mount Options, default set to Check.
Retry Sequence can be set to group, block or auto, default set to Block.
3.4.12 Optimization
PPS-Pro optimization for mixed lines with GemLine machines is a 3 step
process:
1. Import and verify the CAD data.
2. Distribute the components over the machines.
3. Run the GemLine program generator.
In chapter 3.4.13 "Import and verify the CAD data" and in chapter 2.23
"Verify the component data" a short introduction is given of importing and
programming data.
3.4.13 Import and verify the CAD data
■ If the CAD data is provided in FTIP format. convert the FTIP file with
Cad2cad to *.cad and *.pnl files and save the files in Gencad1.3 format.
■ Usage of the ALE file: the machine names have to be exactly the same in
GemLine PPS and in PPS-Pro. (case sensitive).
■ Define a new project in PPS-Pro, don’t use any spaces in the pathname.
■ Import the *.pnl file.
■ PPS-Pro creates the *.mdf file from the *.pnl file and the *.cad file.

User Manual 4022 591 98247
132 PPS-Pro v8.2 05.07
Guidelines for using PPS-Pro
3.4.14 Optimize Manually
Manual optimization is used when you want to make special arrangements
during optimization. The most common application is when multistick or tray
feeders are used. An other example is to use the static component set-up as a
pre-assignment, or you might want to use one of the many special optimi
-
zation settings offered by GemLine PPS (with automatic optimization
‘Move+Auto distribute’ is used).
When manual optimization is set (see SCREEN 78 on page 129), after starting
the cell optimization from PPS-Pro the selected PCB’s are imported into
GemLine PPS. Then the PCB Editor is started.
The PCBs in GemLine PPS are given standard names PRO70_PCB1, PRO70_PCB2
etc., (the reason for these special names is to prevent accidental deletion of
PCB’s with the same name). If you want to find out which PCB name this is in
PPS-Pro please check the ‘PCB Info’ ‘PCB Comment’ field.
3.4.14.1 Start manual optimization
Now manual optimization can be done, starting from the PPS-Pro interface.
Select the PCB and the PCB side to be optimized on the PPS-Pro select
products tab.
When you select one PCB side only, a single PCB optimization will be run.
After this section continue with chapter
3.4.14.2.
When you select more than one PCB side a combined product optimization
will be run. After this section continue with chapter
3.4.14.3.
■ Click Optimize cell.