PPS Pro version 8.2 - 第178页
User Manual 4022 591 98247 174 PPS-Pro v8.2 05.07 Guidelines for using PPS-Pro SCREEN 88 PPS V ersion (Note that th e vers ion o f the d elivered pr odu ct can differ from th e displayed version) 4. Make a cop y of th e …
4022 591 98247 User Manual
05.07 PPS-Pro v8.2 173
Guidelines for using PPS-Pro
■ Make notes of all steps which were taken before the problem occurred.
2. Describe what has already been investigated.
The checks of the ‘pre-gather-stage’ (see C.2 on page 171) can be used as a
reference for this description.
3. Used Version
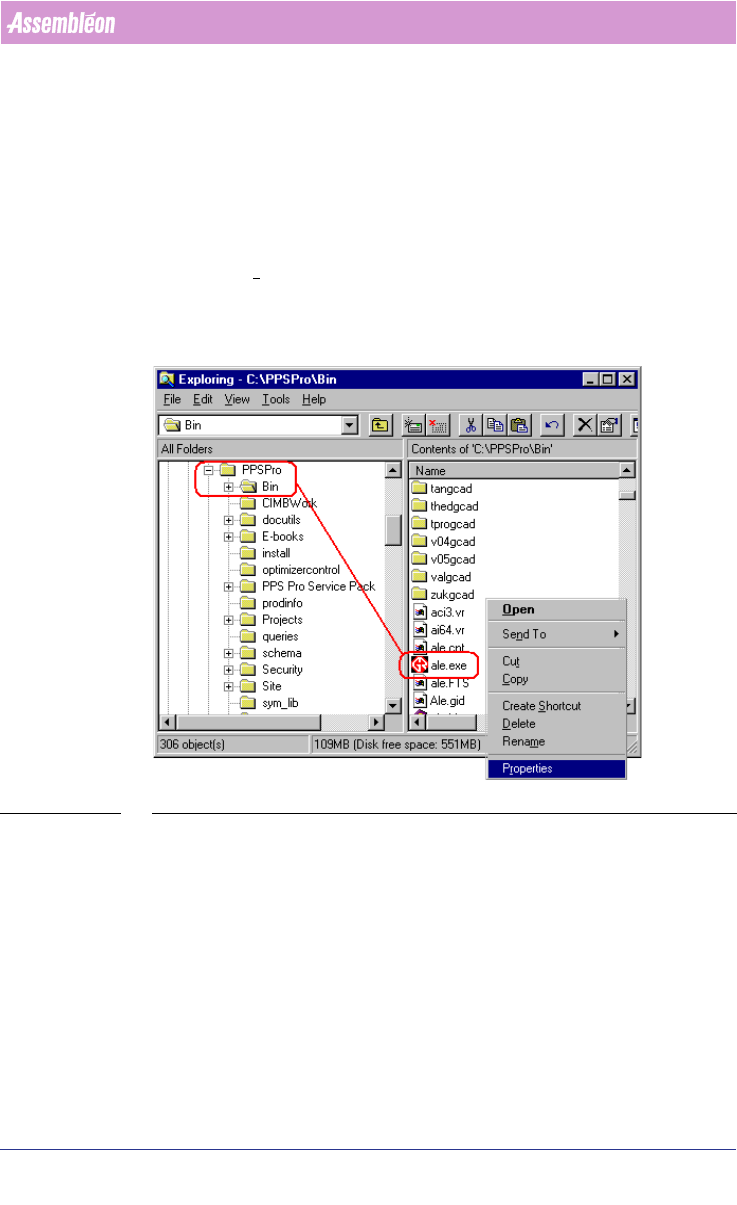
For the FCM/ACM optimizer the version of the installed build can be found by
right-click an ‘.exe’ file (for example ‘ale.exe’) of the PPSPro/Bin-directory and
choose the P
roperties menu item (see SCREEN 87 on page 173). Select the
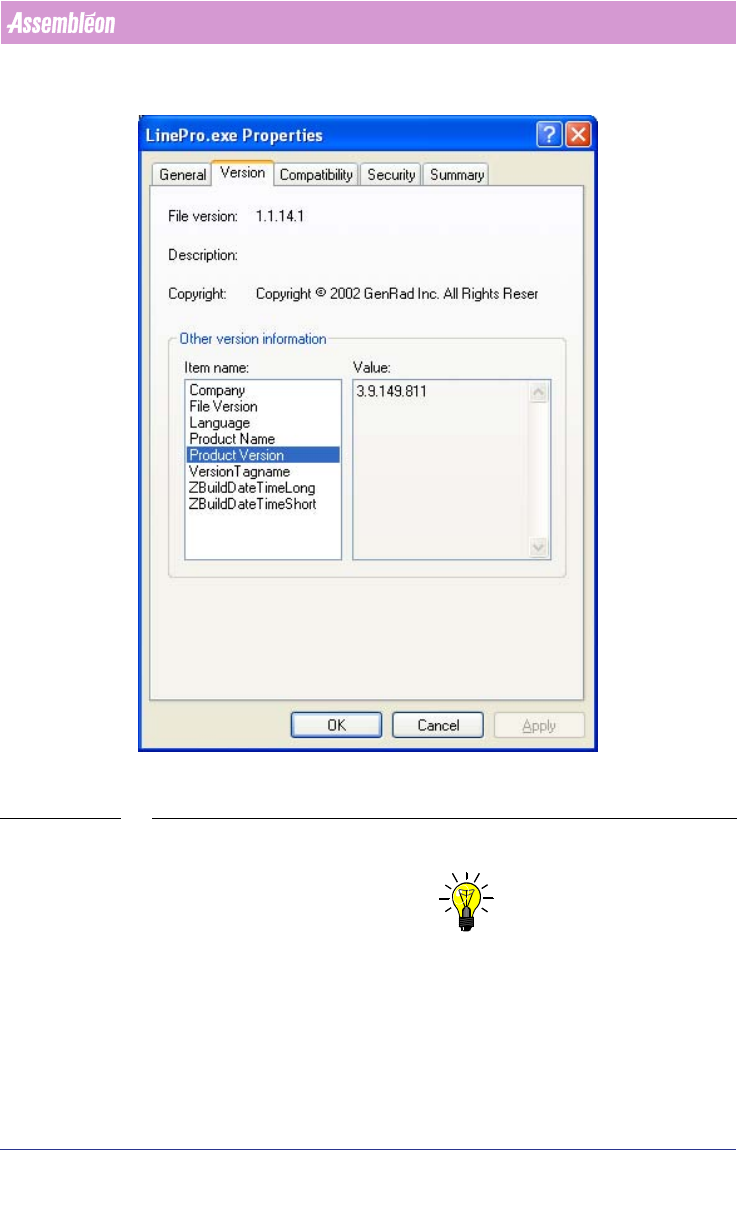
Version tab and select Build version from the Item Name list. The version can
be read from the Value list
(see SCREEN 88 on page 174).
Action: Write down the Build version.
SCREEN 87 PPS Software Version
Some tips w.r.t. this subject:
With the FCM/ACM optimizer add the optimizer version information, in a
default installation these can be found in the properties of the following file:
C:\Assembleon\PPSPro\Bin\Philips\opt_calc.exe
To find the version of the A-Series optimizer, check the first line of any PP
made by the same optimizer.
Always mention this information when communicating with Assembléon
about a your project.
User Manual 4022 591 98247
174 PPS-Pro v8.2 05.07
Guidelines for using PPS-Pro
SCREEN 88 PPS Version (Note that the version of the delivered product can differ from the
displayed version)
4. Make a copy of the total Project.
NOTE: Maintain directory structure in the zip-file.
To reproduce the project, it is very important that at least a copy of the whole
project is made. Go to the directory of the project and make a zip-file of the
whole project.
Action: Make a copy of this directory.
5. PSI-file.
4022 591 98247 User Manual
05.07 PPS-Pro v8.2 175
Guidelines for using PPS-Pro
In the main menu select File > Preferences... and choose the Part Data tab.
Here you will find the path to the used PSI-file.
Action: Make a copy of this file.
6. ALE-file.
In the main menu select File > Preferences and choose the Factory Data tab.
Here you will find the path to the used ALE-file.
Action: Make a copy of this file.
7. Type of line optimzer.
In the main menu select File > Preferences and select the Optimizer tab.
Action: Write down the used line optimizer.
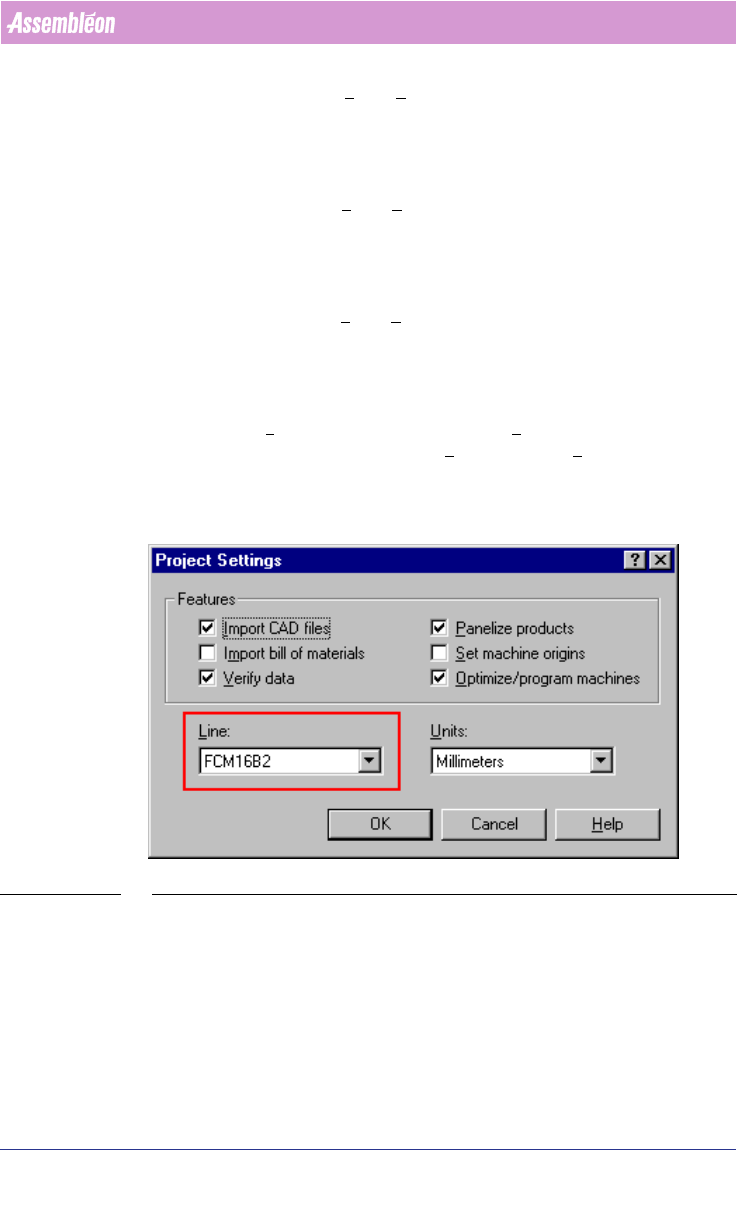
8. Name of the used line.
More than one line can be defined in the ALE file. All defined lines are repre-
sented in the Line dropdown list of Project Settings... (see SCREEN 89 on
page 175). In the main menu select File > Project Settings... to get this
screen.
Action: Write down the name of the used line for the optimization.
SCREEN 89 Line Used
9. Name and side of the used pcb.
More than one pcb can be imported into your project. All imported pcbs are
represented in the Select Products tab
(see SCREEN 90 on page 176). The pcb’s
which must be optimized is (are) checked in the Program column. In the Side
column the side which must be optimized is specified. Possible choices are
‘Top’, ‘Bottom’ and ‘Both’.