PPS Pro version 8.2 - 第31页
4022 591 98 247 User Manual 05.07 PPS-Pro v8.2 27 PPS-Pro GUI SCREEN 19 Import BOM 10. Pr ess the Close button to cl ose the ‘BO M-F ormats Expl orer’ . 11. Pr ess the OK button o f the Import GenCAD Setting s dialog 12.…

User Manual 4022 591 98247
26 PPS-Pro v8.2 05.07
PPS-Pro GUI
2.8.0.1 Import cad file with Smart CAD
NOTE: If a CAD file is imported with Smart CAD it is possible to select Top side or
Bottom side. However no Step-and-repeat symbols will be generated on the
bottom side. These have to be added manually with the Graphical/MDF editor
see 2.13 "Graphical/MDF editor" on page 40.
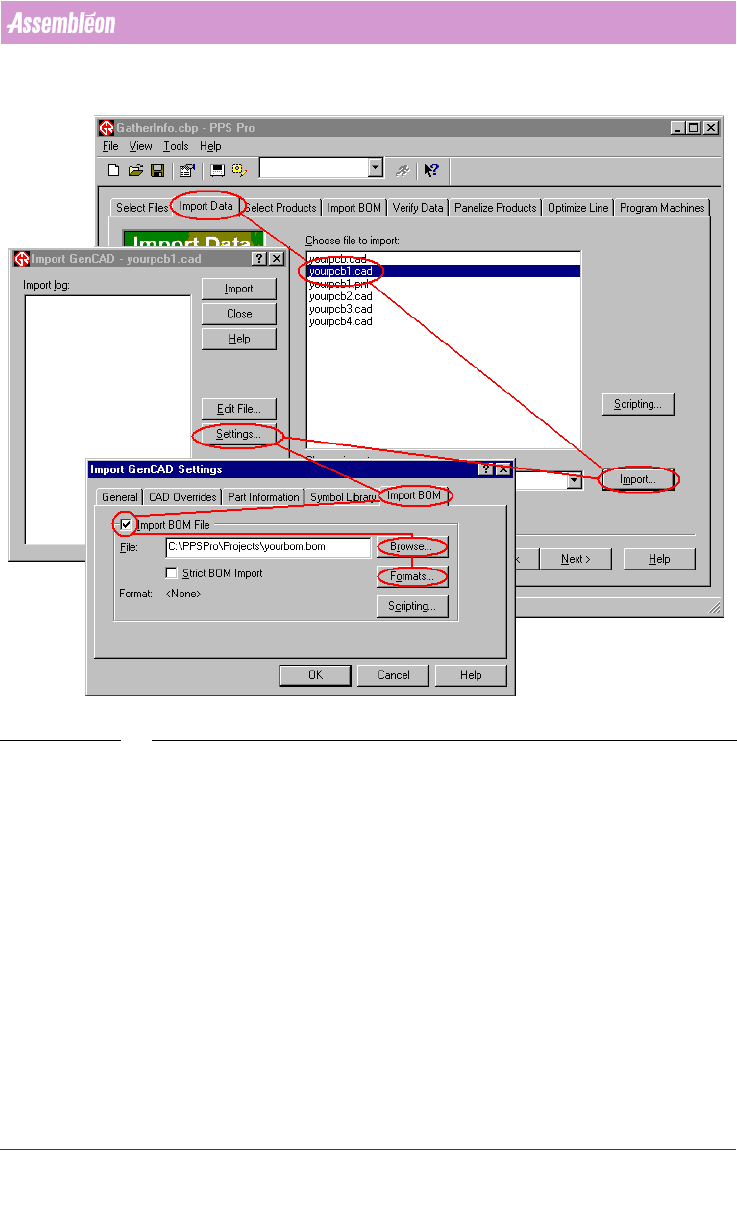
2.8.1 Import BOM-file via the Import Data tab
To import a BOM-file via the Import Data tab, the next steps must be taken:
1. Select the Import Data tab
2. Select a CAD file from the Choose file to import list
3. Press the Import button
4. Press the Settings... button
5. Select the Import BOM tab
6. Tick off the Import BOM File check box
7. Tick off the Strict BOM Import check box (only necessary for strict import
(see 2.11 on page 30))
8. Press the Browse... button and browse to the BOM-file
9. Press the Formats... button to startup the ‘BOM-Formats Explorer’ and
select the correct format from the list. If no correct format is available, a
new format must be made
(see 2.12.1 on page 32).
4022 591 98247 User Manual
05.07 PPS-Pro v8.2 27
PPS-Pro GUI
SCREEN 19 Import BOM
10. Press the Close button to close the ‘BOM-Formats Explorer’.
11. Press the OK button of the Import GenCAD Settings dialog
12. Press the Import button of the Import GenCAD dialog
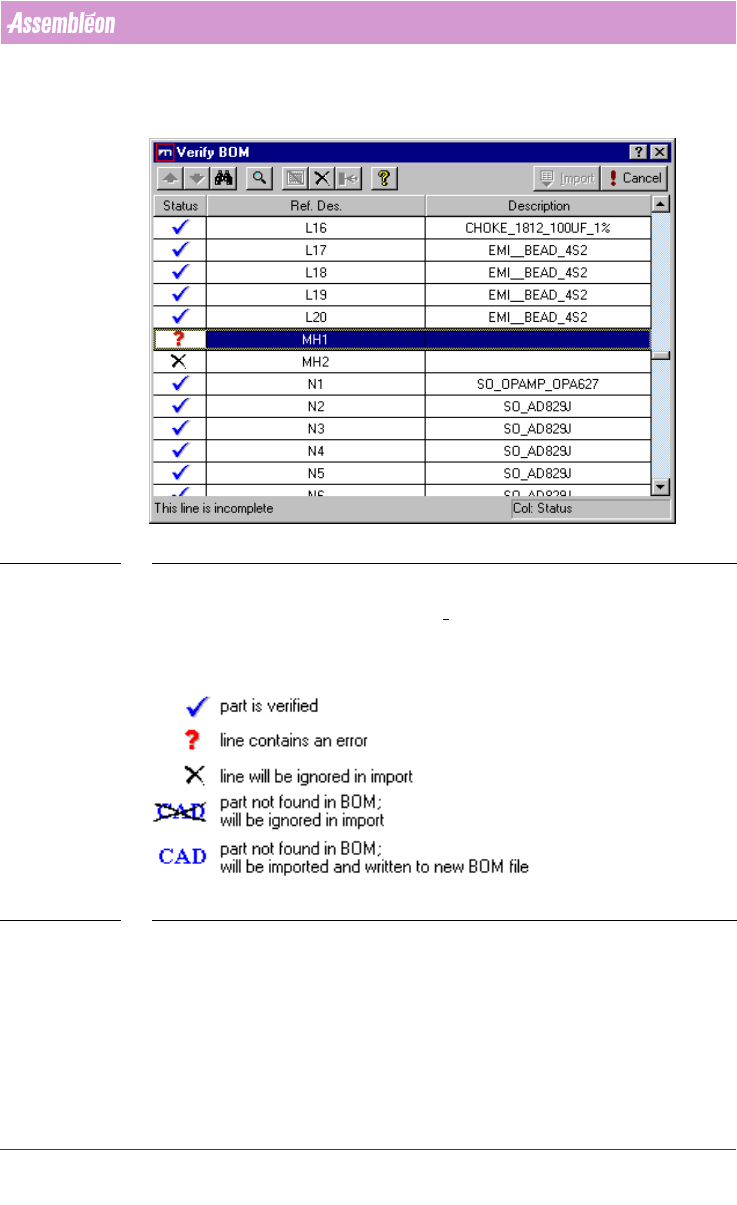
13. Verify the BOM-file in the Verify BOM window
The Verify BOM dialog (see SCREEN 20 on page 28) box checks to see if each
line in your BOM-file is valid. Errors typically occur if discrepancies exist
User Manual 4022 591 98247
28 PPS-Pro v8.2 05.07
PPS-Pro GUI
between your BOM-file and the product, or between the BOM-file and the
selected BOM-format. To complete the BOM import, all parts must be verified.
SCREEN 20 Verify BOM file
When all the parts are imported with the status “Part is verified” (see SCREEN
21 on page 28) -Blue tick, then the Import tab is activated and ready for
importing.
SCREEN 21 Verify Status legend
Press the Import button in the Verify BOM window
2.9 Cad override
With CAD override files it is possible to obtain automatic changes during the
CAD import process. The following cad overrides can be convenient: