4OM-1610-002_w.pdf - 第102页
4OM-1610 1-51 4. Maintenance Method : Chap.1 4.2 Nozzle Filter Change 4.2.1 Nozzle Filter Removal Procedure Push out the nozzle lter using the lter removal jig as shown in the following gure. Filter Removing Jig Vacuu…
4OM-1610
1-50
4. Maintenance Method : Chap.1
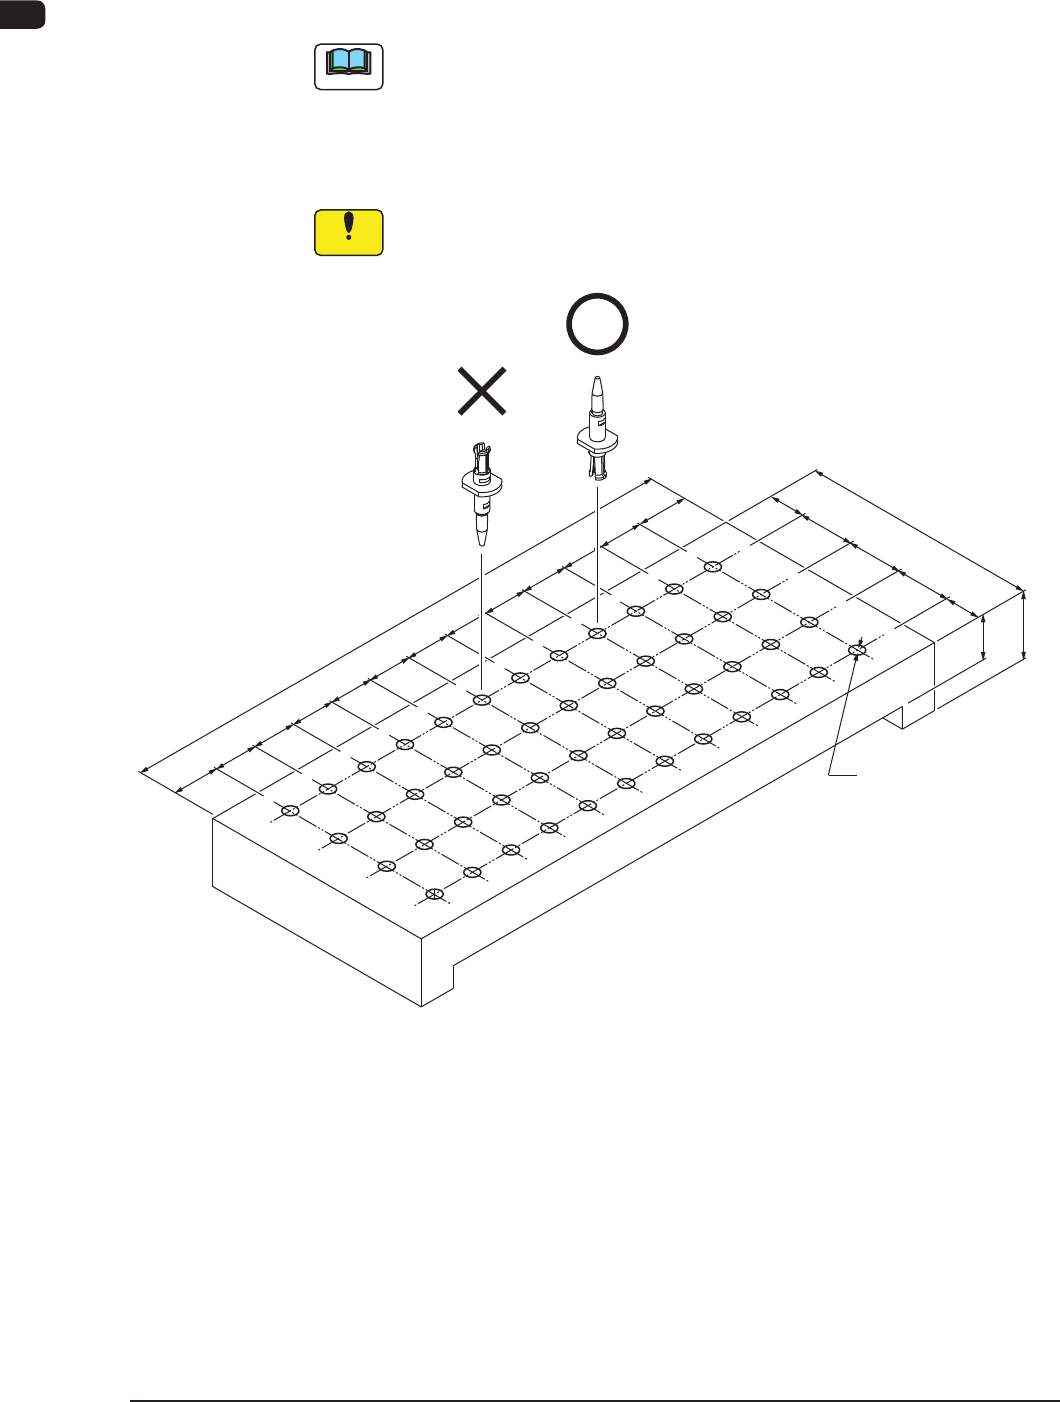
Ultrasonic Cleaning Method
•
Set the nozzle onto the nozzle cleaning jig as shown in the following gure and
dip it in the ultrasonic cleaner lled with water, together with the jig.
Then, clean it for about 15 minutes.
Note
The nozzle cleaning jig must be prepared on the customer side.
•
After washing with the ultrasonic cleaner, blow air to the nozzles.
When the nozzles are not dry enough, wipe them with a rag.
Notice
When a nozzle is set in the jig, pay attention to the orientation of the
nozzle.
F3.5 (THRU)
(159)
12
12
12
12
12
12
12
12
12
12
12
13.5
15
10
15
15
(65)
10
15
13.5
10
Material: Duracon (POM)
Nozzle Cleaning Jig (Example) F4A39-2
1011-001
4OM-1610
1-51
4. Maintenance Method : Chap.1
4.2 Nozzle Filter Change
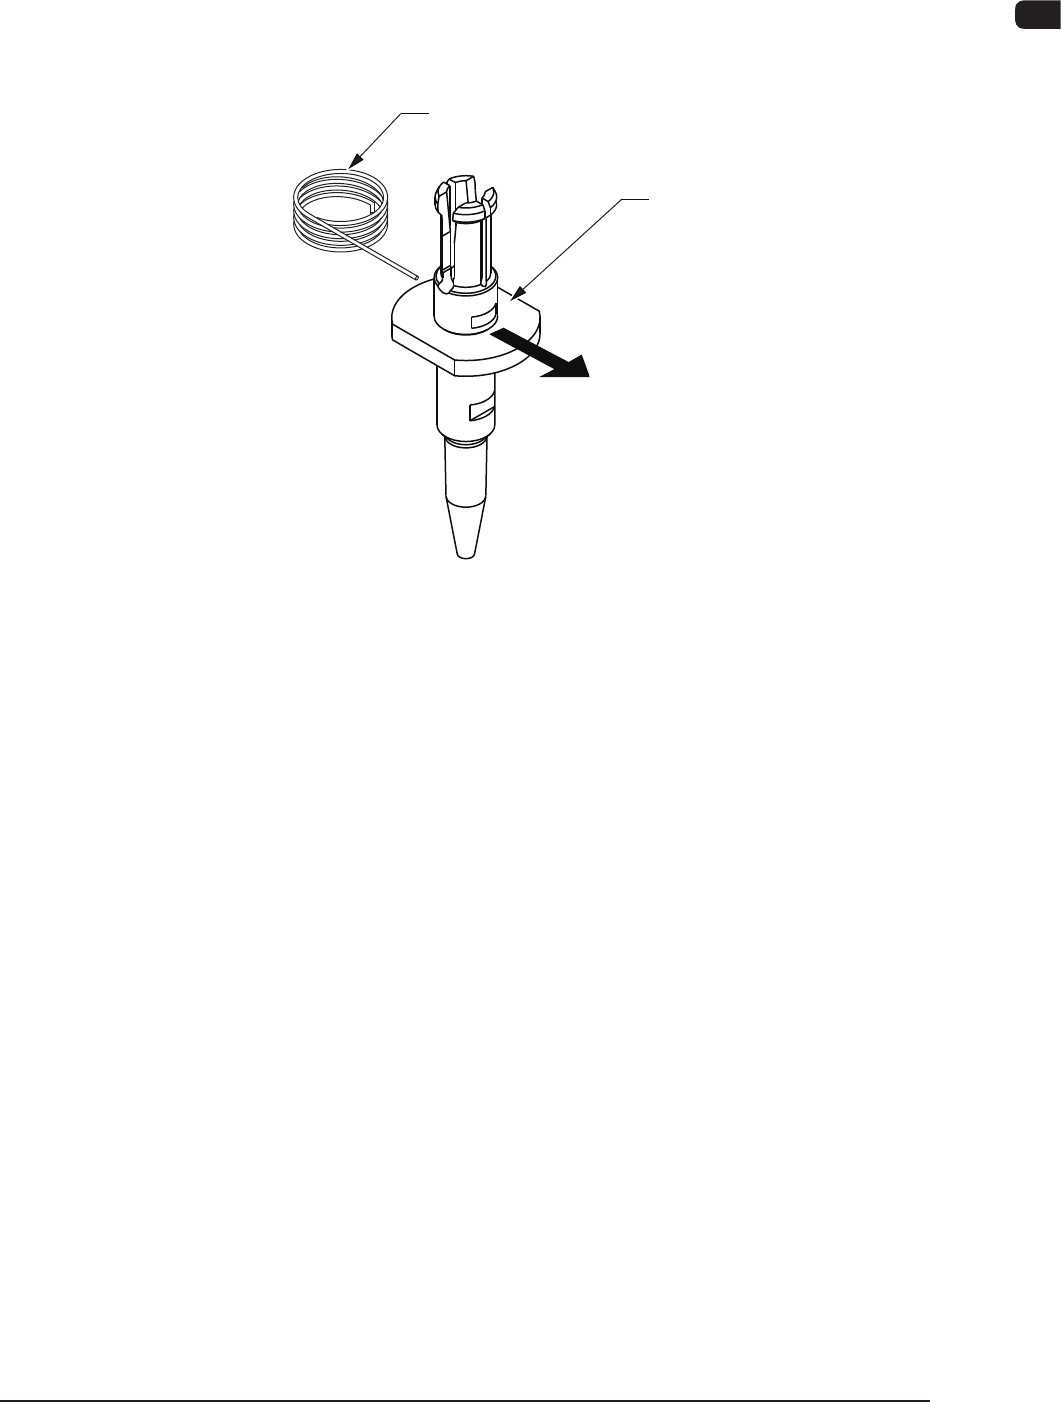
4.2.1 Nozzle Filter Removal Procedure
Push out the nozzle lter using the lter removal jig as shown in the following
gure.
Filter Removing Jig
Vacuum Nozzle
Push
Pushing out the nozzle filter.
F4A39-3
1011-001
4OM-1610
1-52
4. Maintenance Method : Chap.1
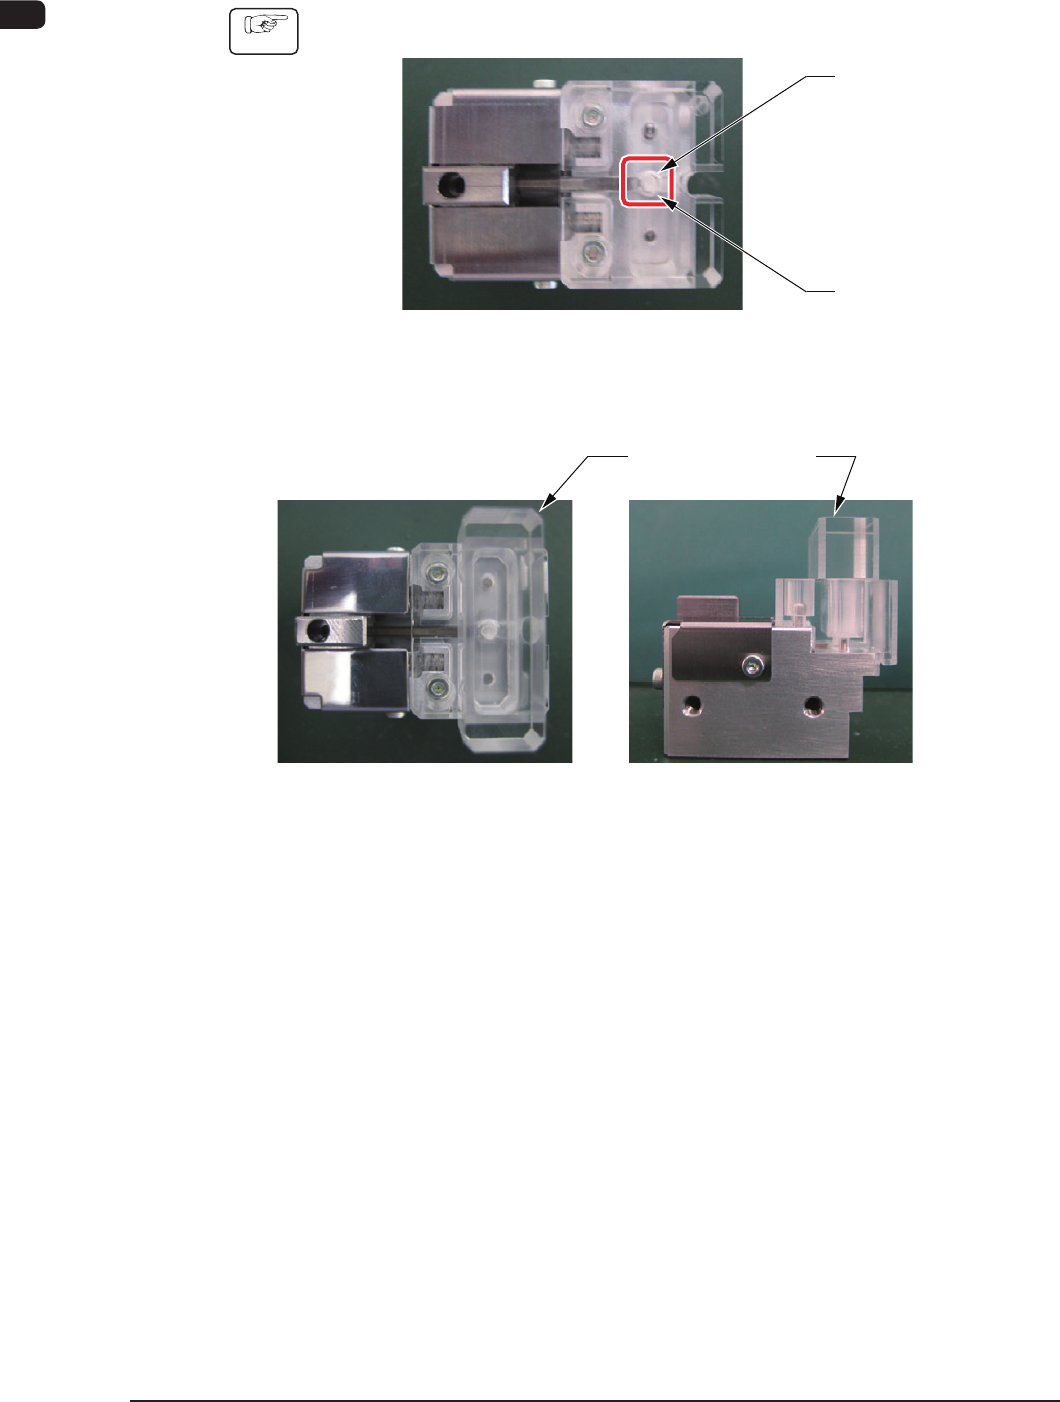
4.2.2 Nozzle Filter Insertion Procedure
•
For High-Speed Nozzle
Procedure
(1) Set the nozzle lter in the hole section.
Hole Section
Nozzle Filter
F4A39-4
(2) Insert the lter holding block into the opening section of the lter set.
Filter Holding Block
F4A39-5
1011-001