00197465-01_SM_CP20-A-M_EN.pdf - 第21页
3 Service Work Conveyor 3.3 Replacing the DP Drive [03058627-xx] Service Manual SIPLACE C&P20, C&P20A, C&P20M 21 3.3 3 . 3 R e p la c in g t h e D P D r iv e [ 0 3 0 5 8 6 2 7 - x x ] Replacing the DP D rive …
3 Service Work Conveyor
3.2 Replacing the Component Camera
20 Service Manual SIPLACE C&P20, C&P20A, C&P20M
Preparation
► Remove the head from the machine. For removal and installation details of the placement head, read
the service manual for your machine.
Removal
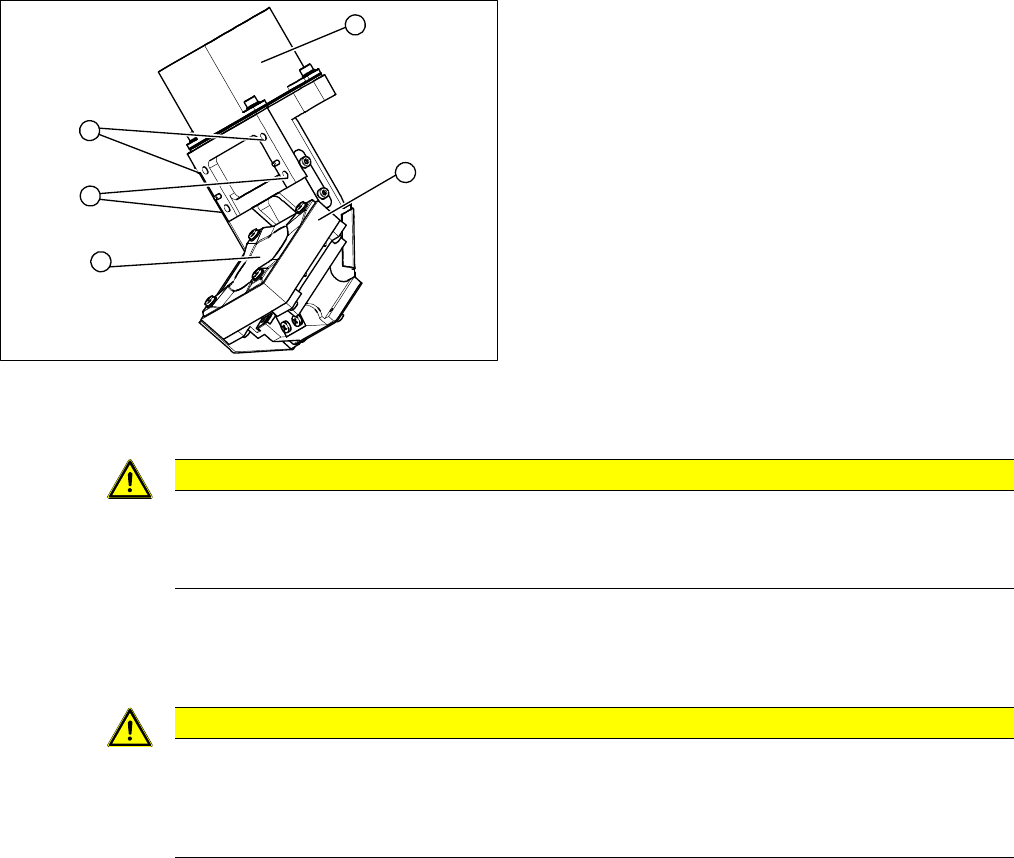
► Remove the cable holder for the component camera cable.
► Loosen the 4 screws fastening the component camera.
► Carefully remove the component camera from the locating pins.
Installation
► Install the new component camera. Make sure that you do not damage or contaminate the camera
lens system.
► Plug in the connection cable and fix it with cable ties, where necessary.
► Follow the removal instructions in reverse order for further installation. Also observe the following
instructions:
1. Component Camera
2. Camera amplifier CCD
3. 4 x fastening screws on the head housing
4. Camera lens system
3
1
4
3
2
CAUTION
Torque 1.3 Nm
Use a torque screwdriver for the fastening screws.
► Tighten the fastening screws to a torque of 1.3 Nm.
CAUTION
Installation instructions
► Calibrate the placement head. This can be done using the FHE function.
If the calibration data are stored in the camera, a brief calibration is sufficient. Otherwise,
you will have to perform a standard calibration.
3 Service Work Conveyor
3.3 Replacing the DP Drive [03058627-xx]
Service Manual SIPLACE C&P20, C&P20A, C&P20M 21
3.3
3.3 Replacing the DP Drive [03058627-xx]
Replacing the DP Drive [03058627-xx]
Parts, equipment and tools
▪ DP drive [03058627-xx] for the C&P20A
▪ Torque screwdriver Torque Vario 10-60 Ncm [00386132-xx]
▪ Dead indexing plate [03013091-xx]
▪ Tools for removing the head, if needed (see also the service manual for your machine)
Overview
Preparation
► Remove the head from the machine. For removal and installation details of the placement head, read
the service manual for your machine.
Removal
► Loosen the screw fastening the silencer and and remove the silencer.
► Loosen the three screws fastening the holding circuit.
CAUTION
Different DP drives used for CP20/CP20A!
Never use the C&P20 DP drive on the C&P20A!
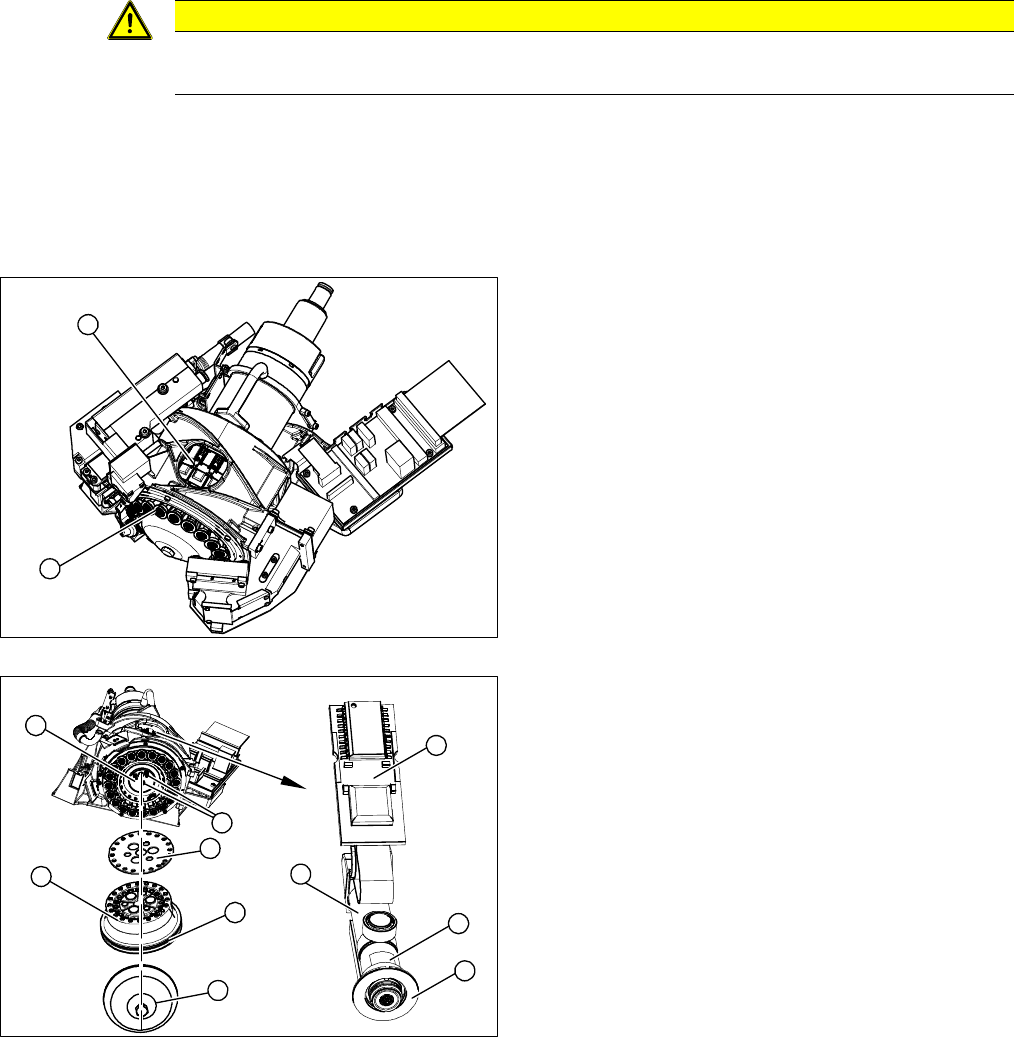
1. DP drives via the service aperture
2. Sleeves 1-20
1. Silencer
2. Hold circuit
3. O-ring
4. Seal disk
5. 3 x fastening screws on the holding circuit
6. Sleeve
7. Dead indexing plate [03013091-xx]
8. Board
9. Complete DP drive
1
2
5
6
9
8
7
1
5
4
3
2
3 Service Work Conveyor
3.3 Replacing the DP Drive [03058627-xx]
22 Service Manual SIPLACE C&P20, C&P20A, C&P20M
► Carefully lever the holding circuit off the locating pins. Make sure that the O-ring is not damaged.
► Pull the nozzle off the segment.
► Carefully remove the dead indexing plate from the segment.
⇨ During assembly, the old dead indexing plate is replaced with a new one.
► Disconnect the hose attached to the "vacuum supply connection" from the DP drive.
► Remove the DP drive through the service aperture.
Pay attention to the red foam ring (Sylomerring) in the star carrier. During assembly, make sure that
the edge of the end stop does not get jammed with this foam ring or be pushed onto it.
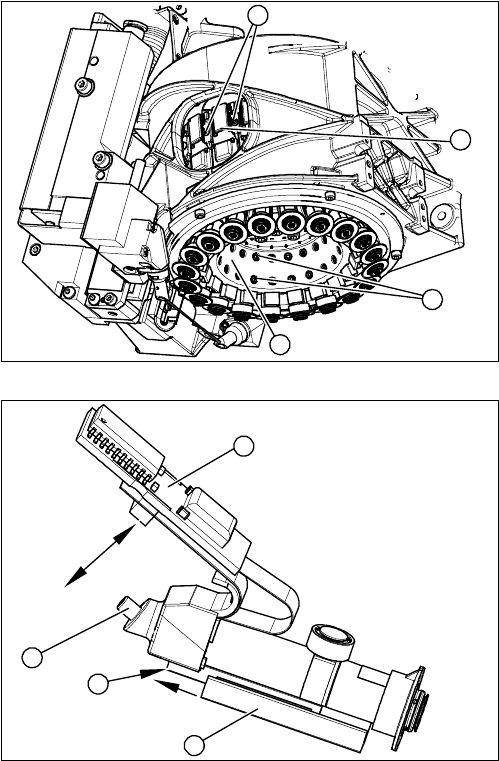
► Through the service aperture, loosen the fixtures (1)
on the left and right of the relevant DP drive board (2).
► Carefully pull the board (2) off the connector.
► Loosen the two screws (3) fastening the relevant DP
drive to the inside of the star carrier (4).
⇨ Take care not to lose the screws.
1. Board
2. Vacuum supply connection
3. Linear guide (2 x fastening screws)
4. End stop edge
4
1
3
2
1
4
3
2