4OM-1003-007.pdf - 第116页
1.4.4 Detachment and Attachment of V acuum Nozzle Before detaching or attaching a vacuum nozzle, be sure to spread a rag under the working area. Otherwise, a fallen vacuum nozzle will easily be lost if any . (1) Detachme…
0409-001 1-50-1 AIL01ETRP
1.4 Maintenance Method
Note
Bolt (4-M3×20)
φ3.2
15 15 15 15 15
20
3
75
15 15 15 15 15
75
Material: A5052
5
5
5
5
5
5
5
5
Unit: mm
Bolt (4-M3×20)
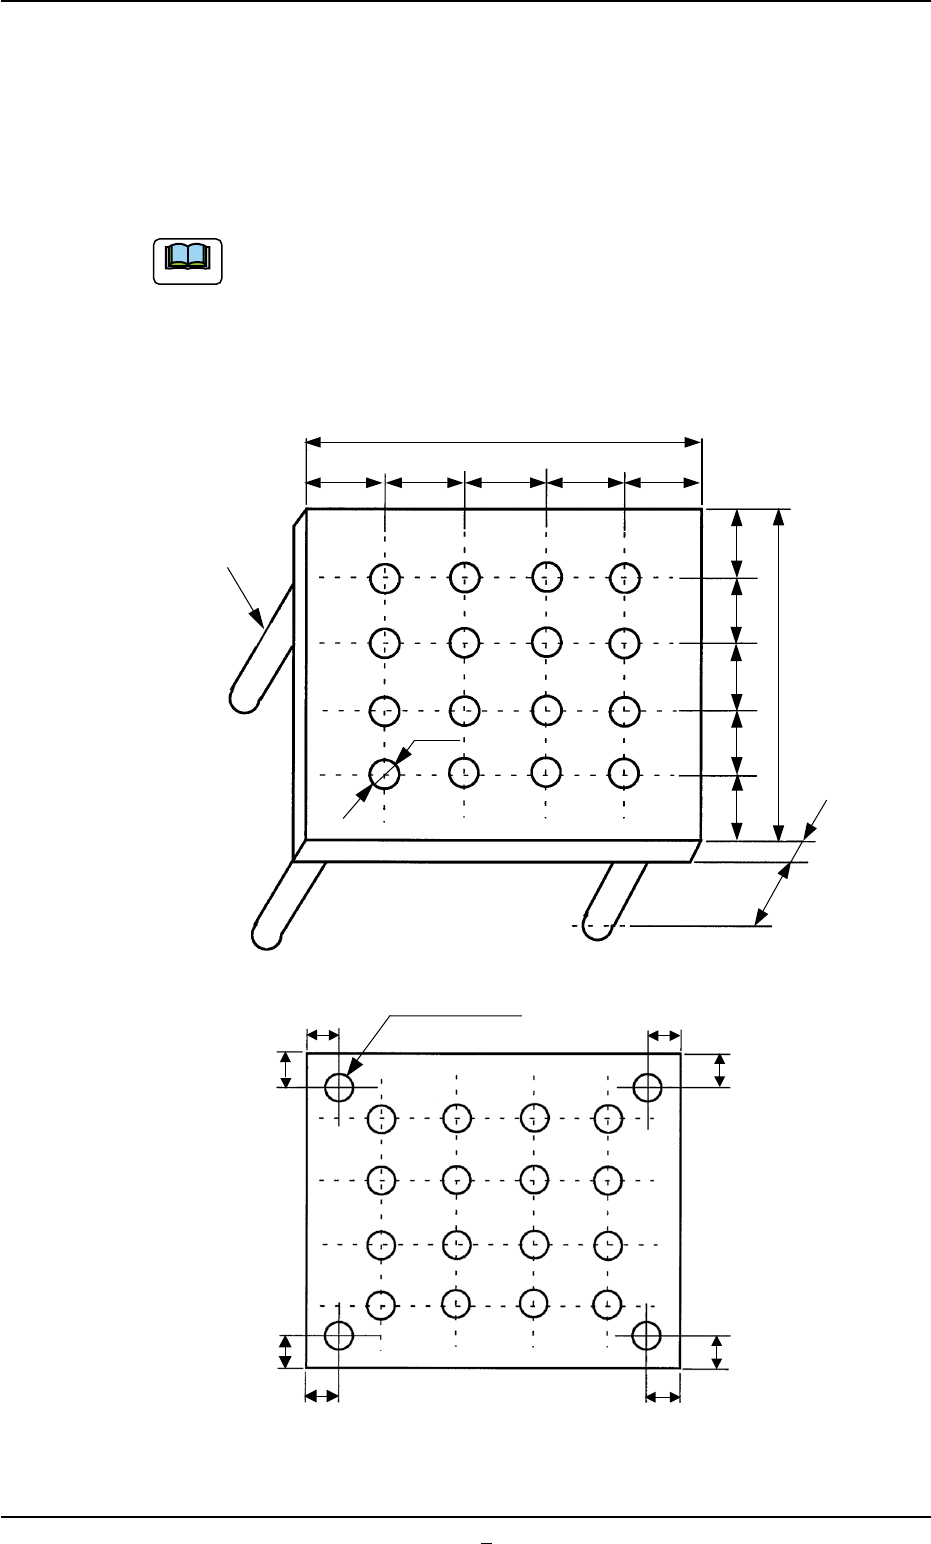
Ultrasonic Cleaning Method
• Set the nozzles in a nozzle cleaning jig as one shown in the figure
below and dip the jig low in the ultrasonic cleaner filled with water.
Keep it in the jig for approximately 15 minutes for the cleaning.
The nozzle cleaning jig must be prepared on the customer
side.
• After washing with the ultrasonic cleaner, blow air to the nozzles.
When the nozzles are not dry enough, wipe them with a rag.
(Whole View)
(Bottom View)
Fig. 4A63-1 Nozzle Cleaning Jig(Example)
1.4.4 Detachment and Attachment of Vacuum Nozzle
Before detaching or attaching a vacuum nozzle, be sure to spread a
rag under the working area.
Otherwise, a fallen vacuum nozzle will easily be lost if any.
(1) Detachment of Vacuum Nozzle
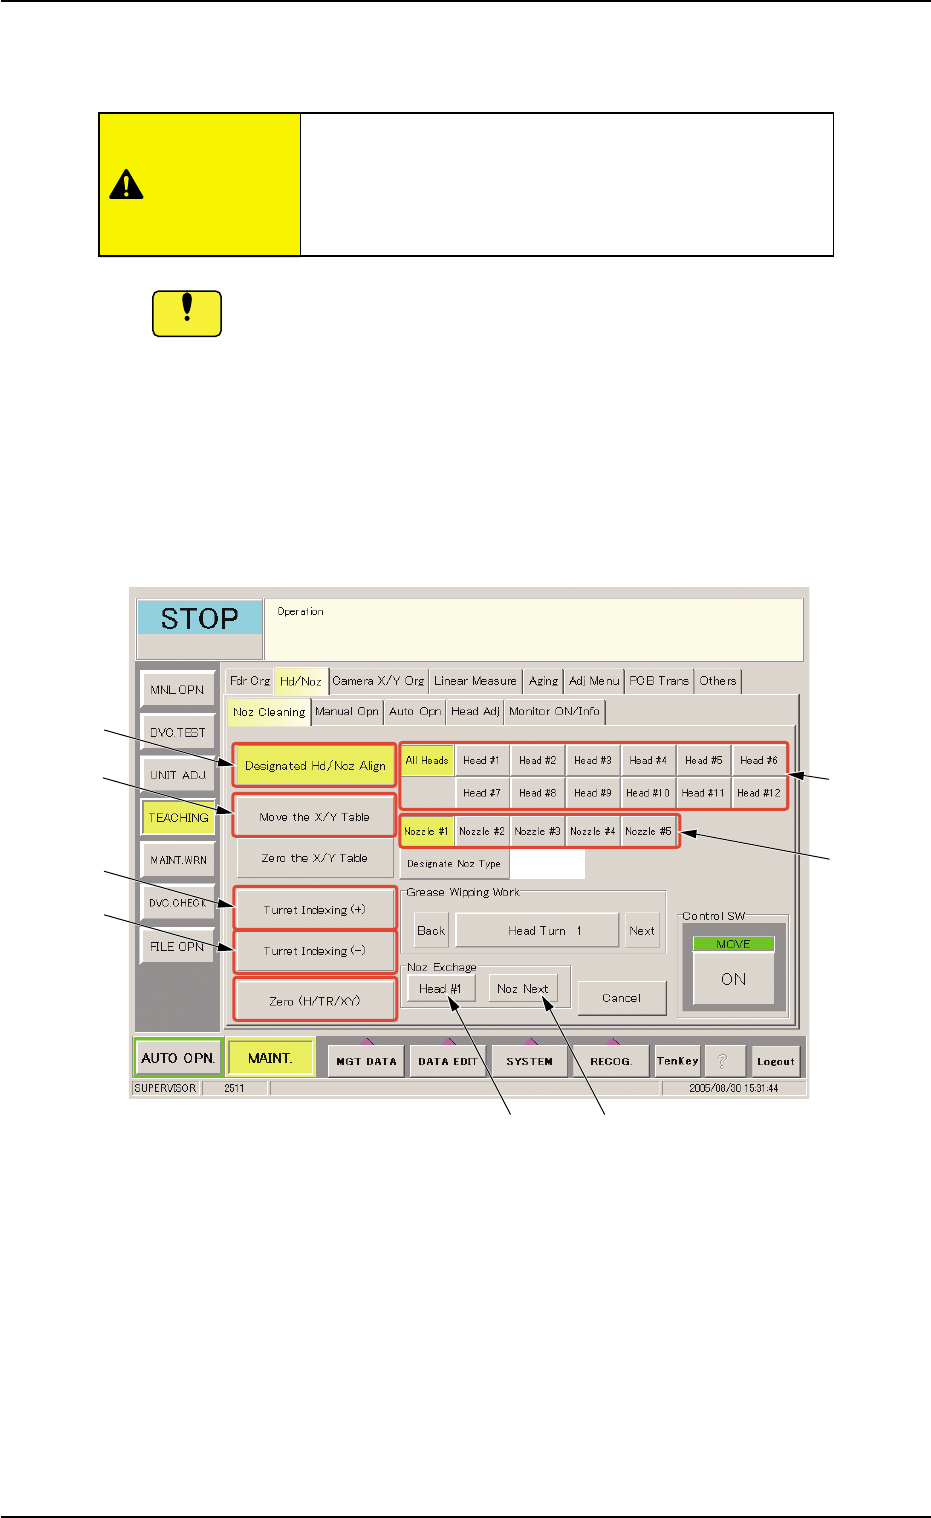
(1-1) Open the "Noz Cleaning" tab sheet. (Operation Sequence:
"UNIT ADJ." Window (Submenu) Æ "Hd/Noz" Tab Æ "Noz
Cleaning" Tab Sheet)
Fig. 4A64 "Noz Cleaning" Tab Sheet
(1-2) Select the [Move the X/Y Table] button (*4) and press the
[ON] button (entitled "MOVE"). In 2 seconds, press the
[ENABLE] button on the operation panel.
The X/Y table moves from the cleaning position to the es-
cape position.
(1-3) Select the [All Heads] button (*1) and specify the [Nozzle #]
button (*2) to be detached.
The vacuum nozzles must be detached or attached
with the operation power being turned "ON".
It is dangerous. Be sure to detach or attach a
vacuum nozzle alone.
0511-003 1-51
AIL01ETRP
1.4 Maintenance Method
CAUTION
Notice
*3
*4
*5
*6
*1
*2
*7
*8
(1-4) Select the [Designated Hd/Noz Align] button (*3) and press
the [ON] button (entitled "MOVE"). In 2 seconds, press the
[ENABLE] button on the operation panel.
The nozzle is shifted to the position (the front side of the
machine) where it can easily be detached.
To detach a nozzle on the desired head, press the
corresponding [Head #] button.
(1-5) Set the [OPERATION] switch to the "SETUP" side.
Confirm that the "LOCK" lamp on the front operation panel is
"ON"
(1-6) Open the front door.
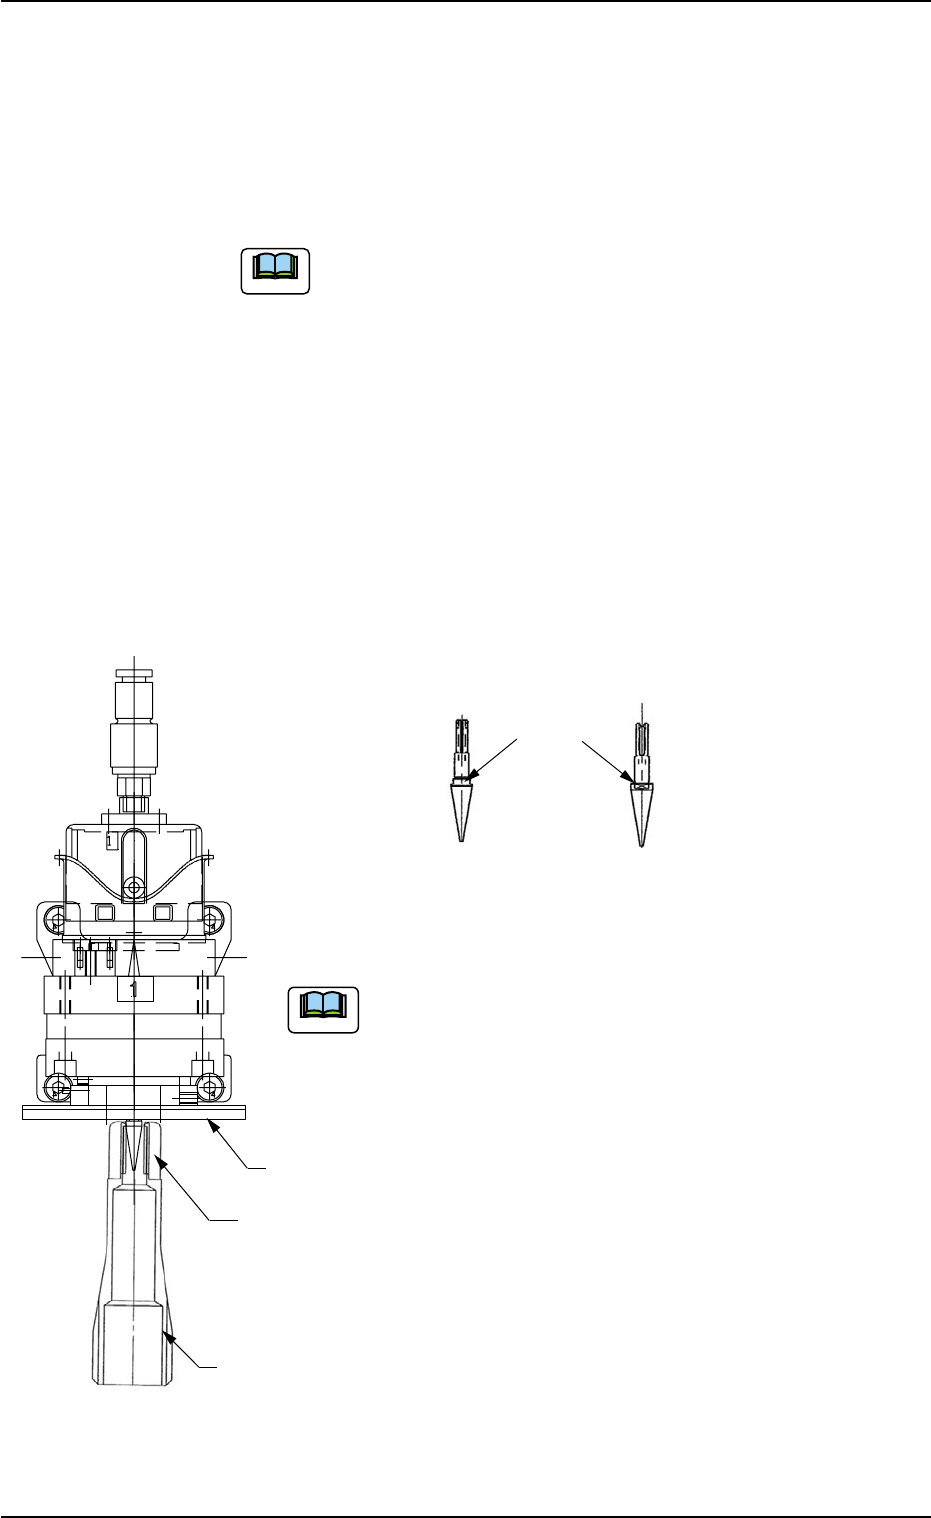
(1-7) Push the bottom of the nozzle removal jig gently and set it on the vacuum
nozzle such that the hook is engaged correctly with the two-plane cham-
fered side of the vacuum nozzle.
(a) While detaching the vacuum nozzle, be careful not
to nick the diffusion plate.
If the nozzle is detached while the nozzle removal jig
is rotating, the diffusion plate may be nicked.
(b) The nozzle removal jig cannot be used for nozzle
type 031 (φ6 nozzle). Detach the nozzle by hand.
1.4 Maintenance Method
0511-002 1-52 AIL01ETRP
Note
Note
Diffusion
Plate
Hook
Nozzle Removal
Jig
Two-Plane
Chamfered Side
(Side View)
(Front View)
Vacuum Nozzle
Fig. 4A65
Fig. 4A65-1