SM411F_Service Manual.pdf - 第142页
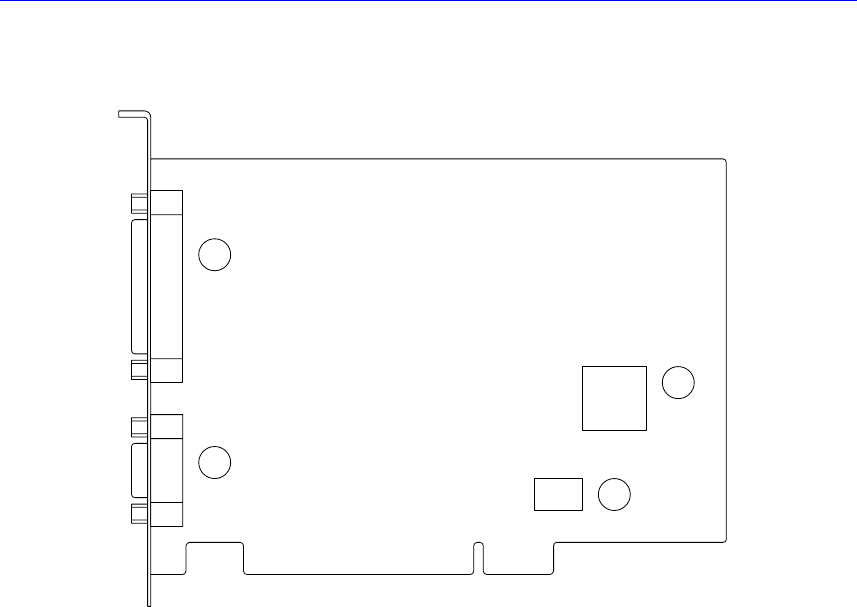
Softwar e 2.2.2. Nexteye Image Graber (SAMC62) Installation 2.2.2.1. Hardware installation 1 2 3 4 ○ 1 Fem ale D-sub connector with 3 lines and 44 pins ○ 2 Male D-sub connector with 3 lines and 15 pins ○ 3 EEPROM for cam…
Software
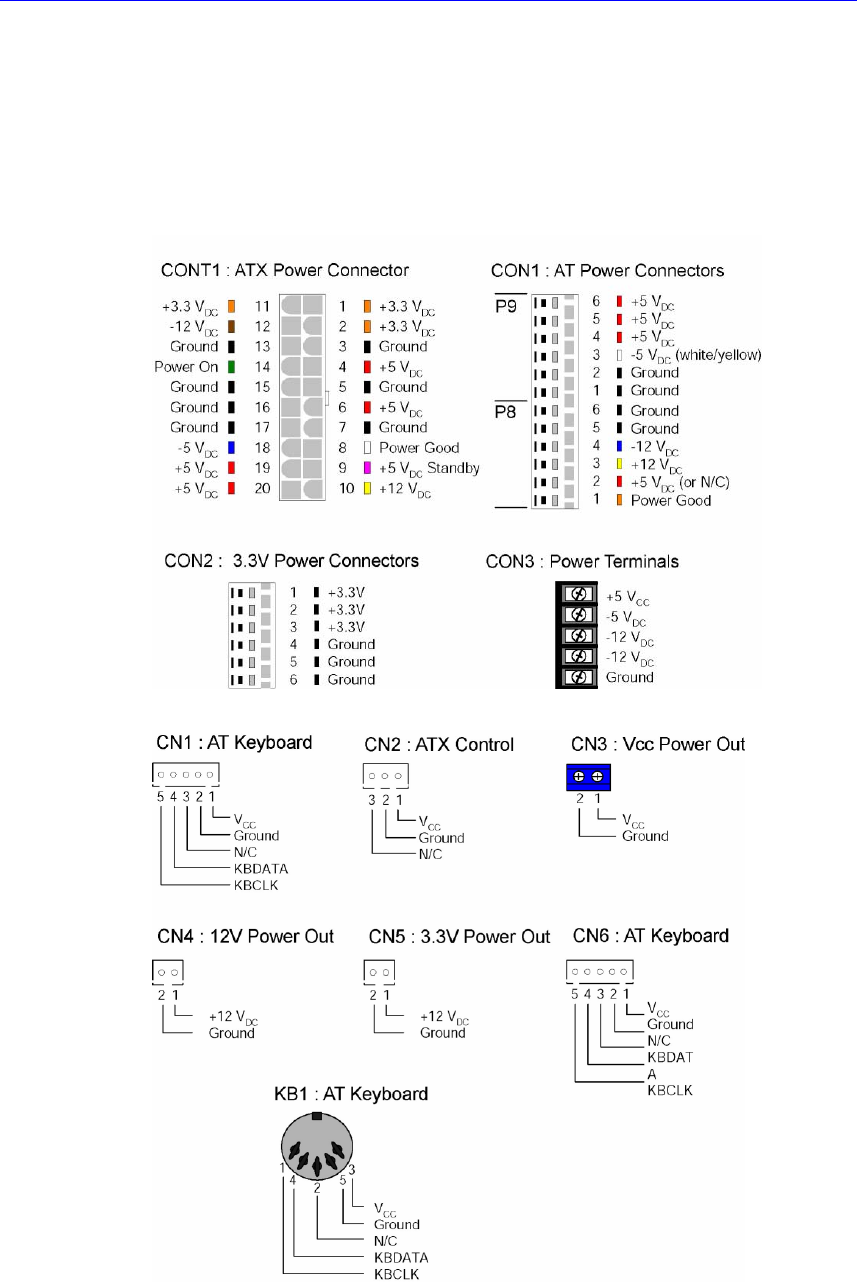
8-slot PC/AT passive backplane with 2×ISA. 4×PCI AND 3×PICMG
4-layer PCB with ground/power plans
High quality Molex connectors
LED power indicators : +5V, -5V, +12V, -12V and +3.3V
20 pin ATX connector, standard AT connector, 5-pin terminal block
Size : 264.2 × 221.6 mm
Software
2.2.2. Nexteye Image Graber (SAMC62) Installation
2.2.2.1. Hardware installation
1
2
3
4
○1 Female D-sub connector with 3 lines and 44 pins
○2 Male D-sub connector with 3 lines and 15 pins
○3 EEPROM for camera control logic
○4 EEPROM for board initialization
Install the SAMC62 in the designated slot of the PBPI-6SA Backplane.
Take the board out from the protection envelope.
At this time, hold the edge of the board away from the gold plated
connector so that it may not be affected by static electricity.
Install the board in the empty PCI slot of the PC.
Tighten the screws to secure the board on the computer.
Connect the prepared camera cable and board.
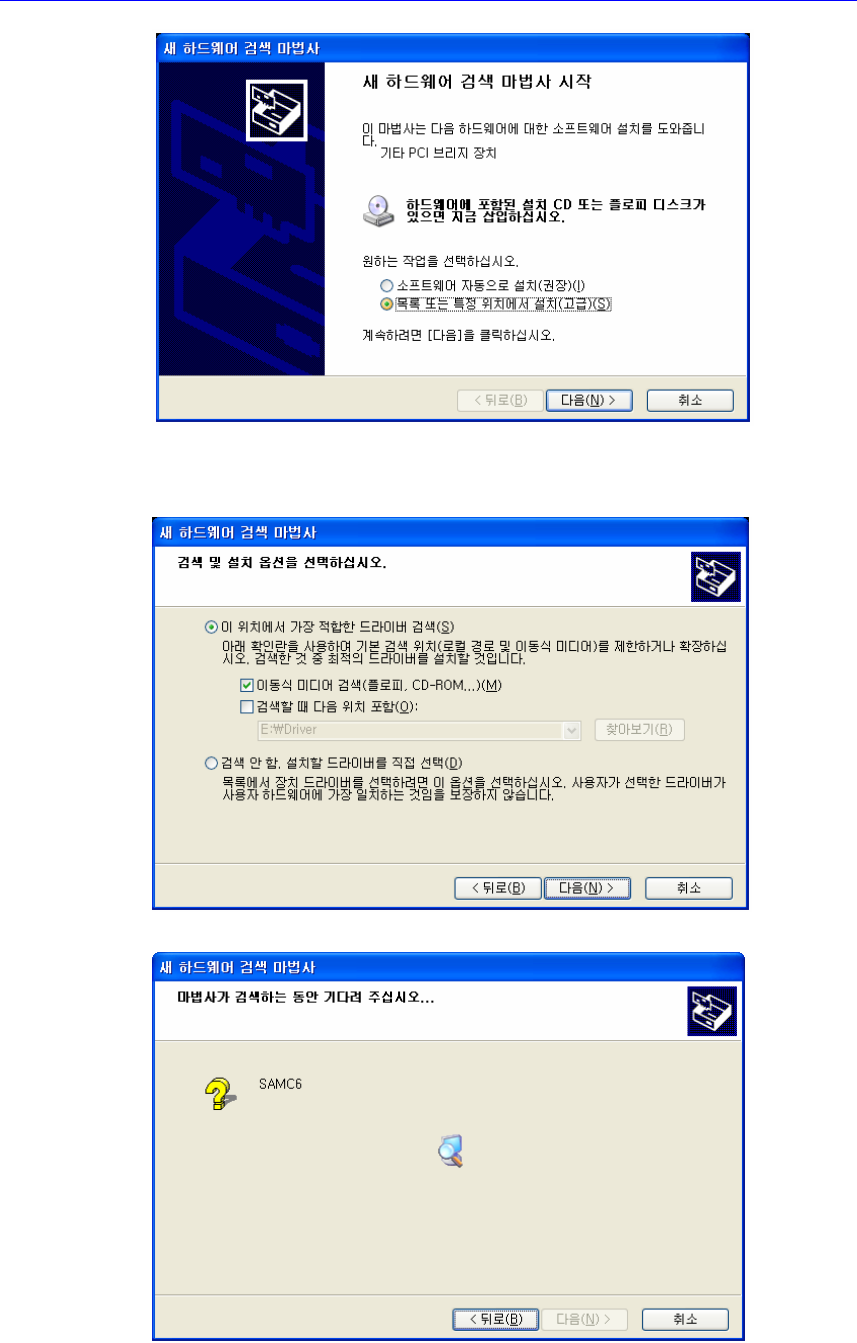
2.2.2.2. Driver installation
The SAMC62 supports the Plug & Play. Therefore, once the PC is turned on
after installing the SAMC62, the following window appears and Windows
automatically recognizes the SAMC62t and begins to install it.
Select the <Installation in the list or at specified place (high grade)> option
button, click the <Next> button and then move to the next step.
Software
If the following window appears, insert the enclosed installation CD and select
the <Movable Media Search (Floppy Disc, CD-ROM….)> check box, then
click the <Next> button to move to the following step.
The dialog box installing the SAMC62 appears.