2OM-1075-002.pdf - 第179页
AHB01ESPP 5.4.3 Examples Pn and On must be taught as follows. Fig. 2E23-6 Objects for Placement Coordinates T eaching 0308-002 5-25-19 5.4 "Place Pos T each" T ab O 1 O 2 Pn TIM-X100R P .C.B. Positioning Refere…

AHB01ESPP
5.4 "Place Pos Teach" Tab
5.4.1 Scope
By capturing the image of P.C.B. patterns in the recognition window with
the P.E.C. recognition camera, it can be checked if wrong parameters
are specified individually as placement coordinates in the pattern pro-
gram.
When a mistake is found, this function can be used to correct the pat-
tern program data, using the manual alignment function (matching op-
eration of displayed component outlines and P.C.B. patterns with the
pointing device).
••
••
• Objective Data for Teaching
Placement Coordinates P1 to Pn Steps (X, Y) in Placement Data
(P-data)
Coordinates (X, Y) of Pattern Origin O1 to On in Placement Data
(O-data)
5.4.2 Cautionary Items on Teaching
••
••
• Before performing a teaching operation on the placement coordinates,
be sure to check if normal P.C.B. origin offsets are set or not in the
"PCB Origin Offset Teach" tab sheet.
If not, perform a teaching operation on the P.C.B. origin offsets be-
forehand.
••
••
• When the P.E.C. recognition is designated in the pattern program
data, all P.E.C. recognition processing must be completed before the
placement coordinates verification in the placement coordinates
teaching.
When the P.E.C. recognition is designated and a teaching operation
is started with the machine in the "STOP" mode, the machine ex-
ecutes the P.E.C. recognition function first.
••
••
• When the unit P.C.B. B.B.R. function (option) is designated in the
pattern program, the movement to the bad mark position and the
detection will not be made in the placement coordinates verification
of the placement coordinates teaching. The objects for teaching are
all unit P.C.B.’s.
5.4 "Place Pos Teach" Tab
0308-002 5-25-18
AHB01ESPP
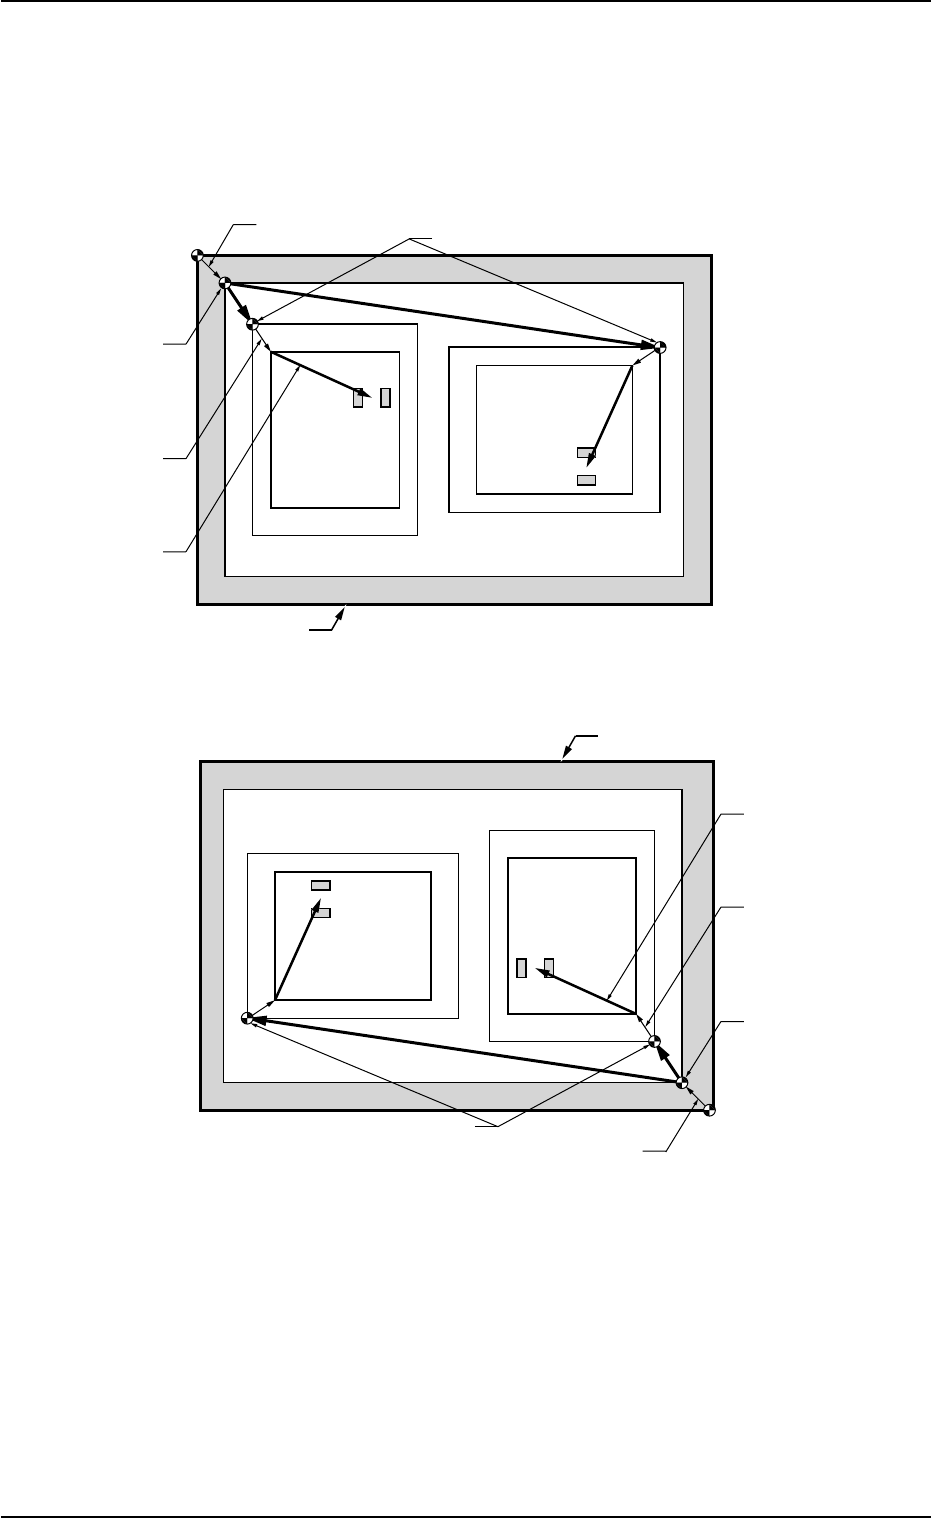
5.4.3 Examples
Pn and On must be taught as follows.
Fig. 2E23-6 Objects for Placement Coordinates Teaching
0308-002 5-25-19
5.4 "Place Pos Teach" Tab
O
1
O
2
Pn
TIM-X100R
P.C.B. Positioning
Reference
P.C.B. Origin Offset
Pattern Origin
P.C.B. Origin
Unit Control
Offset
Outermost Outline of P.C.B.
Placement
Coordinates
Angle of Divided Pattern: 0°
Angle of Divided Pattern: 270°
Pn
O
1
O
2
Pn
TIM-X100R
P.C.B. Positioning
Reference
P.C.B. Origin Offset
Pattern Origin
P.C.B. Origin
Unit Control
Offset
Outermost Outline of P.C.B.
Angle of Divided Pattern: 0°
Angle of Divided Pattern: 270°
Pn
Placement
Coordinates
AHB01ESPP
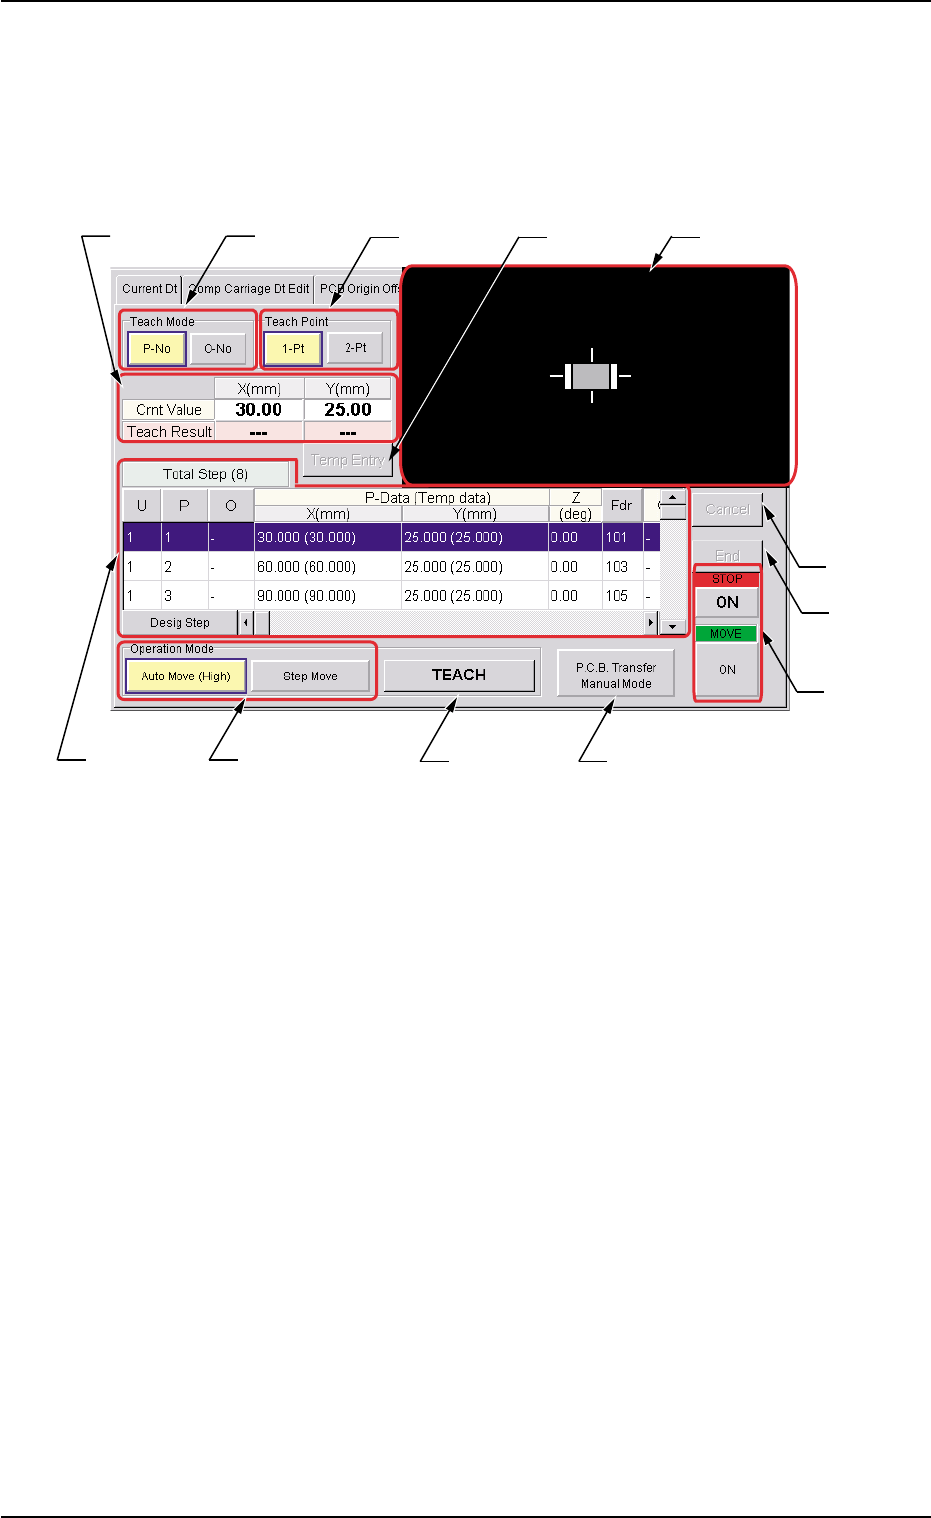
5.4.4 Tab Sheets
••
••
• Sheet Layout
When the "Place Pos Teach" tab is pressed in the "RECOVERY"
window, the following tab sheet appears inside the window.
Fig. 2E23-7 "Place Pos Teach" Tab Sheet
••
••
• Sheet Composition
*1 "Teach Mode" Group Box
Select one of the following buttons to specify how to teach the place-
ment coordinates.
[P-No] and [O-No] Buttons
Select either one of the buttons to specify the data for which the
placement coordinates must be taught.
*2 "Teach Point" Group Box
Select one of the following options to determine how to teach the
objective step for teaching.
[1-Pt] Button
Select this button when the teaching operation must be based on
the center of the component.
[2-Pt] Button
Select this button when the objective component for teaching ex-
ceeds the display range of the P.E.C. recognition camera.
0308-002 5-25-20
5.4 "Place Pos Teach" Tab
*2*1*3
*6
*10
*11
*4
*7
*5
*12
*9*8