2OM-1075-002.pdf - 第216页
AHB01ESPP 7.3.1.1 "P .C.B. T ransfer Adj." T ab Sheet This tab sheet enables the operator to change the setting of the con- veyor timer and conduct a performance test. Parameters can be specified for each conve…
AHB01ESPP
7.3.1 "Conveyor Adj" Window
This window enables the operator to activate the conveyor motors.
••
••
• Sheet Layout
When the [Conveyor Adj] button is pressed in the "PCB Support Pins
Set-up Mode" tab sheet, the following window appears.
Fig. 2E44 "Conveyor Adj" Window
••
••
• Sheet Composition
*1 Tabs and Tab Sheets
The "Conveyor Adj" window is provided with the following 3 tabs.
When a tab is pressed, the corresponding tab sheet appears.
Table 2E9
Tabs Description
P.C.B. Transfer Adj. The corresponding tab sheet enables the operator to conduct a per-
formance test according to the data specified in the "Xfr Prmtr Adj"
tab sheet.
PCB Lct Sol Adj The corresponding tab sheet enables the operator to activate the
P.C.B. locate solenoid.
PCB Xfr Adj The corresponding tab sheet enables the operator to activate the
conveyor motors.
7.3 "PCB Support Pins Set-up Mode" Tab
*1
0206-002 5-53
AHB01ESPP
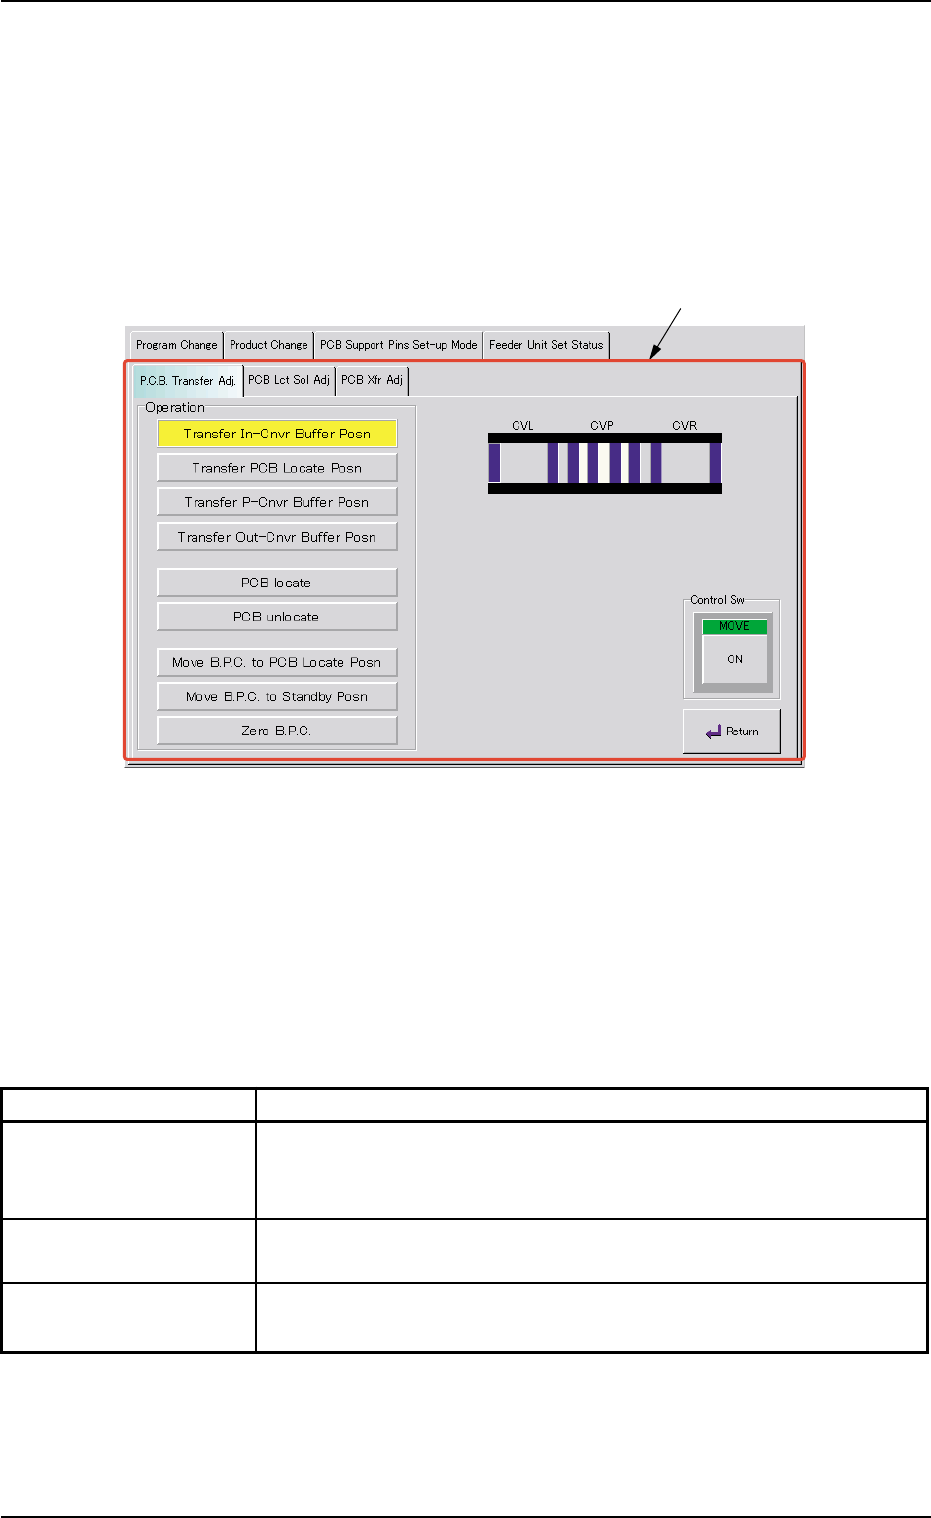
7.3.1.1 "P.C.B. Transfer Adj." Tab Sheet
This tab sheet enables the operator to change the setting of the con-
veyor timer and conduct a performance test.
Parameters can be specified for each conveyor in the "Xfr Prmtr Adj"
tab sheet.
••
••
• Sheet Layout
When the "P.C.B. Transfer Adj." tab is pressed in the "Conveyor Adj"
window, the following tab sheet appears.
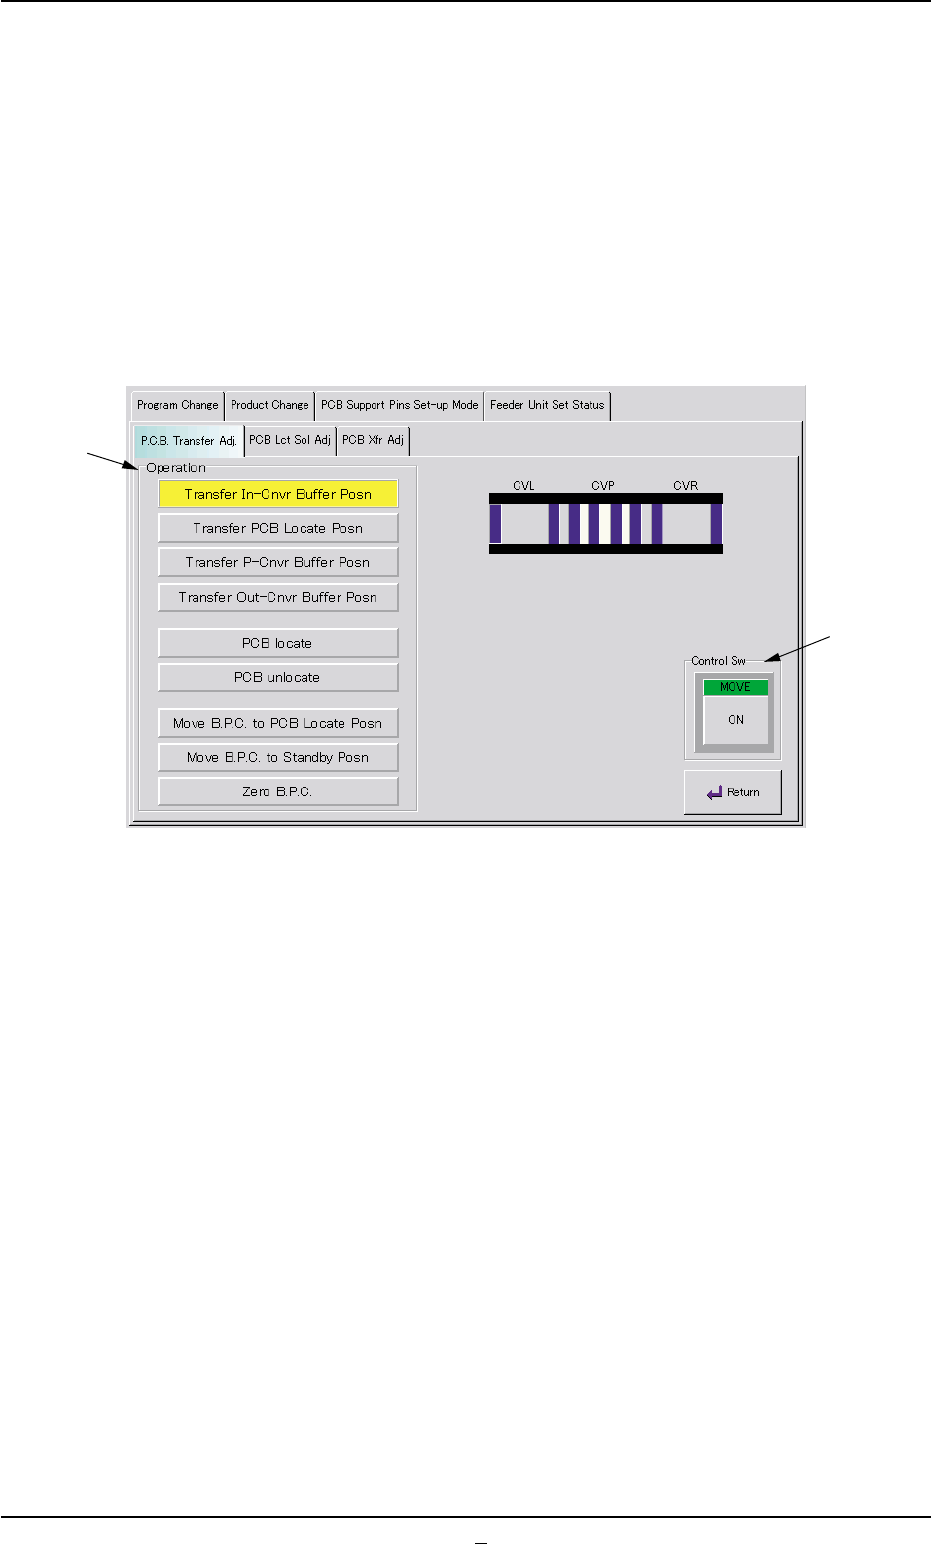
Fig. 2E45 "P.C.B. Transfer Adj." Tab Sheet
••
••
• Sheet Composition
*1 Operation Buttons
The following buttons are provided in this group box.
[Transfer In-Cnvr Buffer Posn] Button
When the [ENABLE] button on the operation panel is pressed in 2
seconds after this button is selected and the [ON] button (entitled
"MOVE") is pressed, the P.C.B. is transferred to the input conveyor
buffering position.
[Transfer PCB Locate Posn] Button
When the [ENABLE] button on the operation panel is pressed in 2
seconds after this button is selected and the [ON] button (entitled
"MOVE") is pressed, the P.C.B. is transferred to the P.C.B. locate
position.
[Transfer P-Cnvr Buffer Posn] Button
When the [ENABLE] button on the operation panel is pressed in 2
seconds after this button is selected and the [ON] button (entitled
"MOVE") is pressed, the P.C.B. is transferred to the P-conveyor
buffering position.
7.3 "PCB Support Pins Set-up Mode" Tab
*1
*2
0206-002 5-54

AHB01ESPP
[Transfer Out-Cnvr Buffer Posn] Button
When the [ENABLE] button on the operation panel is pressed in
2 seconds after this button is selected and the [ON] button (en-
titled "MOVE") is pressed, the P.C.B. is transferred to output
conveyor buffering position.
[PCB locate] Button
When the [ENABLE] button on the operation panel is pressed in
2 seconds after this button is selected and the [ON] button (en-
titled "MOVE") is pressed, the B.P.C. moves up to the P.C.B.
locate position.
[PCB unlocate] Button
When the [ENABLE] button on the operation panel is pressed in
2 seconds after this button is selected and the [ON] button (en-
titled "MOVE") is pressed, the B.P.C. moves down to its origin
position.
[Move B.P.C. to PCB Locate Posn] Button
When the [ENABLE] button on the operation panel is pressed in
2 seconds after this button is selected and the [ON] button (en-
titled "MOVE") is pressed, the B.P.C. moves to its positioning
section.
[Move B.P.C. to Standby Posn] Button
When the [ENABLE] button on the operation panel is pressed in
2 seconds after this button is selected and the [ON] button (en-
titled "MOVE") is pressed, the B.P.C. moves to its standby posi-
tion.
The standby position is specified in the current pattern pro-
gram.
[Zero B.P.C.] Button
When the [ENABLE] button on the operation panel is pressed in
2 seconds after this button is selected and the [ON] button (en-
titled "MOVE") is pressed, the B.P.C. moves to its origin posi-
tion.
*2 "Control Sw" Group Box
When the [ENABLE] button on the operation panel is pressed in 2
seconds after one of the buttons in the "Operation" group box (*1) is
selected and the [ON] button (entitled "MOVE") is pressed, the ac-
tion corresponding to the selected button takes place.
••
••
• Operation Procedure
(1) Set parameters in the "Xfr Prmtr Adj" tab sheet.
(2) Select one of the buttons in the "Operation" group box (*1).
(3) Press the [ON] button (entitled "MOVE"). In 2 seconds, press the
[ENABLE] button on the operation panel.
7.3 "PCB Support Pins Set-up Mode" Tab
Note
0206-001 5-54-1