2OM-1075-002.pdf - 第222页
AHB01ESPP * 2 Mode Displayed is the operating mode of each device. *3 "Control Sw" Group Box When the [ENABLE] button on the operation panel is pressed in 2 seconds after one of the buttons in "*1" is…

AHB01ESPP
[L-Conveyor (-) Low-Speed] Button
When the [ENABLE] button on the operation panel is pressed in 2
seconds after this button is selected and the [ON] button (entitled
"MOVE") is pressed, the L conveyor moves backward at low
speed.
[P-Conveyor (+) HI-Speed] Button
When the [ENABLE] button on the operation panel is pressed in 2
seconds after this button is selected and the [ON] button (entitled
"MOVE") is pressed, the P conveyor moves forward at high speed.
[P-Conveyor (+) Low-Speed] Button
When the [ENABLE] button on the operation panel is pressed in 2
seconds after this button is selected and the [ON] button (entitled
"MOVE") is pressed, the P conveyor moves forward at low speed.
[P-Conveyor (-) HI-Speed] Button
When the [ENABLE] button on the operation panel is pressed in 2
seconds after this button is selected and the [ON] button (entitled
"MOVE") is pressed, the P conveyor moves backward at high
speed.
[P-Conveyor (-) Low-Speed] Button
When the [ENABLE] button on the operation panel is pressed in 2
seconds after this button is selected and the [ON] button (entitled
"MOVE") is pressed, the P conveyor moves backward at low
speed.
[R-Conveyor (+) HI-Speed] Button
When the [ENABLE] button on the operation panel is pressed in 2
seconds after this button is selected and the [ON] button (entitled
"MOVE") is pressed, the R conveyor moves forward at high speed.
[R-Conveyor (+) Low-Speed] Button
When the [ENABLE] button on the operation panel is pressed in 2
seconds after this button is selected and the [ON] button (entitled
"MOVE") is pressed, the R conveyor moves forward at low speed.
[R-Conveyor (-) HI-Speed] Button
When the [ENABLE] button on the operation panel is pressed in 2
seconds after this button is selected and the [ON] button (entitled
"MOVE") is pressed, the R conveyor moves backward at high
speed.
[R-Conveyor (-) Low-Speed] Button
When the [ENABLE] button on the operation panel is pressed in 2
seconds after this button is selected and the [ON] button (entitled
"MOVE") is pressed, the R conveyor moves backward at low
speed.
7.3 "PCB Support Pins Set-up Mode" Tab
0206-001 5-56-1

AHB01ESPP
*2 Mode
Displayed is the operating mode of each device.
*3 "Control Sw" Group Box
When the [ENABLE] button on the operation panel is pressed in 2
seconds after one of the buttons in "*1" is selected and the [ON]
button (entitled "MOVE") is pressed, the action corresponding to the
selected button takes place.
••
••
• Operation Procedure
(1) Select one of the buttons in "*1" as the device to be inspected.
(2) Press the [ON] button (entitled "MOVE"). In 2 seconds, press the
[ENABLE] button on the operation panel. The motor starts rotating.
To stop the rotation, press the [STOP] button on the operation panel.
7.3 "PCB Support Pins Set-up Mode" Tab
0206-001 5-56-2
AHB01ESPP
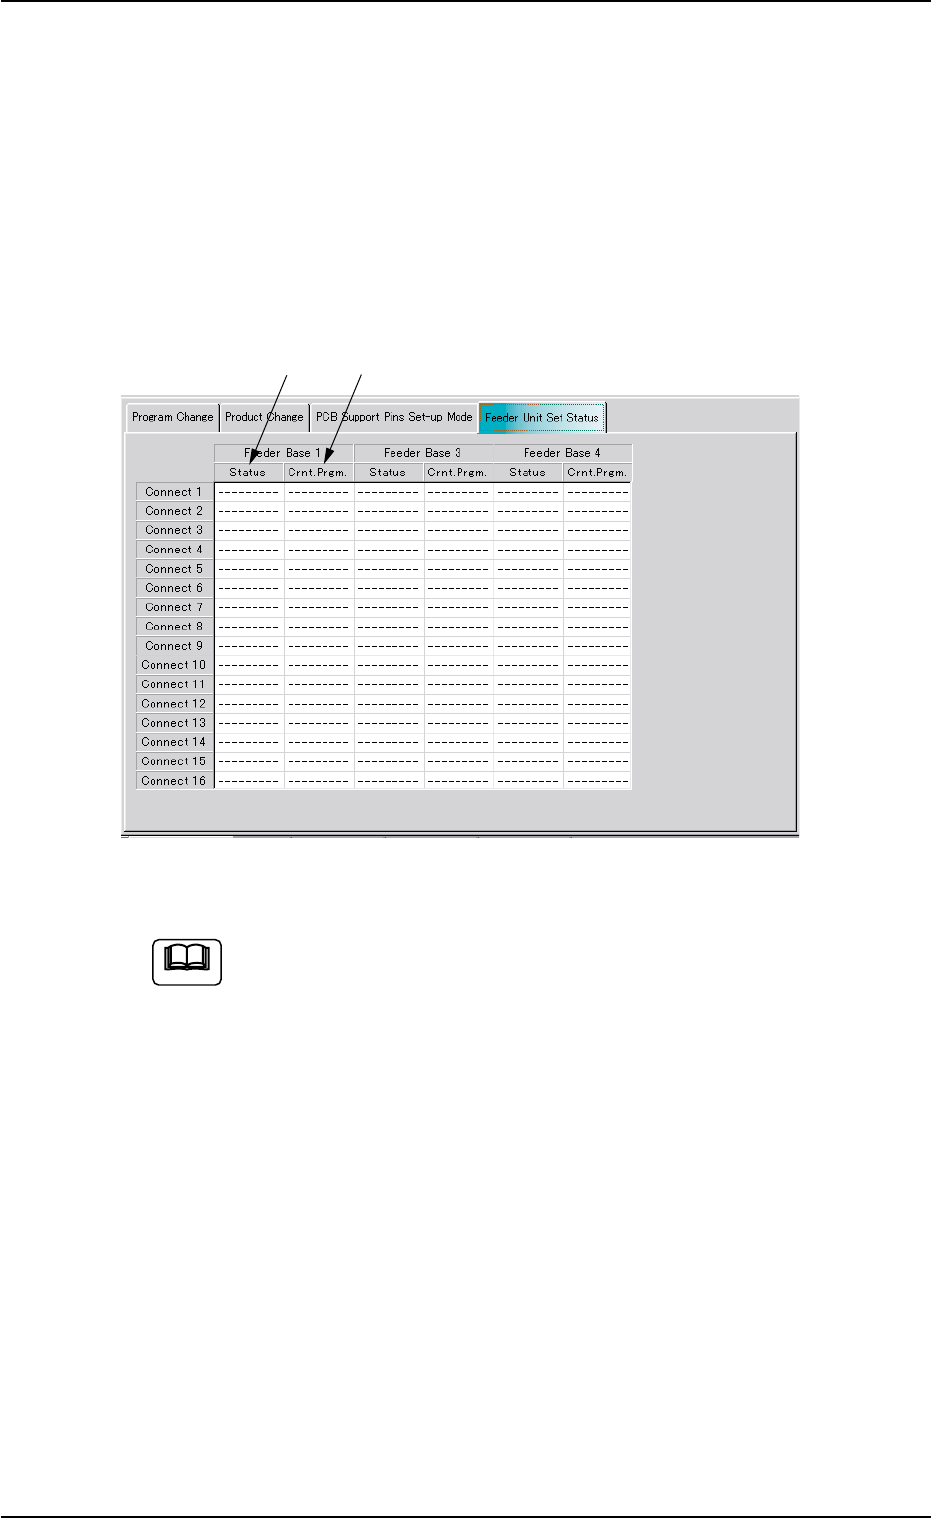
7.4 "Feeder Unit Set Status" Tab
The corresponding tab sheet enables the operator to confirm the re-
quired feeders and check if the correct feeders are actually installed on
the feeder bases.
••
••
• Sheet Layout
When the "Feeder Unit Set Status" tab is pressed in the "PRGM. CHG."
window (submenu), the following tab sheet appears.
Fig. 2E48 "Feeder Unit Set Status" Tab Sheet
The tab sheet may look different, depending on which options
are selected.
••
••
• Sheet Composition
*1 Crnt. Prgm.
Displayed are the types of the feeders specified in the placement
feeder location data.
*2 Status
Displayed are the types of the actually installed feeders.
7.4 "Feeder Unit Set Status" Tab
Note
0206-002 5-57
*1
*2