2OM-1075-002.pdf - 第258页
AHB01ESPP (3) When the [ENABLE] button on the operation panel is pressed in 2 seconds after the [ON] button (entitled "MOVE"), the X/Y beam moves to the designated position. When the [ENABLE] button on the oper…
AHB01ESPP
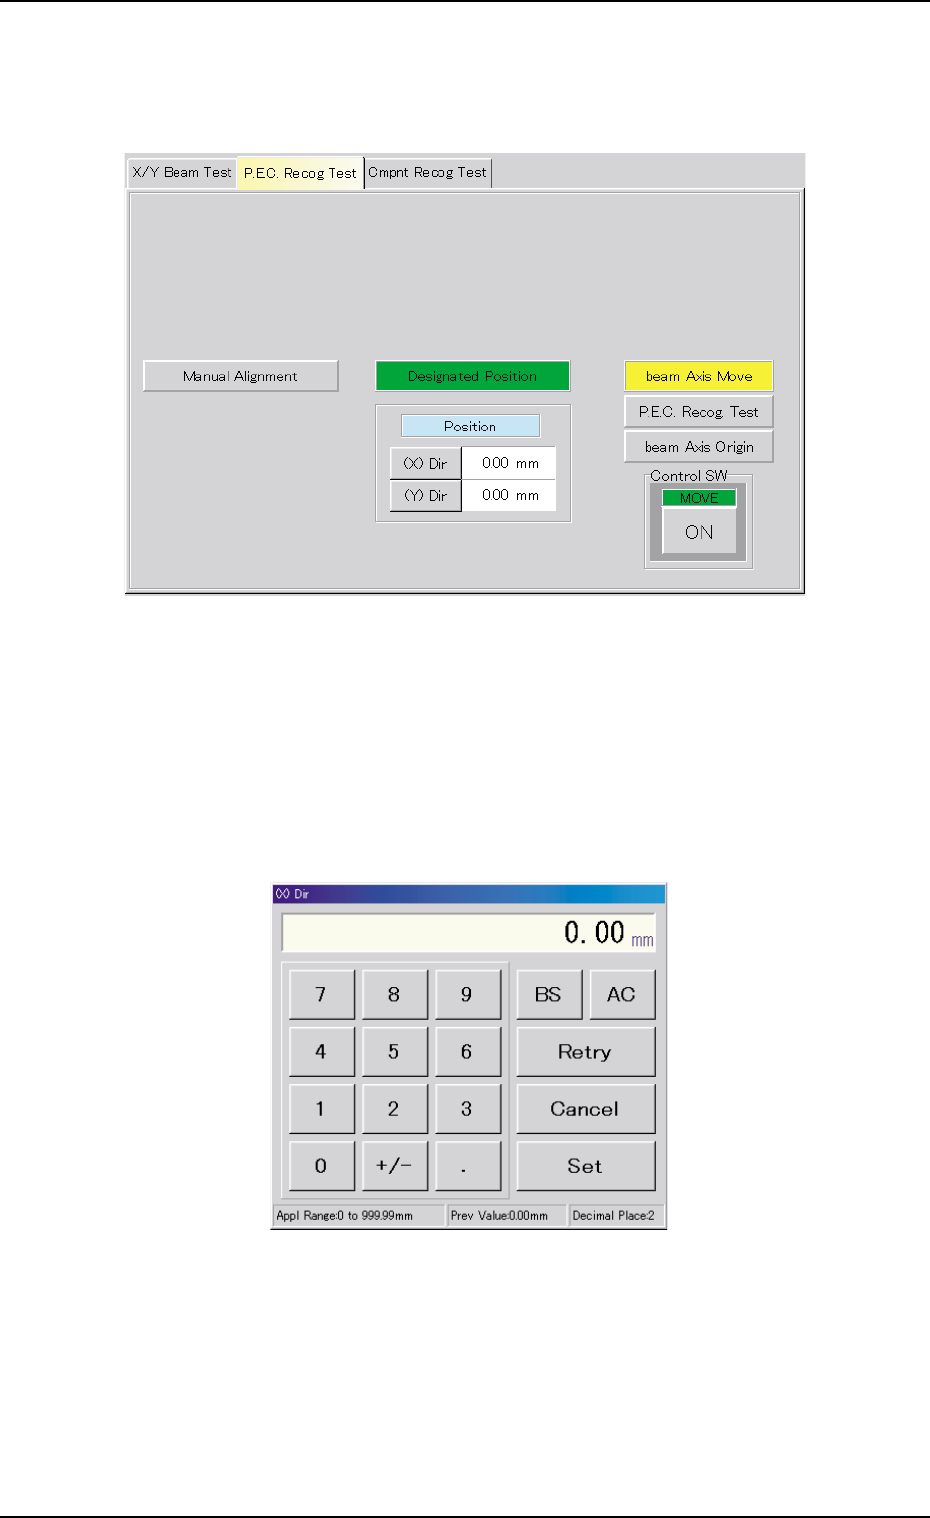
• Designated Position
(1) When the [Designated Position] button is pressed in the tab sheet
(Fig. 2F18), the following sheet appears.
Fig. 2F19
(2) When the [(X) Dir] button is pressed, the "(X) Dir" edit window opens.
Enter a parameter (designated position) in the X direction to desig-
nate the target position of the X/Y beam movement in this edit win-
dow.
Follow the same procedure to enter a parameter in the Y direction.
Fig. 2F20
0206-003 6-25
3.2 "P.E.C. Recog Test" Tab

AHB01ESPP
(3) When the [ENABLE] button on the operation panel is pressed in 2
seconds after the [ON] button (entitled "MOVE"), the X/Y beam
moves to the designated position.
When the [ENABLE] button on the operation panel is pressed in
2 seconds after the movement to the designated position and
the [P.E.C. recog. Test] and [ON] (entitled "MOVE") buttons are
pressed, a P.E.C. recognition test is made and the "P.E.C. Recog
Test" tab sheet resumes.
• P.E.C. Recognition Test
(1) Press the [P.E.C. Recog Test] button and the [ON] button (entitled
"MOVE"). After that, press the [ENABLE] button on the operation
panel in 2 seconds. The P.E.C. recognition test is conducted.
When the [Enable] button under "Set Mark" is selected and the rec-
ognition test is completed successfully, the X/Y beam moves until
the fiducial mark is located at the center of the recognition monitor.
When the test fails, a recognition error message is issued.
Note: Try to shift the fiducial mark to various places by moving the
X/Y beam and perform the recognition tests.
(2) To end the P.E.C. recognition test, press the [beam Axis Origin] but-
ton and the [ON] button (entitled "MOVE"). After that, press the [EN-
ABLE] button on the operation panel in 2 seconds. The X/Y beam
returns to its origin.
The "P.E.C. Recog Test" tab sheet resumed.
0206-003 6-26
Note
3.2 "P.E.C. Recog Test" Tab
AHB01ESPP
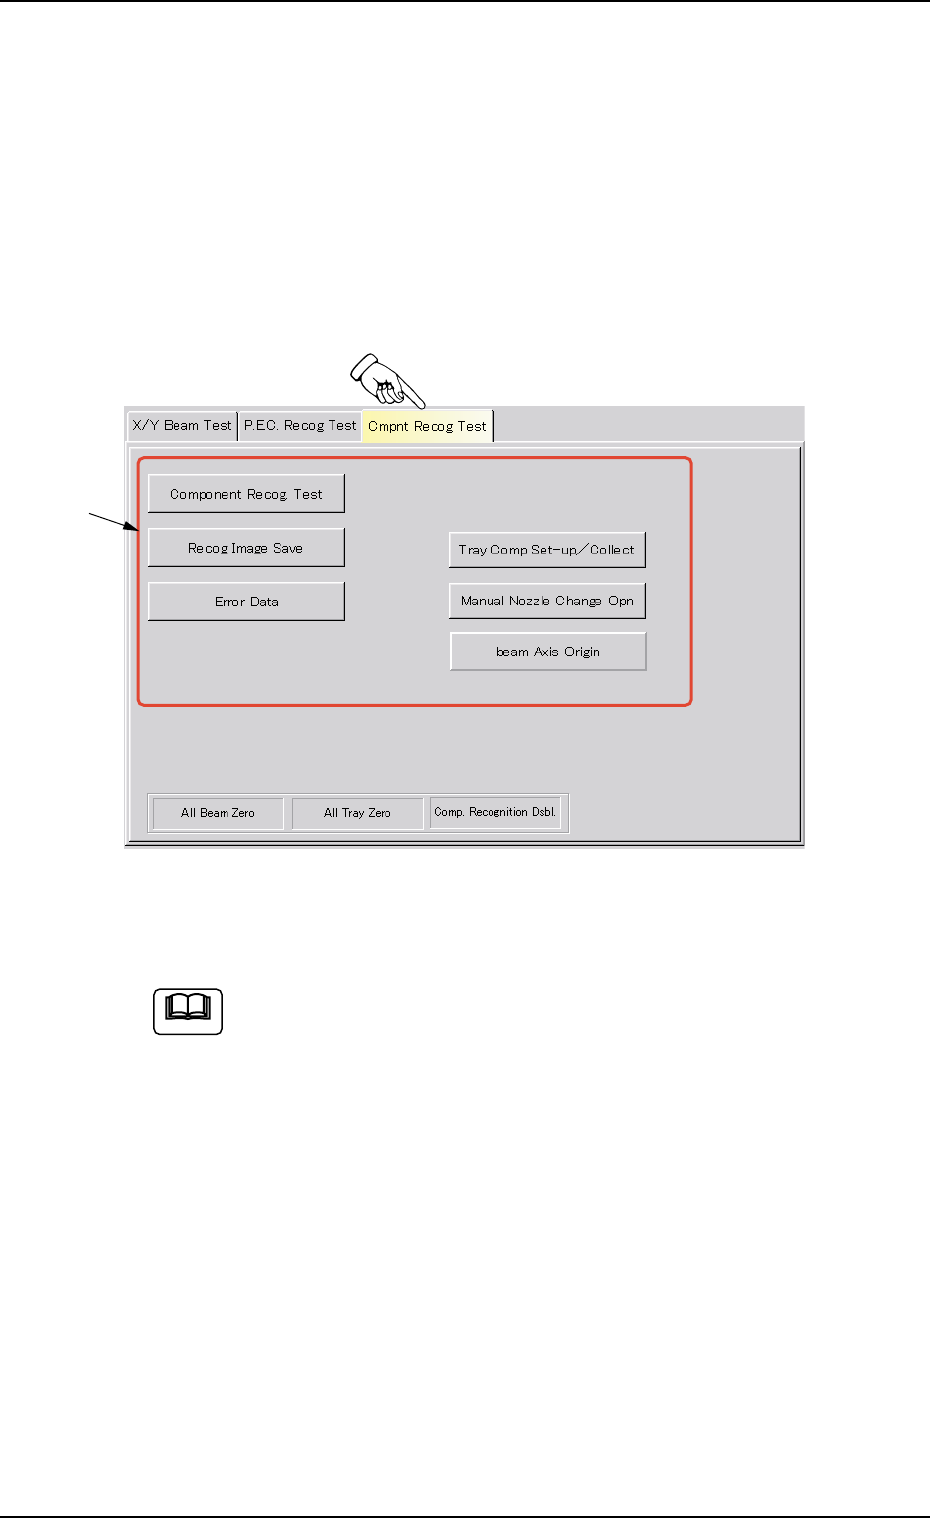
3.3 "Cmpnt Recog Test" Tab
The corresponding tab sheet enables the operator to check whether or
not the component designated using a test ID can normally be recog-
nized.
• Sheet Layout
When the "Cmpnt Recog Test" tab is pressed in the "DVC. TEST" win-
dow (submenu), the following tab sheet appears inside the window.
Fig. 2F21 "Cmpnt Recog Test" Tab Sheet
(Provided with Multi-Layer Tray Feeder 2)
The tab sheet may look different, depending on which options
are selected.
• Sheet Composition
*1 Operation Selection Buttons
When one of the following buttons is pressed, each corresponding
sheet appears for the component recognition test.
[Component Recog Test] Button
When pressed, this button opens the operation sheet for the com-
ponent recognition test.
[Recog Image Save] Button
When this button is pressed, the recognized image can be saved
on a floppy disk.
0206-003 6-27
3.3 "Cmpnt Recog Test" Tab
Note
*1