2OM-1075-002.pdf - 第267页
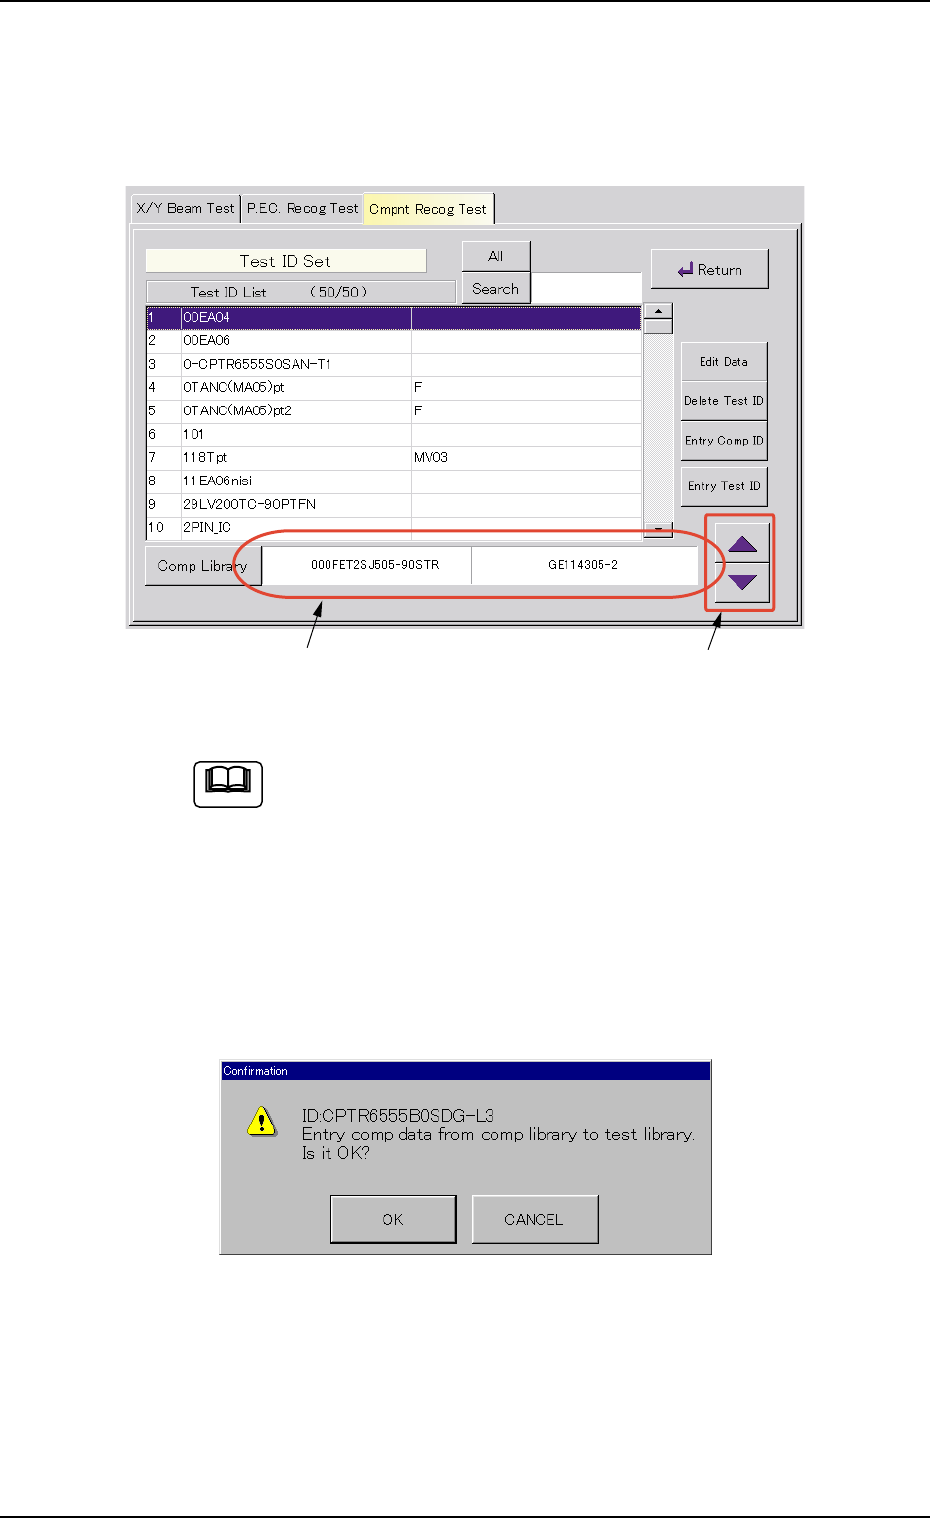
AHB01ESPP Selected Component ID Arrow Buttons (3-3) Select the component ID to be registered as a test ID from the "Comp ID List ( ### )" pane and press the [Select] button. The "T est ID Set" sheet a…
AHB01ESPP
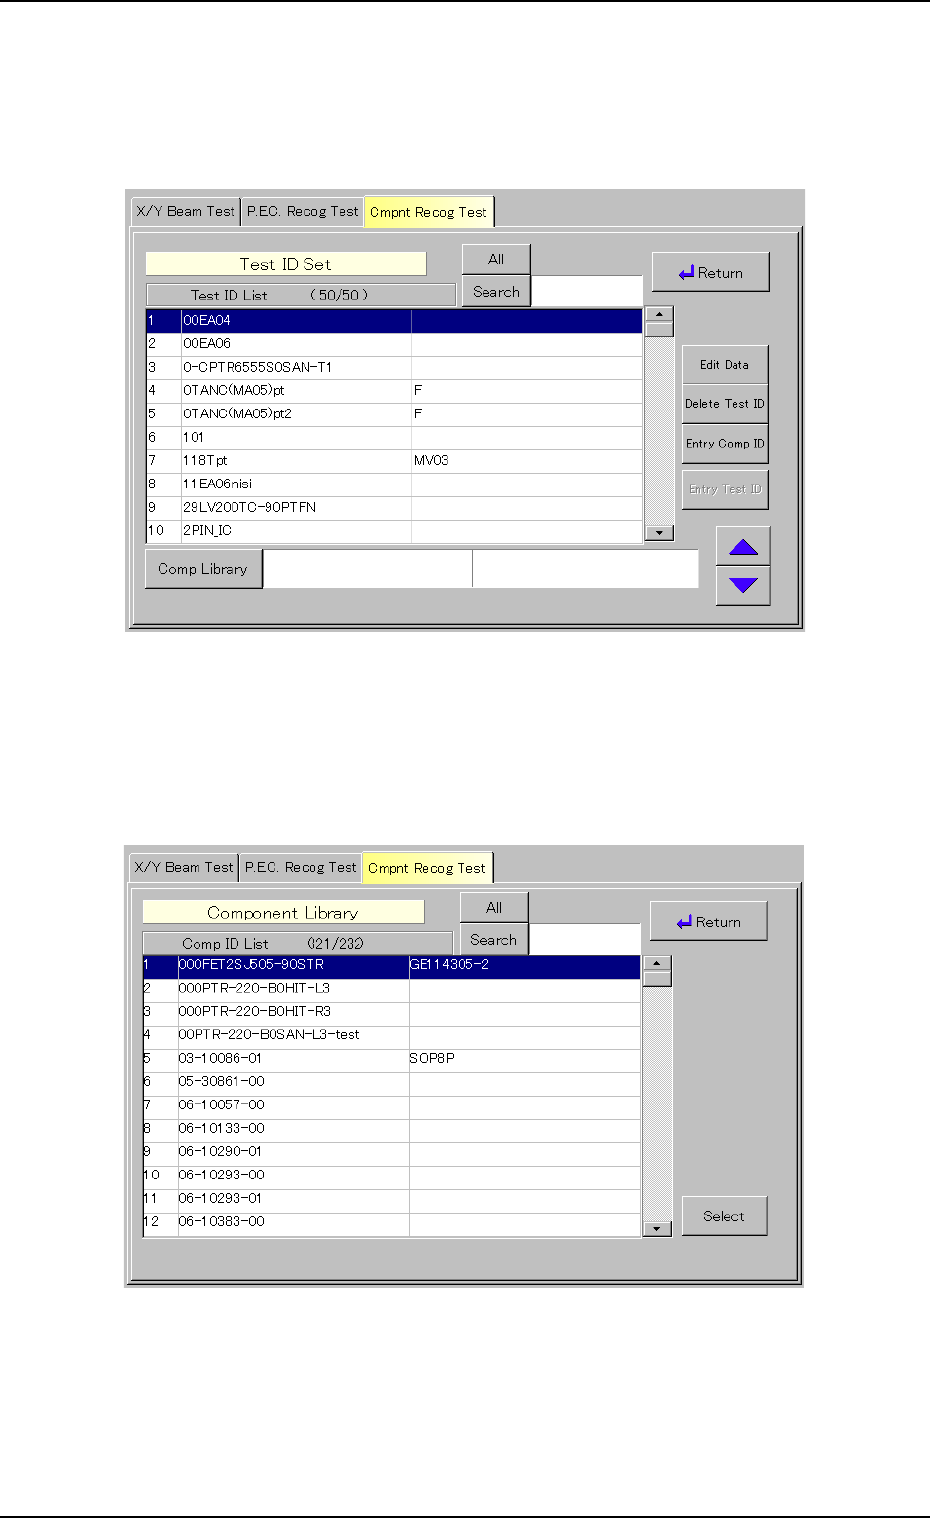
(3) Setting of Tested Component ID
(3-1) When the [Test ID] button (*4) is pressed in the "Component
Recog. Test" sheet (Fig. 2F22), the following "Test ID Set"
sheet appears.
Fig. 2F25 "Test ID Set" Sheet
(3-2) When the [Comp Library] button is pressed, the following
"Component Library" sheet appears for component ID selec-
tions.
Fig. 2F26 "Component Library" Selection Sheet
0308-004 6-34
3.3 "Cmpnt Recog Test" Tab
AHB01ESPP
Selected Component ID
Arrow Buttons
(3-3) Select the component ID to be registered as a test ID from
the "Comp ID List ( ### )" pane and press the [Select] button.
The "Test ID Set" sheet appears and the selected compo-
nent ID is displayed in the "Comp Library" pane.
Fig. 2F27
(a) When a test ID is selected, the [Entry Test ID] button
becomes active.
(b) Press the right arrow buttons to scroll up or down the
component IDs.
A component ID for testing can be registered without
making the list of component IDs visible.
(3-4) Press the [Entry Test ID] button. The following message box
opens for confirmation to the entry.
Fig. 2F28
When the [OK] button is pressed, the selected component
ID is registered as a test ID and the "Test ID List (XXX)" ap-
pears in the "Test ID Set" sheet (Fig. 2F29).
When the [Cancel] button is pressed, the registration of the
test ID is canceled.
Note
0308-004 6-35
3.3 "Cmpnt Recog Test" Tab
AHB01ESPP
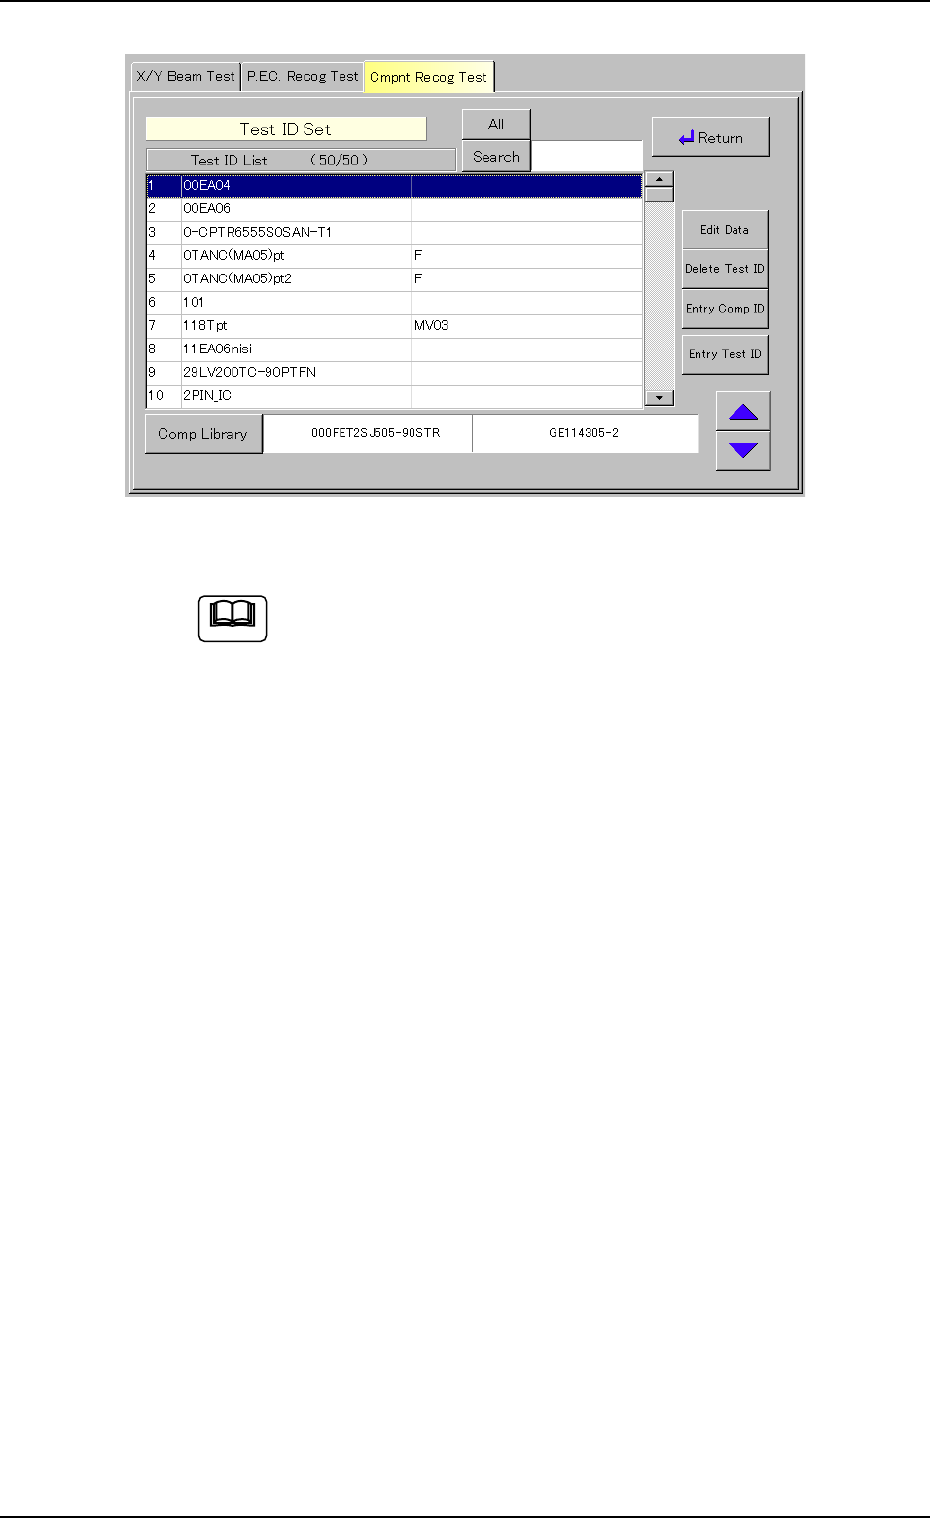
Fig. 2F29
After the "Test ID List (XXX)" has appeared, the [Search],
[Edit Data], [Delete Test ID], and [Entry Comp ID] buttons
become active.
(3-5) When the [Return] button is pressed, the "Component Recog.
Test" operation sheet (Fig. 2F22) appears.
0308-004 6-36
Note
3.3 "Cmpnt Recog Test" Tab