2OM-1075-002.pdf - 第295页
AHB01ESPP 4. 2 "Feeder Base" T ab The corresponding tab sheet enables the operator to conduct a perfor- mance test of the feeder bases. • Sheet Layout When the "Feeder Base" tab is pressed in the &quo…

AHB01ESPP
[R-Conveyor (-) HI-Speed] Button
When the [ENABLE] button on the operation panel is pressed
in 2 seconds after this button is selected and the [ON] button
(entitled "MOVE") is pressed, the R conveyor moves backward
at high speed.
[R-Conveyor (-) Low-Speed] Button
When the [ENABLE] button on the operation panel is pressed
in 2 seconds after this button is selected and the [ON] button
(entitled "MOVE") is pressed, the R conveyor moves backward
at low speed.
*2 Mode
Displayed is the operating mode of each device.
*3 "Control Sw" Group Box
When the [ENABLE] button on the operation panel is pressed in 2
seconds after one of the buttons in "*1" is selected and the [ON]
button (entitled "MOVE") is pressed, the action corresponding to the
selected button takes place.
• Operation Procedure
(1) Select one of the buttons in "*1" as the device to be inspected.
(2) Press the [ON] button (entitled "MOVE"). In 2 seconds, press the
[ENABLE] button on the operation panel.
The motor starts rotating.
To stop the rotation, press the [STOP] button on the operation panel.
01 12-002 6-6 2
4.1 "Conveyor Adj" Tab
AHB01ESPP
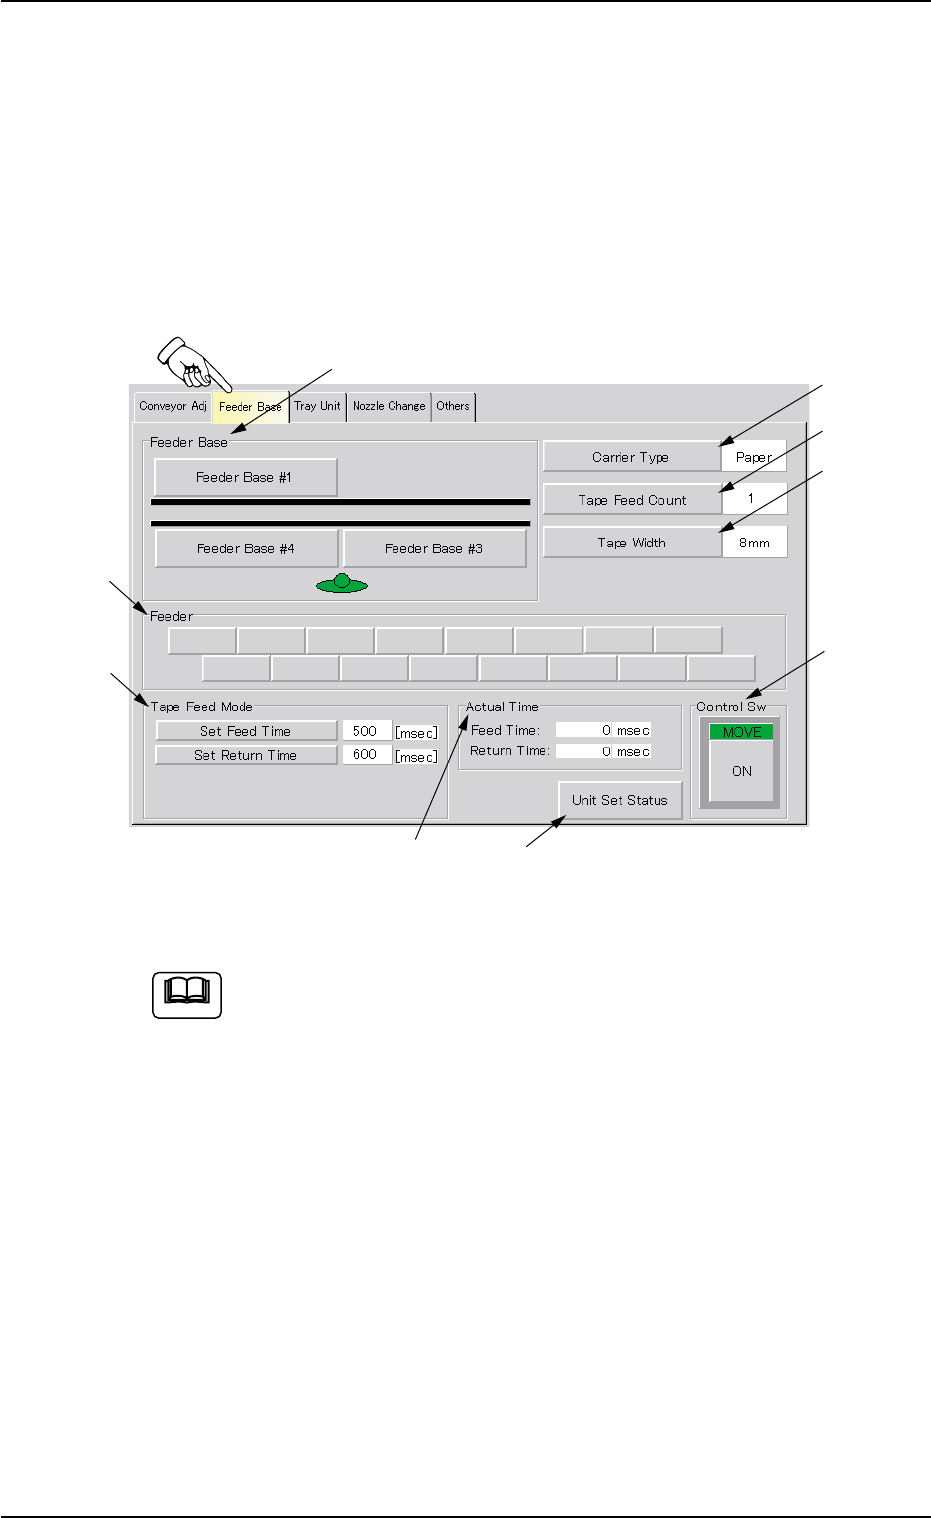
4.2 "Feeder Base" Tab
The corresponding tab sheet enables the operator to conduct a perfor-
mance test of the feeder bases.
• Sheet Layout
When the "Feeder Base" tab is pressed in the "UNIT ADJ." window
(submenu), the following tab sheet appears inside the window.
Fig. 2F46 "Feeder Base" Tab Sheet (Provided with Multi-Layer Tray Feeder 2)
The tab sheet may look different, depending on which options
are selected.
• Sheet Layout
*1 "Feeder Base" Group Box
The following buttons are provided in this group box.
[Feeder Base #1] Button
Press this button to activate Feeder Base #1.
[Feeder Base #3] Button
Press this button to activate Feeder Base #3.
[Feeder Base #4] Button
Press this button to activate Feeder Base #4.
Note
0308-004 6-63
4.2 "Feeder Base" Tab
*3
*2
*8
*6
*7
*1
*4
*5
*9
AHB01ESPP
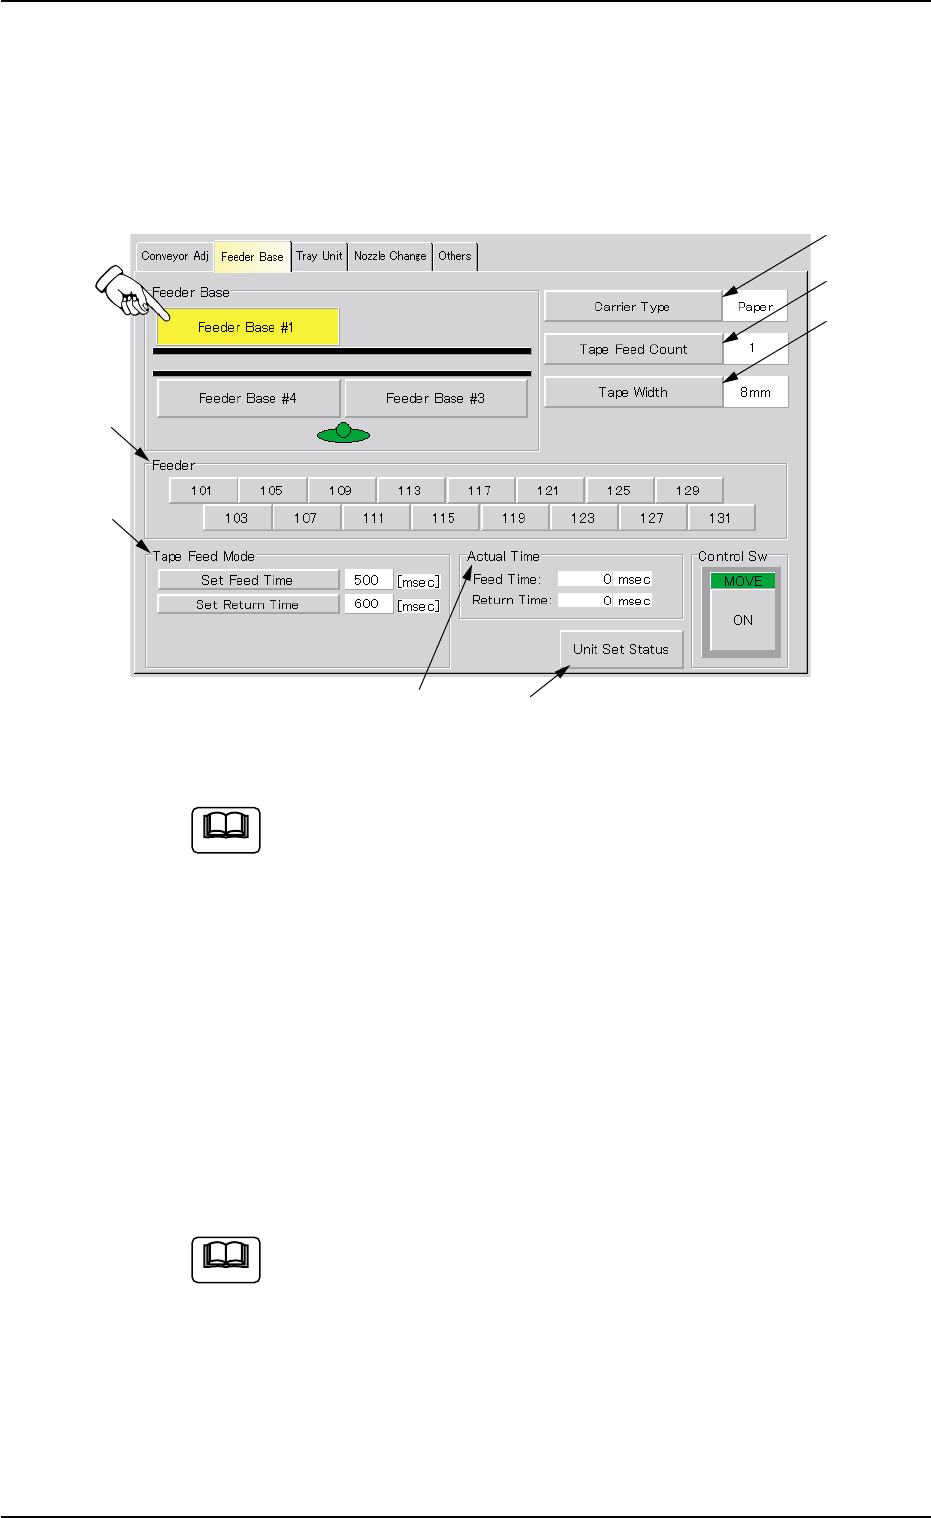
*2 "Feeder" Group Box
When one of the buttons in the "Feeder Base" group box (*1) is
pressed, the corresponding feeder No. buttons appear in this group
box.
Press the feeder No. button of the feeder to be activated.
Fig. 2F47 "Feeder Base" Tab Sheet ([Feeder Base #1] Button Selected)
Two feeder Nos. can be selected at the same time to si-
multaneously move the two feeders forward.
*3 [Carrier Type] Button
Set the type of a tape in the text box.
Every time this button is pressed, the parameter changes in scroll-
ing such as "Paper" Æ "Embossed" Æ "Adhesive" Æ "Paper".
*4 [Tape Feed Count] Button
When this button is pressed, the "Tape Feed Count" edit window
opens. Enter the number of feeding times in the range of "1 to 9
times" as the number of tape feeding actions.
In normal cases, set "1" in the text box.
When the selected tape has to be fed more than one due to
the relation between the feed pitch and the feeder, set the
required number of tape feeding times.
0308-004 6-64
4.2 "Feeder Base" Tab
*3
*2
*8
*6
*7
*4
*5
Note
Note