2OM-1075-002.pdf - 第299页
AHB01ESPP 4 . 3 "Nozzle Change" T ab The corresponding tab sheet enables the operator to manually open or close the nozzle stockers, attach the vacuum nozzles, and perform a cycle of storage operation. • Sheet …
AHB01ESPP
*8 [Unit Set Status] Button
When the button is pressed, the "Unit Set Status" window opens.
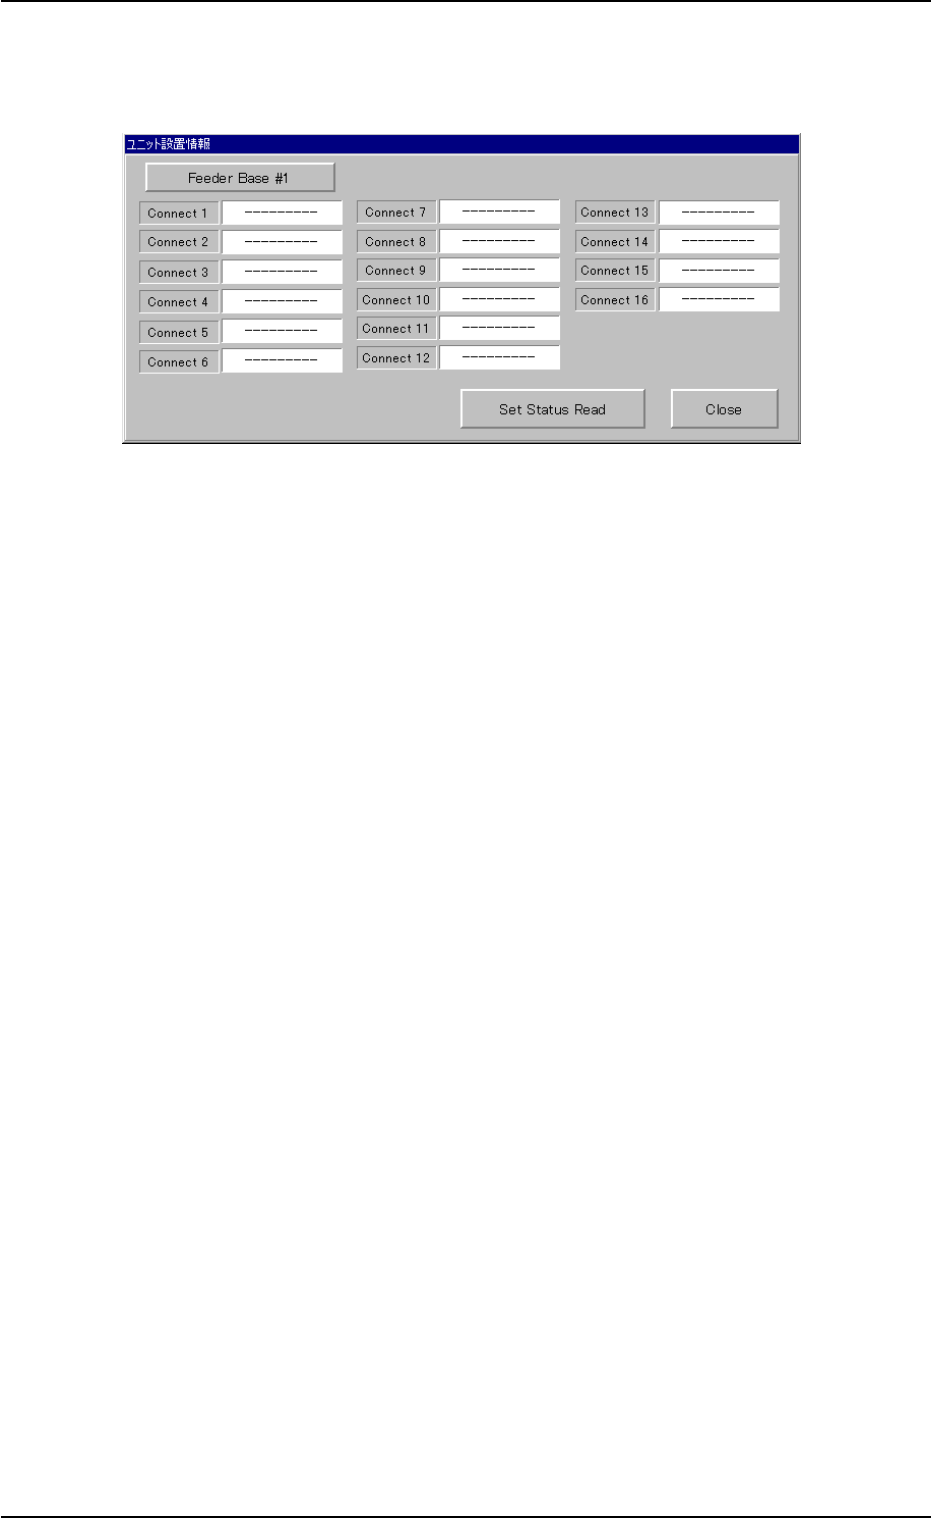
Fig. 2F48 "Unit Set Status" Window
(1) Select the desired feeder base.
Every time this button is pressed, the label changes in scrolling
such as "Feeder Base #1" Æ "Feeder Base #3" Æ "Feeder
Base #4" Æ "Feeder Base #1".
(2) Press the [Set Status Read] button.
The status of each connector (1 through 16) is displayed for the
selected feeder base.
(3) Press the [Close] button. The "Unit Set Status" window closes.
*9 "Control Sw" Group Box
When one of the buttons (feeder base No.) is selected in "*1", a
feeder No. is specified in "*2", various parameters are set in "*3
through *7", and the [ENABLE] button on the operation panel is
pressed in 2 seconds after the [ON] button (entitled "MOVE"), the
tape of the selected feeder moves forward and backward according
to the specified parameters.
0206-003 6-66
4.2 "Feeder Base" Tab
AHB01ESPP
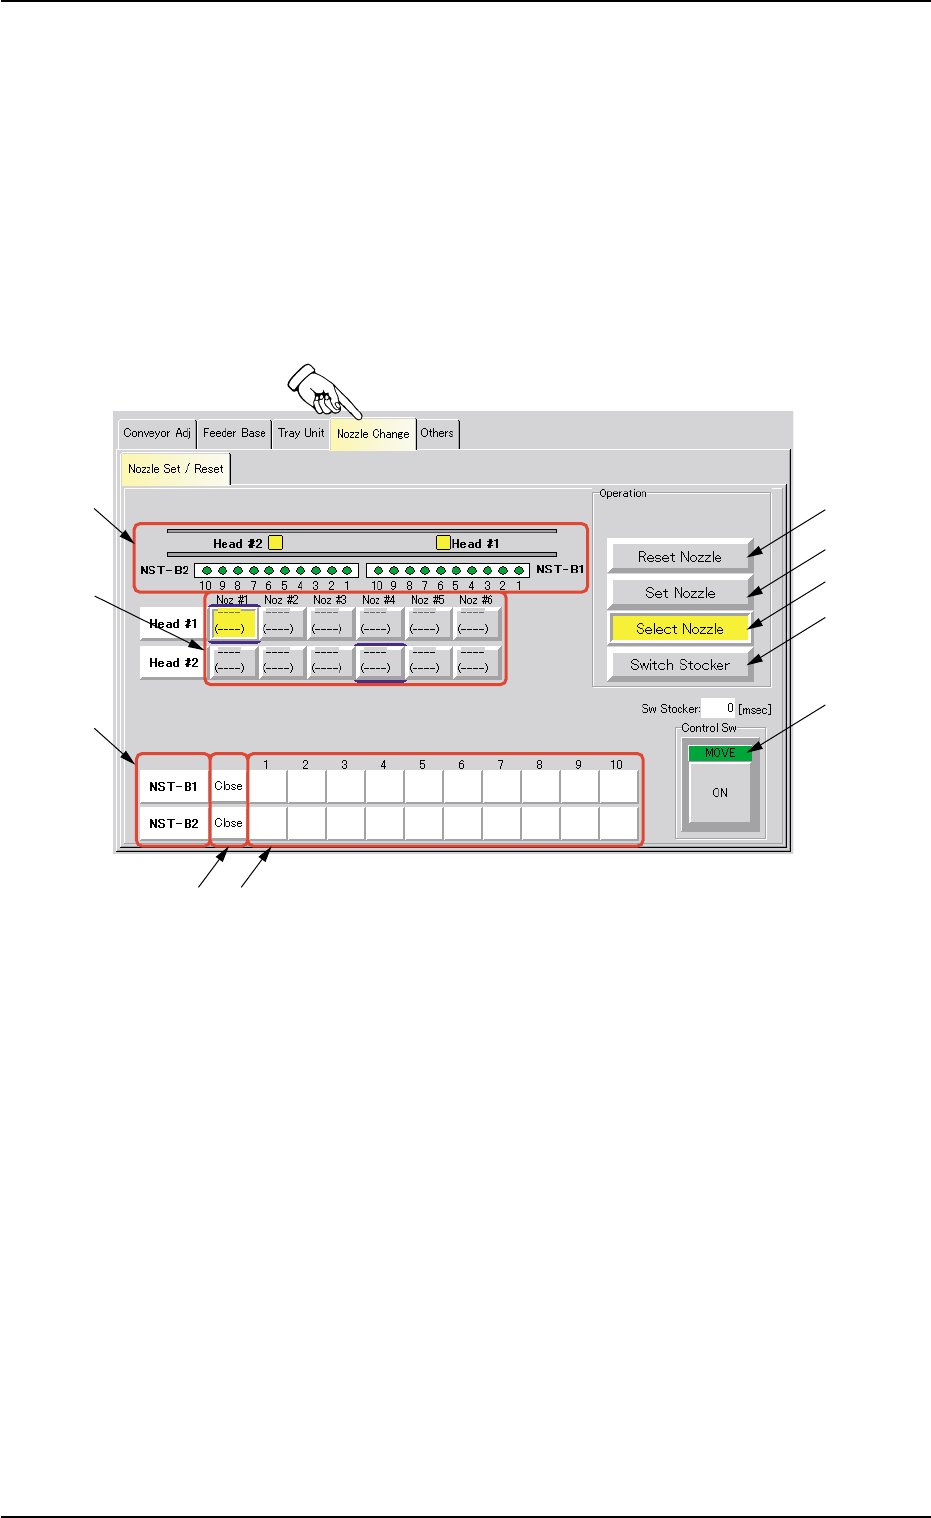
4.3 "Nozzle Change" Tab
The corresponding tab sheet enables the operator to manually open or
close the nozzle stockers, attach the vacuum nozzles, and perform a
cycle of storage operation.
• Sheet Layout
When the "Nozzle Change" tab is pressed in the "UNIT ADJ." window
(submenu), the following tab sheet appears inside the window.
Fig. 2F50 "Nozzle Change" Tab Sheet
0308-004 6-67
4.3 "Nozzle Change" Tab
*5
*6
*7
*9*8
*10
*4
*3
*2
*1

AHB01ESPP
• Sheet Composition
*1 [Reset Nozzle] Button
When this button is pressed, the specified nozzles are stored in the
nozzle stocker.
When pressed, this button turns yellow, indicating that any one of
the nozzle selection (head) buttons (*6) can be set active.
*2 [Set Nozzle] Button
The nozzle selected from the nozzle stocker is attached to the speci-
fied nozzle No. position.
When pressed, this button turns yellow, indicating that one of the
nozzle selection (head) buttons (*6) and one of the nozzle selection
(stocker) buttons (*9) can be set active.
*3 [Select Nozzle] Button
The specified nozzle is moved to the "Nozzle #1" (downward) posi-
tion.
When pressed, this button turns yellow, indicating that any one of
the nozzle selection (head) buttons (*6) can be set active.
0308-003 6-68
4.3 "Nozzle Change" Tab