2OM-1075-002.pdf - 第304页
AHB01ESPP • Procedure for Nozzle Attachment (1) Press the [Set Nozzle] button (*2). The background color of the button turns yellow , indicating that the nozzle selection (head) buttons (*6) and the nozzle selection (noz…
AHB01ESPP
0308-004 6-71
4.3 "Nozzle Change" Tab
• Do not change any nozzle when a component is
picked up by the head.
Otherwise, the vacuum will be turned off, releas-
ing the component from the head.
*10
*1
*6
CAUTION
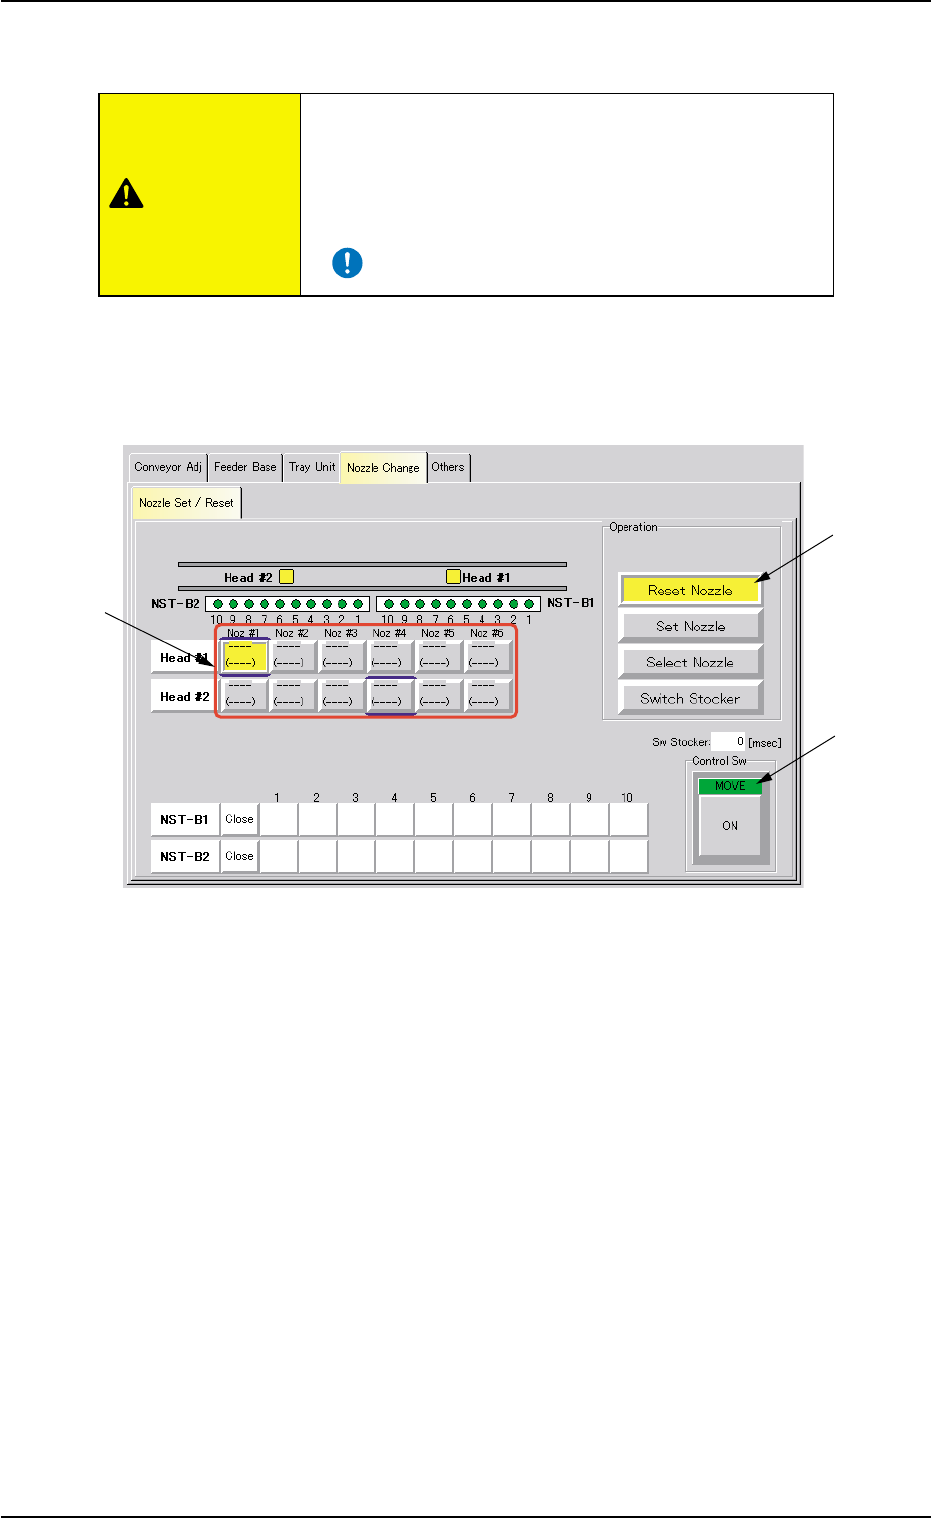
• Procedure for Nozzle Storage Operation
(1) Press the [Reset Nozzle] button (*1).
The background color of the button turns yellow, indicating that the
nozzle selection (head) buttons (*6) are set active.
Fig. 2F52 "Nozzle Change" Tab Sheet ([Reset Nozzle] Button Selected)
(2) Select the nozzle to be stored in the nozzle stocker by pressing one
of the nozzle selection (head) buttons (*6).
The background color of the selected button turns yellow.
(3) When the [ENABLE] button on the operation panel is pressed in 2
seconds after the [ON] button (*10 entitled "MOVE"), the selected
nozzle is stored in the nozzle stocker.
AHB01ESPP
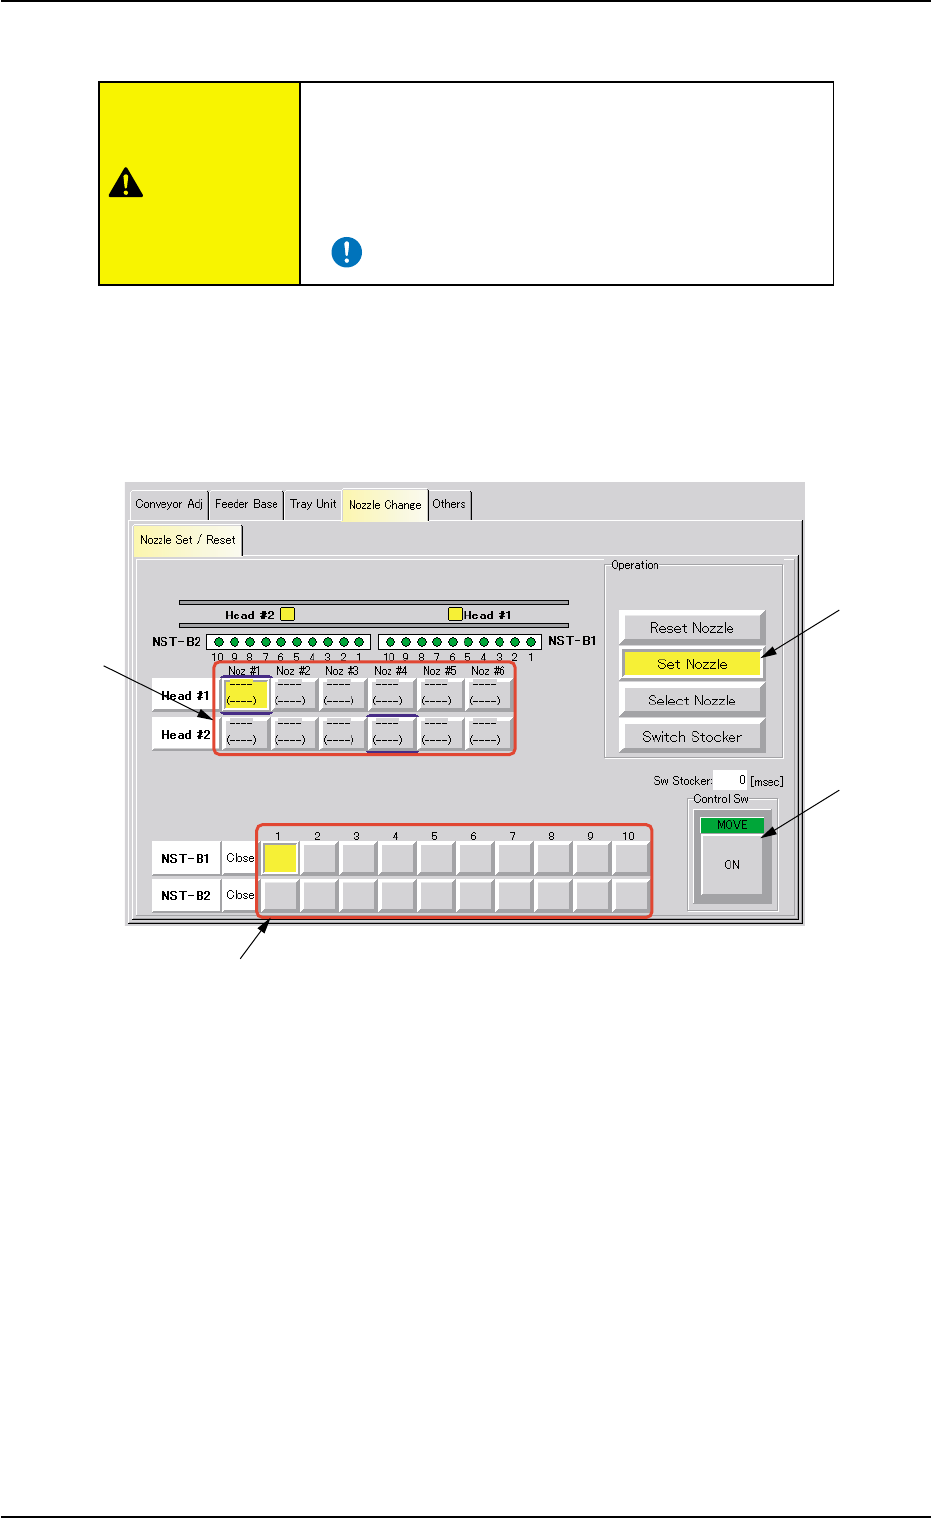
• Procedure for Nozzle Attachment
(1) Press the [Set Nozzle] button (*2).
The background color of the button turns yellow, indicating that the
nozzle selection (head) buttons (*6) and the nozzle selection (nozzle
stocker) buttons (*9) are set active.
Fig. 2F53 "Nozzle Change" Tab Sheet
([Set Nozzle] Button Selected)
0308-003 6-72
4.3 "Nozzle Change" Tab
• Do not attach any nozzle when a component is
picked up by the head.
Otherwise, the vacuum will be turned off, releas-
ing the component from the head.
*10
*2
*9
*6
CAUTION

AHB01ESPP
(2) Select the nozzle to be attached to the head by pressing one of the
nozzle selection (nozzle stocker) buttons (*9).
The background color of the selected button turns yellow.
(3) Select the position (Nozzle No.) where the nozzle must be attached
by pressing one of the nozzle selection (head) buttons (*6).
The background color of the selected button turns yellow.
(4) When the [ENABLE] button on the operation panel is pressed in 2
seconds after the [ON] button (entitled “MOVE”) (*10), the action to
attach the specified nozzle takes place.
No nozzle can be attached to the nozzle No. where a nozzle is
already attached.
Note
0308-004 6-73
4.3 "Nozzle Change" Tab