2OM-1075-002.pdf - 第329页
AHB01ESPP T eaching Procedure Selection of [T ape, V ib. Stick T each Ecc. Pick-Up Pos. [Pickup Loc. Adj.]] Button in Fig. 2F57 Selection of Head Setting of Objective Feeder No. for T eaching Refer to "5.1.4 "F…

AHB01ESPP
••
••
• Teaching Operation for Eccentric Pick-Up Setting against Hin-
drance in Component Picks at Center
Perform this teaching operation when a component has a groove, a
protrusion, etc., and cannot be picked up at the center.
(1) Follow the teaching procedure in Fig. 2F61 and perform a teaching
operation on the component center position.
(2) Follow the teaching procedure in Fig. 2F69 and perform a teaching
operation on the pick-up location corrective position.
Before teaching the data for "Pickup pos correction" in the compo-
nent library data to intentionally shift the pick-up location from the
component center, it is premised that the component center posi-
tion should be grasped first. Therefore, be sure to select the [Teach
Pick-Up Pos. [Comp. Center Pos.]] button and perform the teach-
ing operation on the component center position. After that, select
the [Teach Ecc. Pick-Up Pos. [Pickup Loc. Adj.]] button.
When the center position is not grasped correctly and the
teaching operation is performed on the eccentric pick-up
location, improper values are fed back to the "X [mm]" and
"Y [mm]" text boxes of the label "Pickup pos correction" in
the component library data, causing the component library
data to lose its generality.
5.1 "Pick-Up Location" Tab
Note
0206-003 6-96
AHB01ESPP
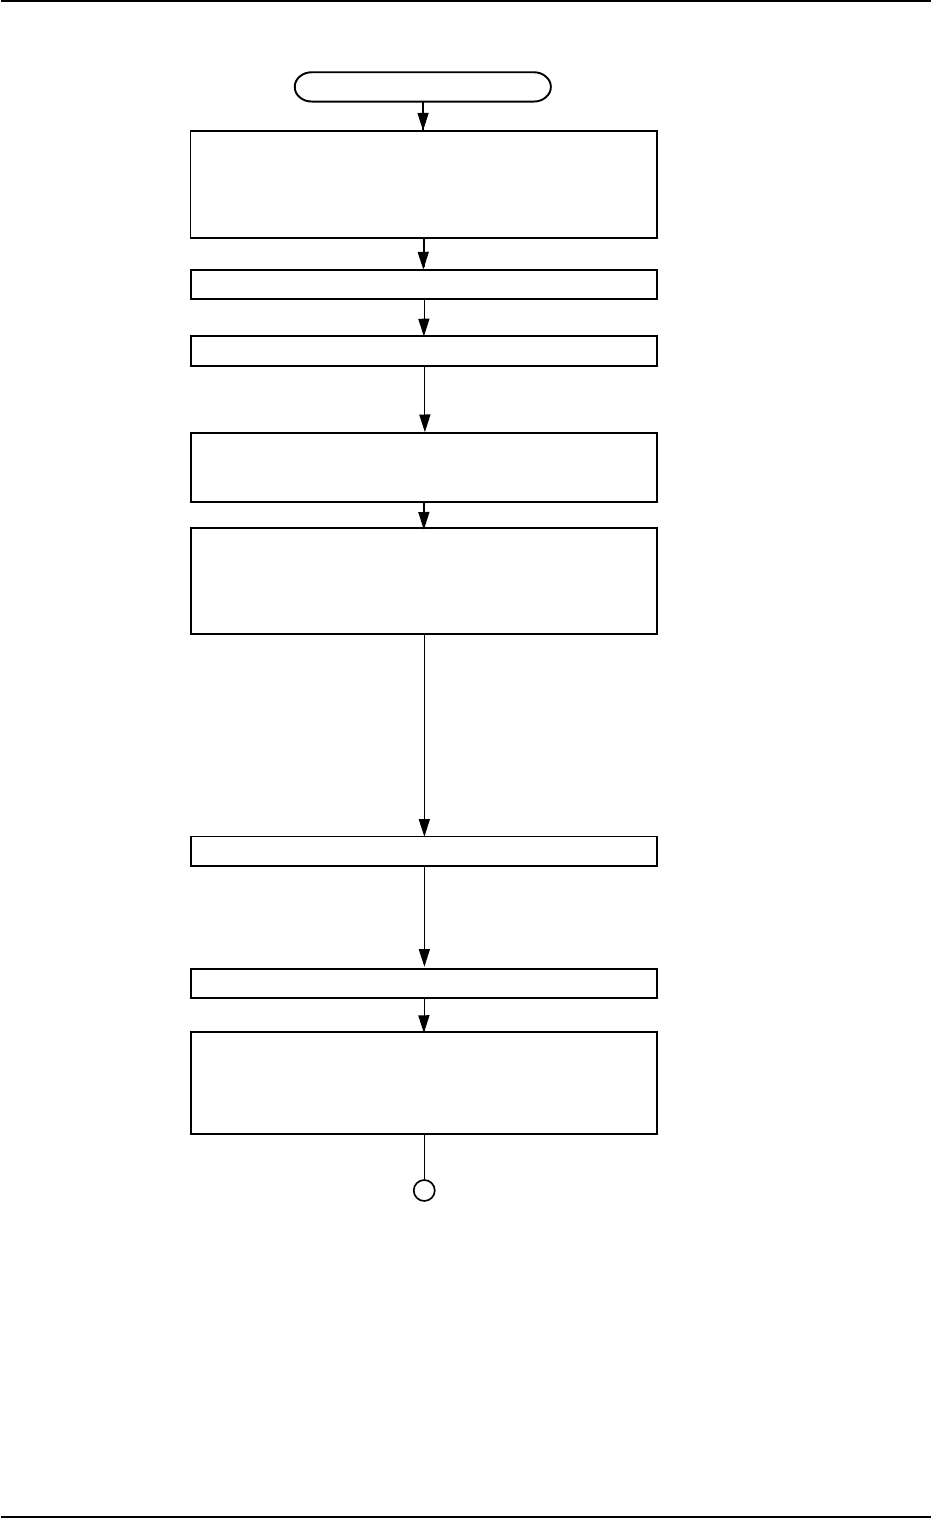
Teaching Procedure
Selection of [Tape, Vib. Stick Teach Ecc.
Pick-Up Pos. [Pickup Loc. Adj.]]
Button in Fig. 2F57
Selection of Head
Setting of Objective Feeder No. for Teaching
Refer to "5.1.4 "Feeder No. Set" Sheet"
for details.
Selection of [Teach Ecc. Pick-Up Pos.
[Pickup Loc. Adj.]] Button
Press the [ENABLE] button on the operation
panel in 2 seconds after the [ON] button
(entitled "MOVE").
An image is taken into the pick-up loca-
tion corrective position of the objective
feeder for teaching by the P.E.C. recog-
nition camera.
The pickup position correction data set
up at teaching execution is reflected.
Positioning Operation with Pointing Device
Refer to "Pointing Device Operation" (de-
scribed later) for details.
Selection of [End] Button
Selection of [YES] Button in "Confirmation"
Dialog Box for Replacement of
Component Library Data
Fig. 2F69
5.1 "Pick-Up Location" Tab
0206-003 6-97
AHB01ESPP
••
••
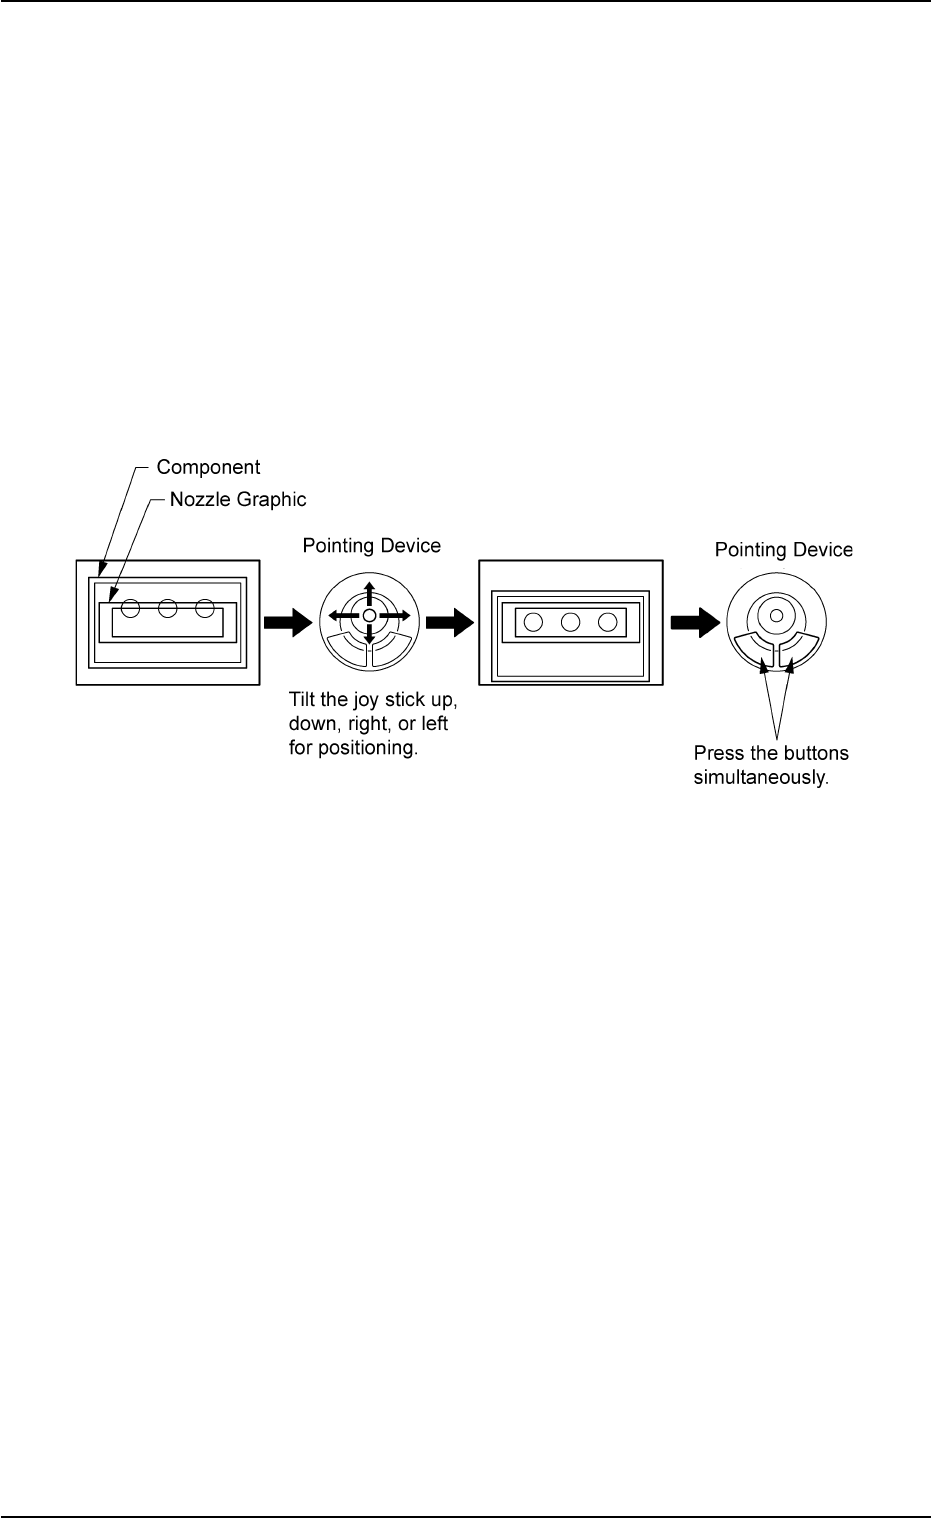
• Pointing Device Operation
"Eccentric Pick-Up Position Teaching Operation (Pick-Up Posi-
tion Correction"
(1) When the [ENABLE] button on the operation panel is pressed in 2
seconds after the [Eccentric Pt.] button and the [ON] button (en-
titled "MOVE"), the P.E.C. recognition camera moves to the speci-
fied feeder No. position.
The graphic of the nozzle appears on the recognized image.
(2) Make an alignment with the pointing device and press the right and
left buttons simultaneously.
Fig. 2F70
5.1 "Pick-Up Location" Tab
0206-003 6-98