2OM-1075-002.pdf - 第440页
AHB01ESPP 5.21 "Head Master Offset" T ab *4 T eaching Operation Selection Buttons The following buttons are provided. [All Beam Heads Zero] Button: When this button is pressed, all X/Y beams are zeroed. [T each…
AHB01ESPP
5.21 "Head Master Offset" Tab
The corresponding tab sheet enables the operator to perform a teach-
ing operation on the head master offsets.
This teaching operation must be performed only by our service
personnel.
••
••
• Sheet Layout
When the "Head Master Offset" tab is pressed in the "TEACHING" win-
dow (submenu), the following tab sheet appears inside the window.
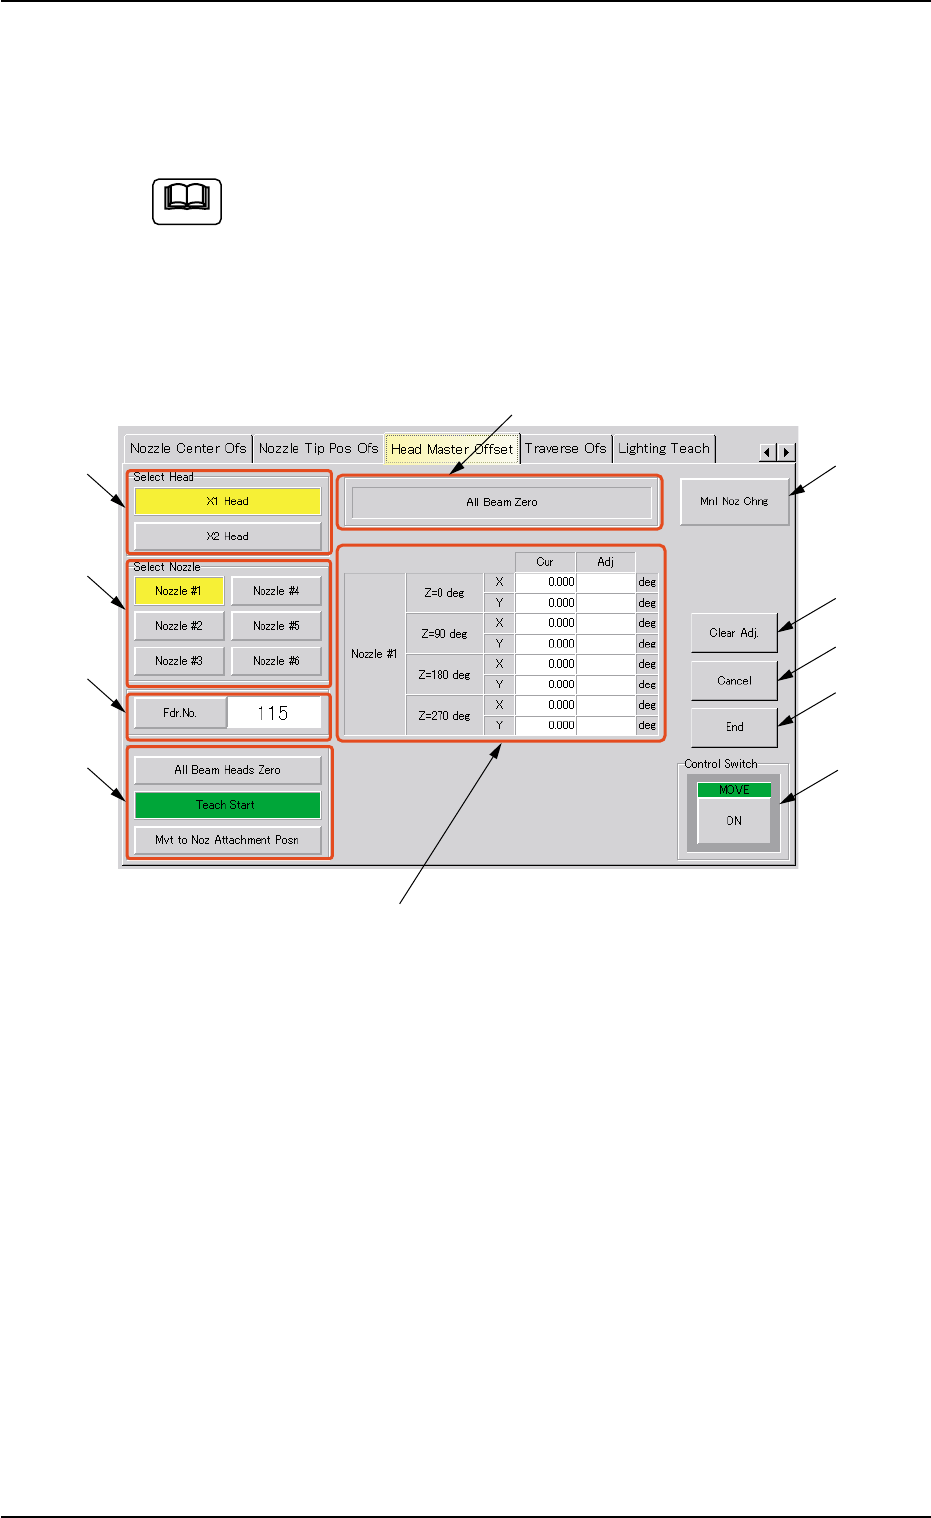
Fig. 2F132 "Head Master Offset" Tab Sheet
••
••
• Sheet Composition
*1 "Select Head" Group Box
Select the head to be used for teaching operations.
The following buttons are provided in this group box.
[X1 Head] and [X2 Head] Buttons
*2 "Select Nozzle" Group Box
Select the nozzle position to be taught.
*3 Fdr. No.
When this button is pressed, the "Fdr. No." edit window opens. En-
ter the feeder No. to which the head must be moved, using the ten-
key pad.
5.21 "Head Master Offset" Tab
Note
*2
*1
*3
*4
*8
*9
*10
*11
*7
*6
*5
0308-004 6-205

AHB01ESPP
5.21 "Head Master Offset" Tab
*4 Teaching Operation Selection Buttons
The following buttons are provided.
[All Beam Heads Zero] Button:
When this button is pressed, all X/Y beams are zeroed.
[Teach Start] Button:
When this button is pressed, a teaching operation is per-
formed, using the selected head.
[Mvt to Noz Attachment Posn] Button:
When this button is pressed, the head moves to the speci-
fied feeder No. (Fdr. No.) position.
*5 Offset Values
Displayed are the current values and the adjusted ones after teach-
ing.
*6 Set Status
When "All Beam (Incl. NC Axis) Heads Zero" is completed, the back-
ground color of "All Beam Zero" turns green. (Otherwise, the back-
ground has no color.)
(a) When each device is not zeroed and the teaching op-
erations are performed, note that the offset values may
not be taught correctly.
(b) Before performing a teaching operation, be sure to
zero all beams.
*7 [Mnl Noz Chng] Button
When this button is pressed, the "Nozzle Change" sheet appears.
Refer to "4.3 "Nozzle Change" Tab" for details.
*8 [Clear Adj.] Button
When pressed, this button clears the results of the teaching opera-
tion.
*9 [Cancel] Button
When pressed, this button ends the results of the teaching opera-
tion without reflecting them on the offset data.
*10 [End] Button
When this button is pressed, a "Confirmation" dialog box opens.
When the [YES] button is pressed, the results of the teaching op-
eration are reflected on the offset data and the dialog box closes.
*11 "Control Switch" Group Box
Select one of the teaching item selection buttons and press the [ON]
button (entitled "MOVE"). After that, press the [ENABLE] button on
the operation panel in 2 seconds. A teaching operation is performed
on the selected item.
Note
0308-004 6-206
AHB01ESPP
5.22 "Lighting Teach" Tab
The corresponding tab sheet makes it possible to teach various kinds of
lighting-related parameters.
This teaching operation must be performed only by our service
personnel.
••
••
• Sheet Layout
When the "Lighting Teach" tab is pressed in the "TEACHING" window
(submenu), the following tab sheet appears.
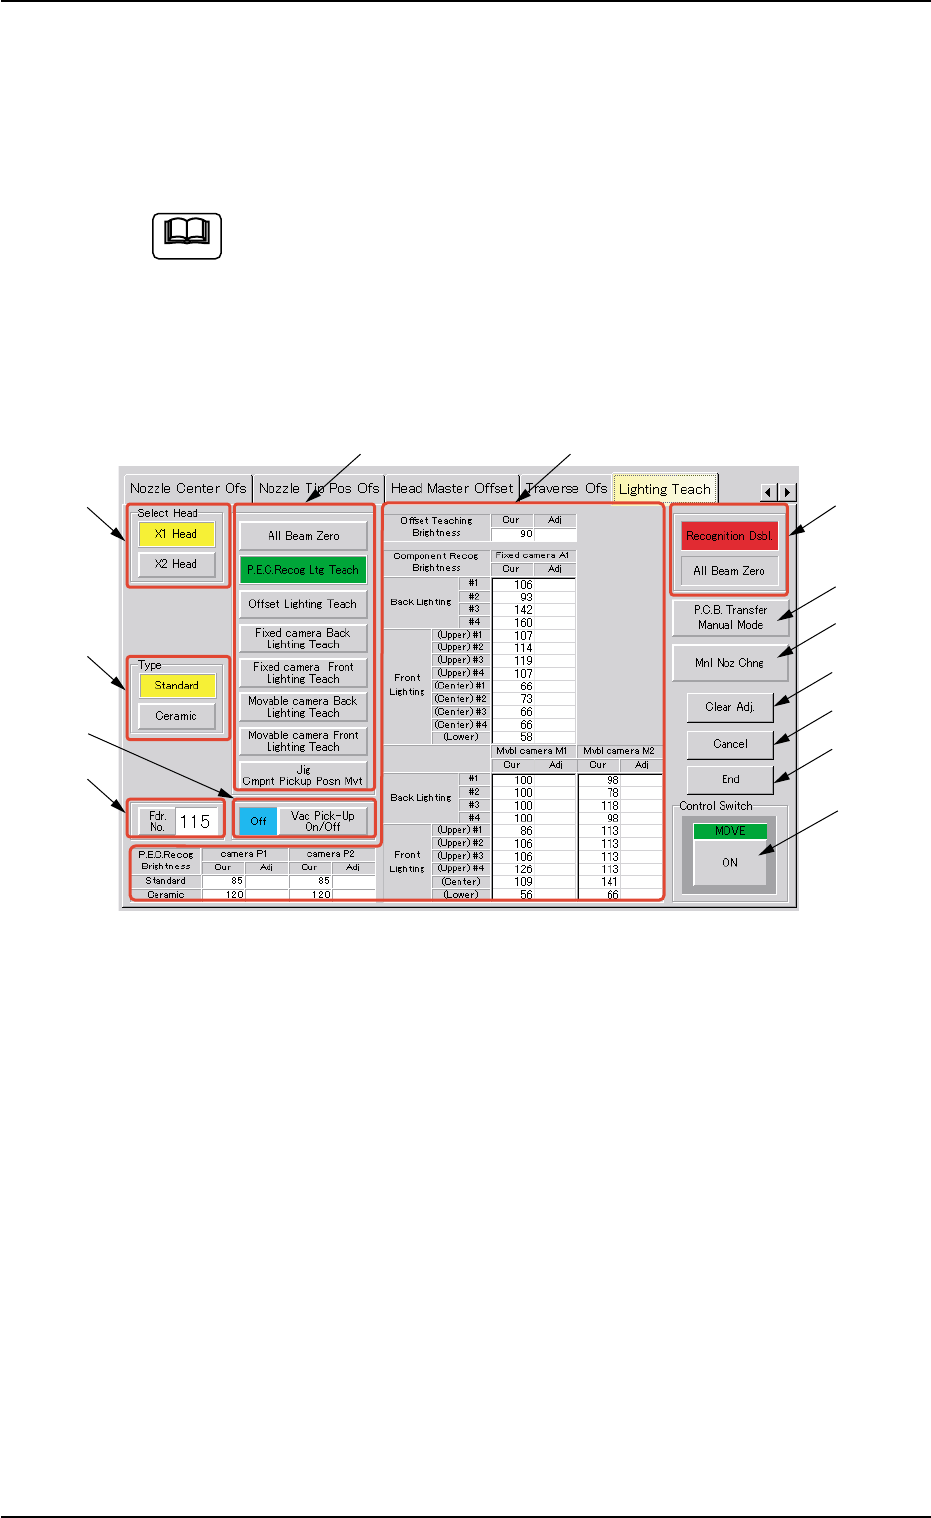
Fig. 2F132-1 "Lighting Teach" Tab Sheet
The tab sheet may look different, depending on which options are se-
lected.
••
••
• Sheet Composition
*1 "Select Head" Group Box
Select the head to be used for teaching operations.
The following buttons are provided in this group box.
[X1 Head] Button
When this button is pressed, a teaching operation is performed,
using the X1 head.
[X2 Head] Button
When this button is pressed, a teaching operation is performed,
using the X2 head.
Note
*2
*1
*3
*5
*8
*9
*10
*11
*12
*13
*7
*6
*4
5.22 "Lighting Teach" Tab
0308-001 6-206-1