Nordson-EFD-Series-450-Instructions.pdf - 第13页
Series 450 Autovalve / Snuff Back | Instructions / Parts Lists 13 www.nordsonefd.com info@nordsonefd.com +1-401-431-7000 Sales and service of Nordson EFD dispensing systems are available worldwide. Accessories Carbon Ste…
Series 450 Autovalve / Snuff Back | Instructions / Parts Lists
12 www.nordsonefd.com info@nordsonefd.com +1-401-431-7000 Sales and service of Nordson EFD dispensing systems are available worldwide.
AV-RK-TGT #7704093
Ref. No. Qty. Description
13 2 PTFE Front Seal
3 6 UHMPE U-cup & SS Spring
6 6 PTFE encapsulated O-ring
AV-RK-TPV #7704095
Ref. No. Qty. Description
13 2 PTFE Front Seal
3 6 PU U-cup & Viton O-ring
6 6 Viton (brown) O-ring
AV-RK-TTT #7704096
Ref. No. Qty. Description
13 2 PTFE Front Seal
3 6 PTFE U-cup & PTFE O-ring
6 6 PTFE encapsulated O-ring
Spare Parts Kits
450 Autogun Repair Kits
Each kit contains a complete set of lip seals, O-rings, and front seals.
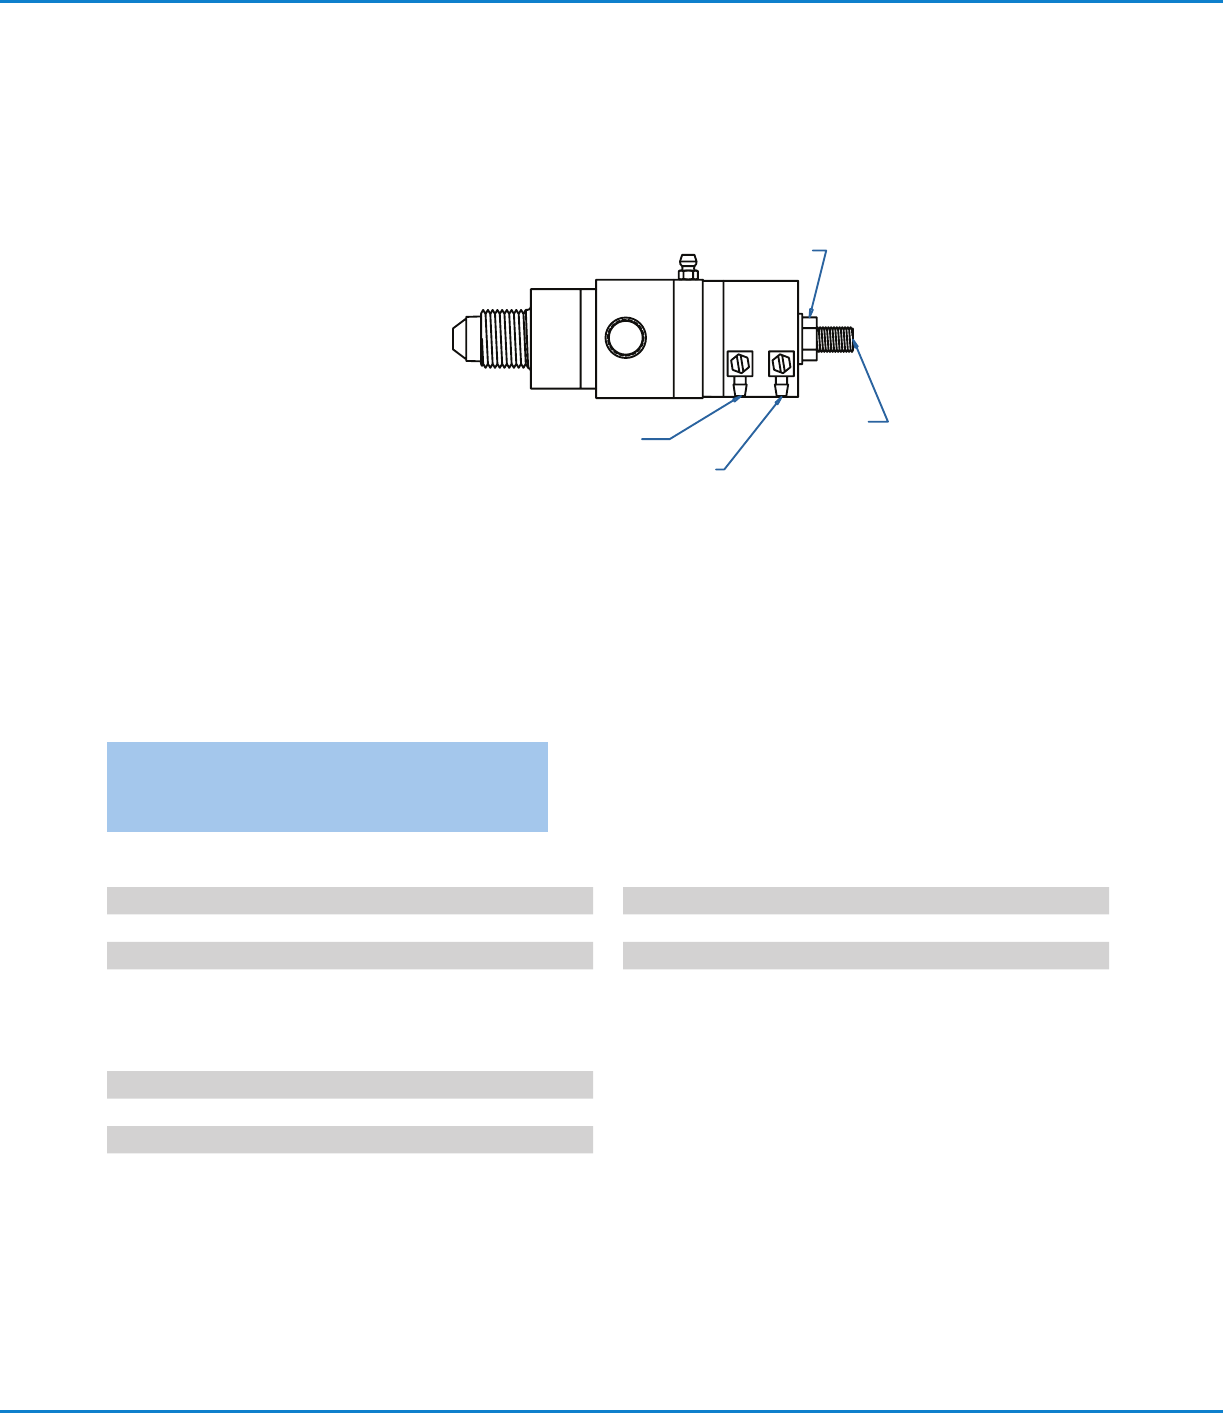
450 Autovalve with Snuff-Back
Snuff-Back Adjustment: Advancing (clockwise turn) the snuff-back adjustment screw reduces snuff-back, retracting it
(counterclockwise) increases the snuff-back. Since excessive snuff-back action can cause plugging of the valve, adjust for
minimum snuff-back as follows: With the pumps on and valve in the “closed” position, advance the adjustment screw until
material begins to drool out of the static mixer (acting as if the valve is open). Then retract the screw just until fluid stops, at
the minimum snuff-back position. If material drools or drips during operation, slightly increase the snuff-back until the desired
action is achieved.
Locking nut
Connect air to close
Snuff-back
adjustment
screw
Connect air to open
NOTE: Each 450 AutoGun comes with (2) front seals to be
discarded.
Consult Factory for additional seal combinations.
Series 450 Autovalve / Snuff Back | Instructions / Parts Lists
13www.nordsonefd.com info@nordsonefd.com +1-401-431-7000 Sales and service of Nordson EFD dispensing systems are available worldwide.
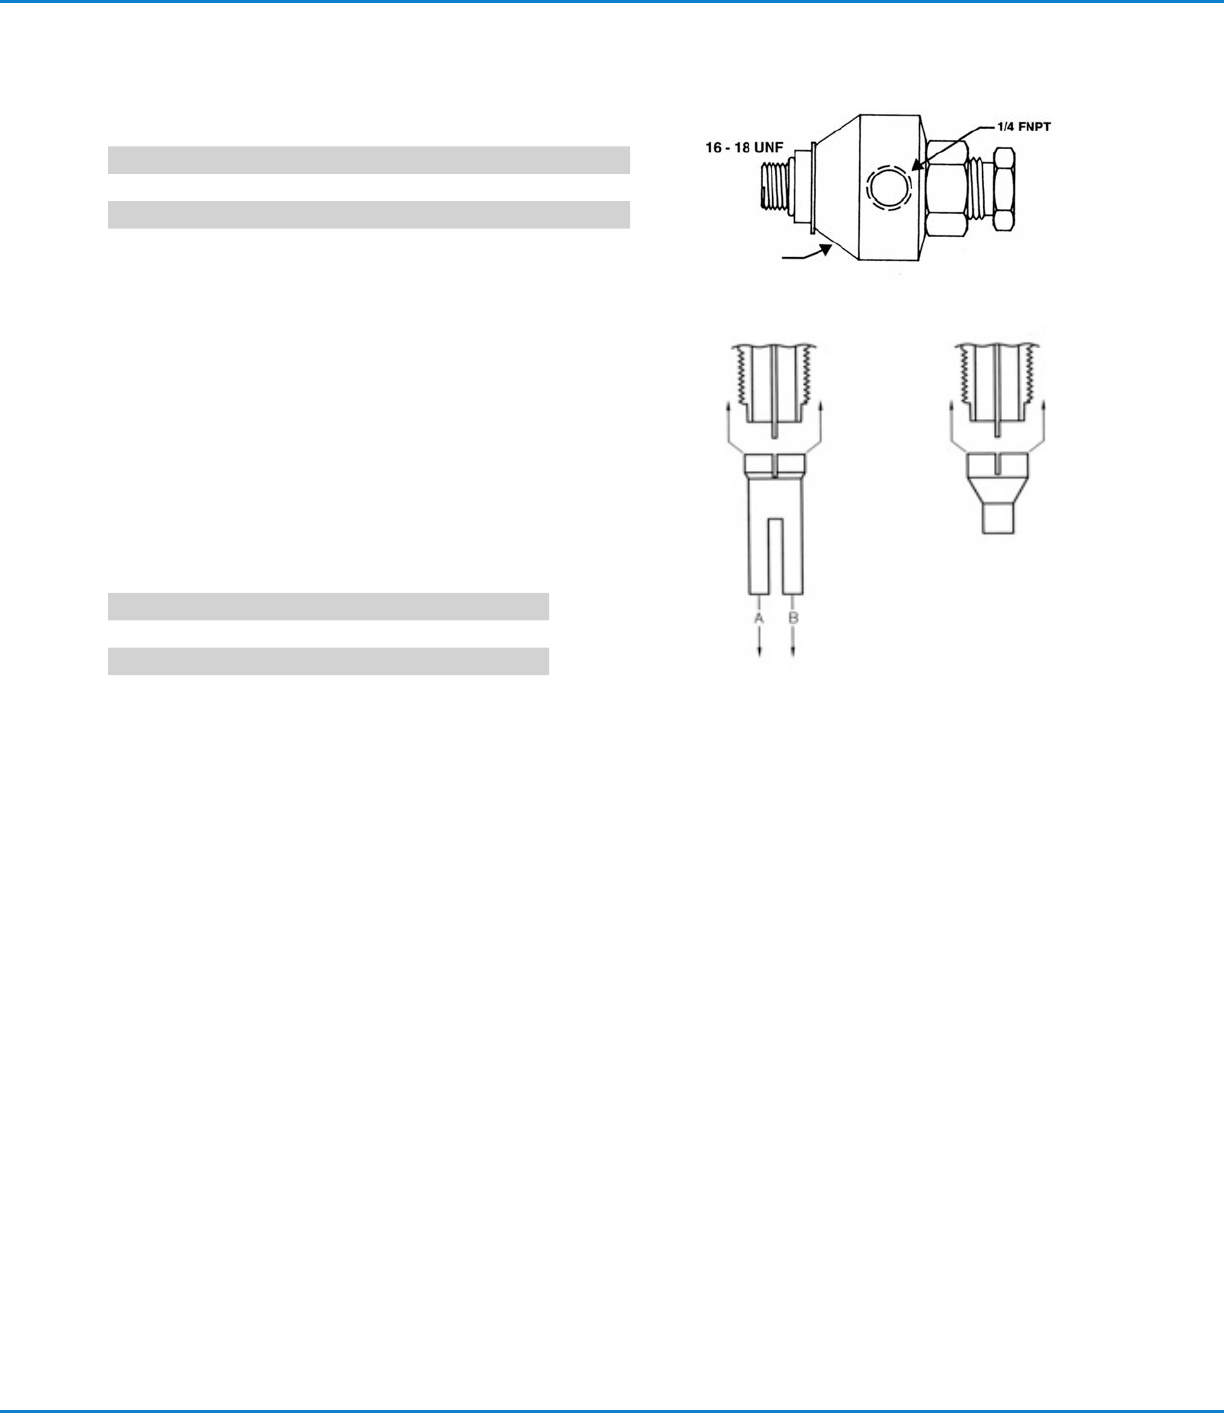
Accessories
Carbon Steel Adapters
P/N Description
7702420 90 degree Elbow with 3/8 FNPS
7702425 Straight Adapter with 3/8 FNPS
Collar
Ratio Check Cap
In order to ensure correct A/B ratio, ratio checks
should be performed regularly with our Ratio Check
Cap.
Night Cap
At night or on weekends, it is a good idea to seal your
system. After the static mixer is removed, a night cap
can be installed. This seals the system and makes
startup simpler.
P/N Description
7701184* Ratio Check Cap with retaining nut
7701181* Night Cap with retaining nut
*Use with 1:1 ratio manifolds only.
Ratio check
Night cap
Manifold Manifold
Series 450 Autovalve / Snuff Back | Instructions / Parts Lists
For Nordson EFD sales and service in over
40 countries, contact Nordson EFD or go to
www.nordsonefd.com.
Global
800-556-3484; +1-401-431-7000
info@nordsonefd.com
Europe
00800 7001 7001
infoefd.europe@nordsonefd.com
Asia
China: +86 (21) 3866 9006; china@nordsonefd.com
India: +91 80 4021 3600; india@nordsonefd.com
Japan: +81 03 5762 2760; japan@nordsonefd.com
Korea: +82-31-736-8321; korea@nordsonefd.com
SEAsia: +65 6796 9522; sin-mal@nordsonefd.com
Viton is a registered trademark of E.I. DuPont.
The Wave Design is a trademark of Nordson Corporation.
©2024 Nordson Corporation 7703864 v043024
Troubleshooting
Problem Possible Cause Solution
No flow Manifold clogged Remove manifold and clean
Air pressure too low Requires 5.5bar (80psi) inlet pressure
Air valve damaged See Note 1 below
Valve fouled See Note 2 below
Disassemble (see Maintenance)
Valve leaks Snuff-back Retract snuff-back screw (70)
Spool valve (75) clogged See Note 3 below
Seals (3) worn Replace seals (see Maintenance)
Spool valve (75) worn Inspect and replace if required
Valve drools Air trapped in valve Replace seals (see Maintenance)
Seals (3) worn Review Startup procedure
Off ratio A:B Metering pumps Check pumps
A & B back up into tie plate Seals (3) damaged Replace back lip seals (page6)
Material not mixing Mixer fouled Replace mixer
Off ratio A:B Take ratio check
Mixer leaks Manifold fouled Clean nose of manifold
Lip seals deteriorated Chemical attack See Maintenance
NOTE 1: Inspect air cartridge valve (103) in handle (90). The On-Off function of the valve is controlled by this cartridge valve
in the handle. The air cylinder requires air in the front to close and air in the back to open.
To inspect the cartridge valve, disconnect the two air lines on the air cylinder (1). When the trigger is depressed, air should
be flowing only through the back air line and not through the front air line. When the trigger (91) is released the air should
reverse.
NOTE 2: Advance the snuff-back screw (70) and pulse air into the air cylinder. Repeat 3 or 4 times.
NOTE 3: First release the pressure on the A and B hoses. Remove the manifold and advance the snuff-back screw (70) until
the spool valves are protruding from the seat plate (8). With a toothbrush or rag soaked in solvent, brush the valves clean.
After cleaning, depress trigger to retract spool valve.