00198045-01_OM_BulkFeeder_X_EN.pdf - 第30页
SIPLACE BulkFeede r X / Operating Ma nual 05/2017 Edition 30 Figure 5-1: Starting automatic cal ibration
SIPLACE BulkFeeder X / Operating Manual 05/2017 Edition
29
5.1.1 Inserting the Feeder in the Placement Machine
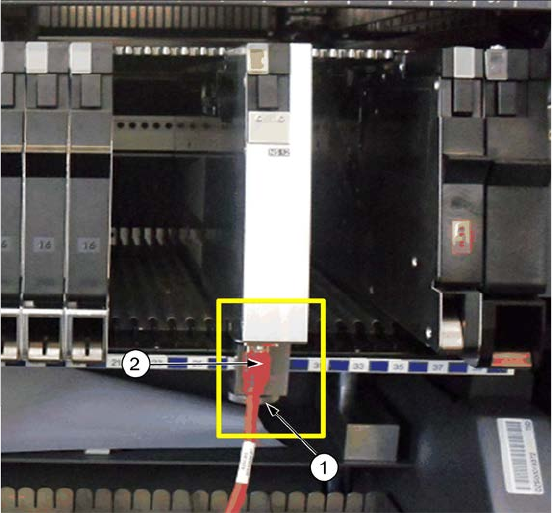
Position the feeder with the ►
front sliding guide onto the
Omega profile for the
required track on the
changeover table.
Tighten the mechanical ►
mount (1) of the Base Unit
with the knurled screw on
the table.
Connect the camera cable ►
(2) into the corresponding
connector on the Base
Unit.
The login procedure starts automatically. The status display LED lights up green when the login
procedure has been completed successfully and the feeder is defined in the current setup.
5.2 Calibrating the Feeder
The full calibration has to be carried out the first time when the feeder is set up or if the feeder is
opened and relevant parts are exchanged, such as camera, lens, illumination etc.
Relevant data is stored in the feeder memory. If the feeder is inserted again, the calibration must
not be carried out. The data, necessary for further actions is read from the feeder. However, if the
stored data is invalid or corrupt, the full calibration has to be carried out.
The stored data is:
– scale factor at a specific height
– offset (x, y, phi) feeder camera
– glass plate height
Additionally, a contamination check of the glass plate is performed. Dependent on the
contamination grade, the operator is prompted to clean the glass plate manually and perform
another reference run, see section 5.7 Cleaning the Glass Plate.
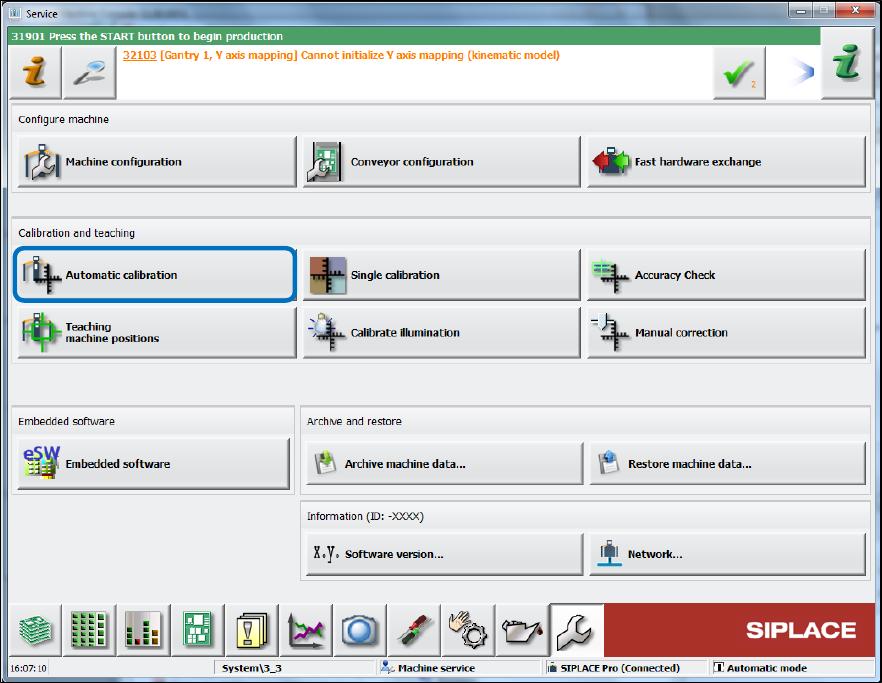
Start the full calibration under Service – Automatic calibration on the station software GUI. ►
SIPLACE BulkFeeder X / Operating Manual 05/2017 Edition
30
Figure 5-1: Starting automatic calibration
SIPLACE BulkFeeder X / Operating Manual 05/2017 Edition
31
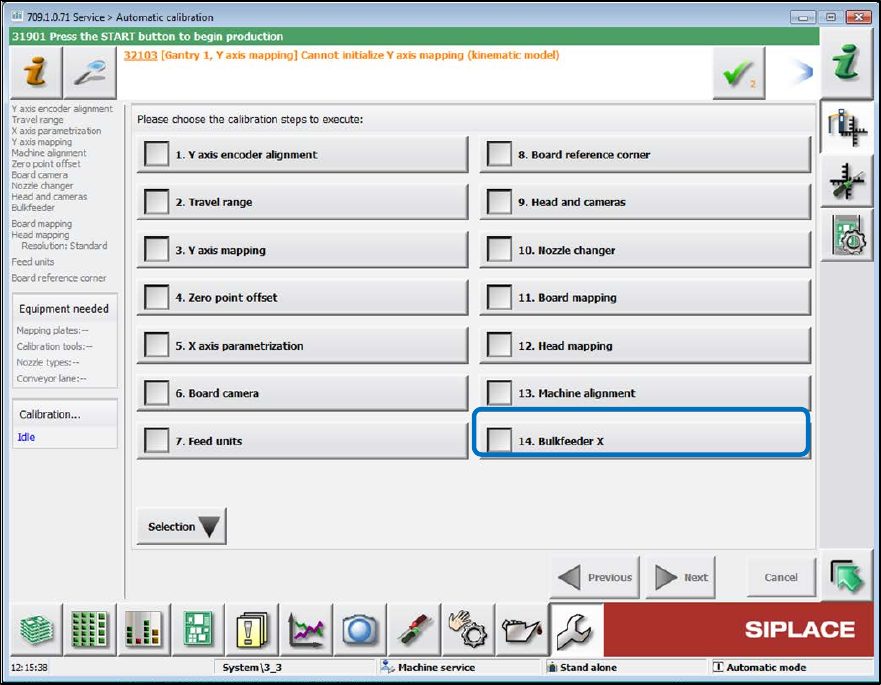
Select the Bulkfeeder option in the next dialog box. ►
Figure 5-2: Selecting BulkFeeder X