00197458-01_UG_EDM_V2.2_en - 第33页
EDM V2.2 / U ser Guid e Ausgabe 10/2013 E dition 33 Figure 4- 23 : Displaying diff erences in the line data The m aster version is displa yed on the l eft side and t he cli ent version o n the right side and t he assigne…
EDM V2.2 / User Guide Ausgabe 10/2013 Edition
32
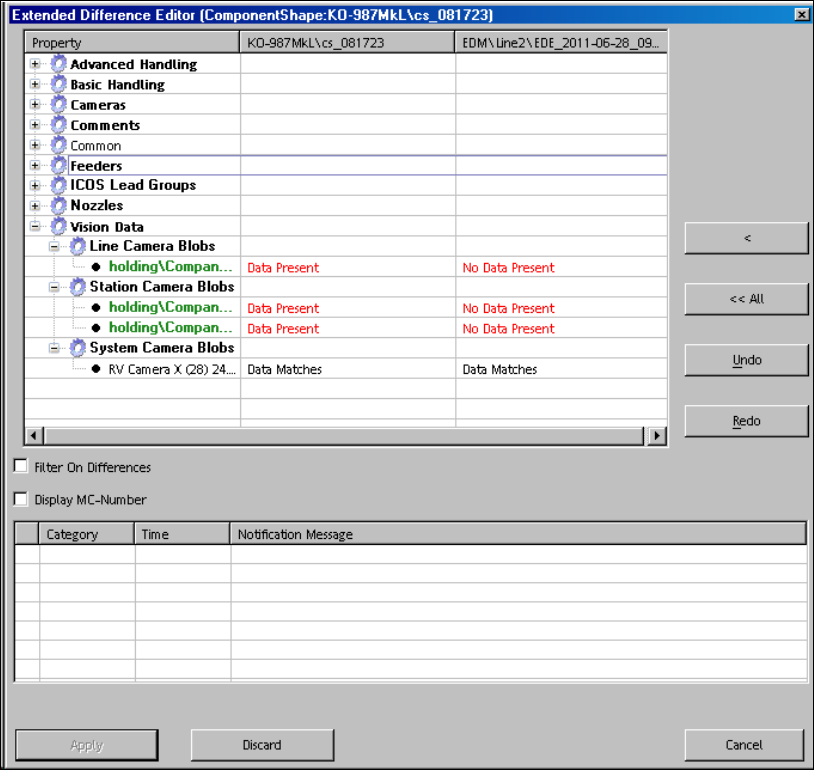
Figure 4-22: Extended Different Editor
► Use < to merge a single change.
► Use << All to merge all changes.
► Use the Undo and Redo buttons to undo / redo the merges made with the other buttons.
4.4.2 Handling Changed Line Vision Data
The selective acceptance of changed line Vision data for assigned SIPLACE Pro lines has been
optimized as follows:
Notifications with changed line Vision data and a list of the assigned SIPLACE Pro lines are
transferred from the Line Server to the Clearing Pool. The list of the assigned SIPLACE Pro lines is
passed to the Extended Difference Editor (EDE) in SIPLACE Pro.
By double-clicking or clicking with the right-hand mouse button on an object and selecting the
Validate Changes… entry in the context menu, the EDE is started and displays all differences in
the line data.
EDM V2.2 / User Guide Ausgabe 10/2013 Edition
33
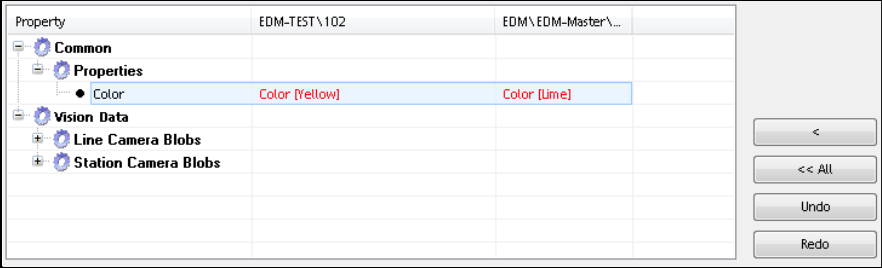
Figure 4-23: Displaying differences in the line data
The master version is displayed on the left side and the client version on the right side and the
assigned SIPLACE Pro lines are highlighted. The data preparation engineer accepts the changed
line Vision data for all assigned SIPLACE Pro lines by clicking the <<All button.
The differences for line data of non-assigned SIPLACE Pro lines can be accepted with the <
button.
4.4.3 Selecting Multiple Objects
The Clearing Pool supports the selection of multiple objects to be accepted or rejected for import.
Multiple objects on the same level may be selected as follows:
► Select the first object with Left mouse click.
► Select the second object with Shift + Left mouse click.
If multiple objects from different tree nodes shall be selected, each of them has to be selected
individually with Ctrl + Left mouse click.
EDM V2.2 / User Guide Ausgabe 10/2013 Edition
34
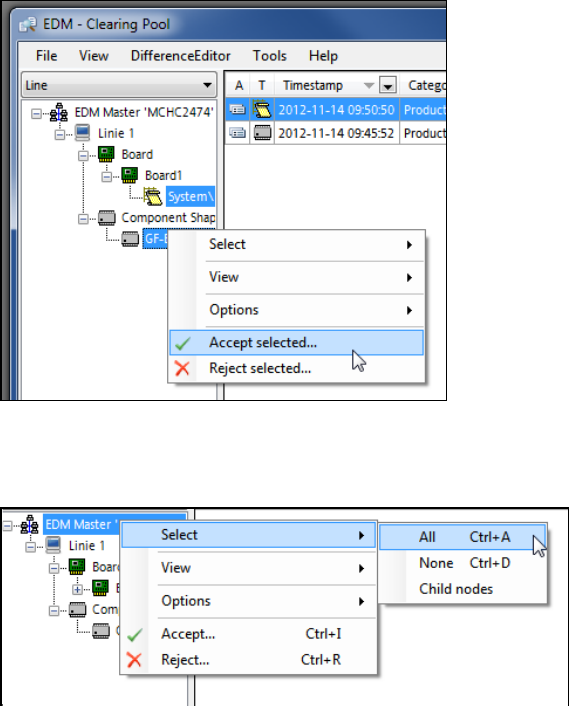
Figure 4-24: Manual selection of multiple objects
On a tree node, the user can select all objects (Select – All) or only the child nodes (Select –
Child nodes).
Figure 4-25: Selecting objects