1OM-1625-004_w.pdf - 第145页
1OM-1603 3-22 2. Program Change Operation : Chap.3 (4) While holding the nozzle stocker by hand, push down the lever of the nozzle stocker section and detac h the nozzle stocker from the nozzle st ocker section. Nozzle S…
1OM-1603
3-21
2. Program Change Operation : Chap.3
•
Procedure of Vacuum Nozzles Replacement
Procedure
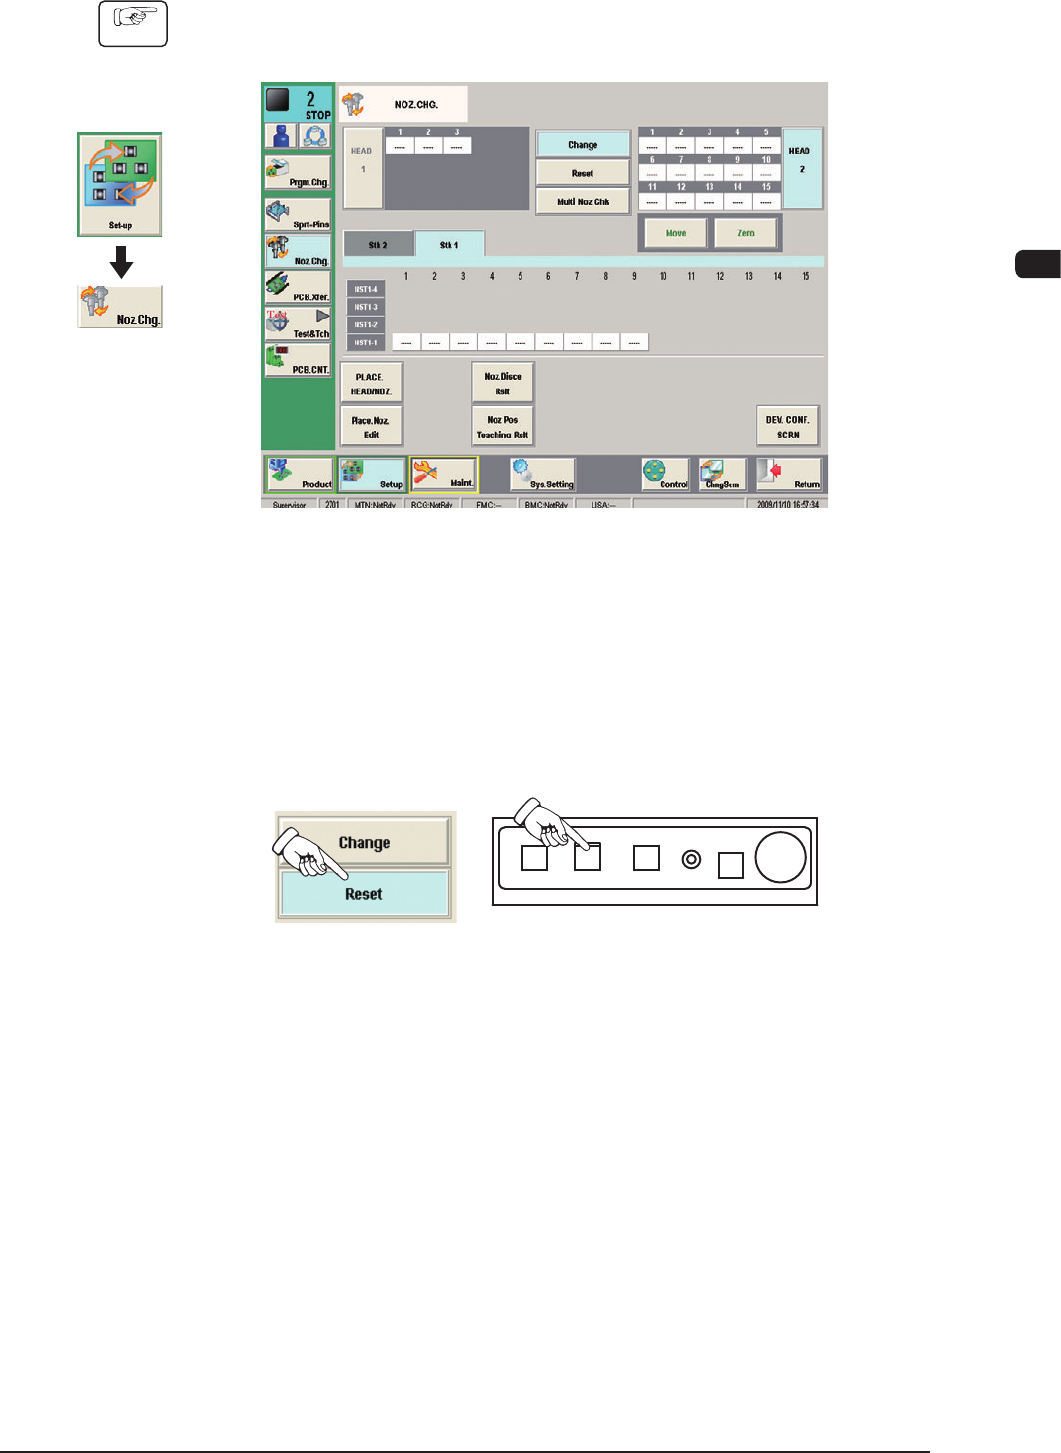
(1) Press the [Noz Chg] button in the submenu on the [Setup] window.
(The "NOZ CHG." window will be opened).
F1C16
(2) Press the [Reset] button.
(3) Press the [MOVE] button and then, within 10 seconds, press the [START]
button on the operation panel.
(The vacuum nozzle on the placement head will be housed in the nozzle
stocker).
F1C17
Graphic
Development
1012-005
1OM-1603
3-22
2. Program Change Operation : Chap.3
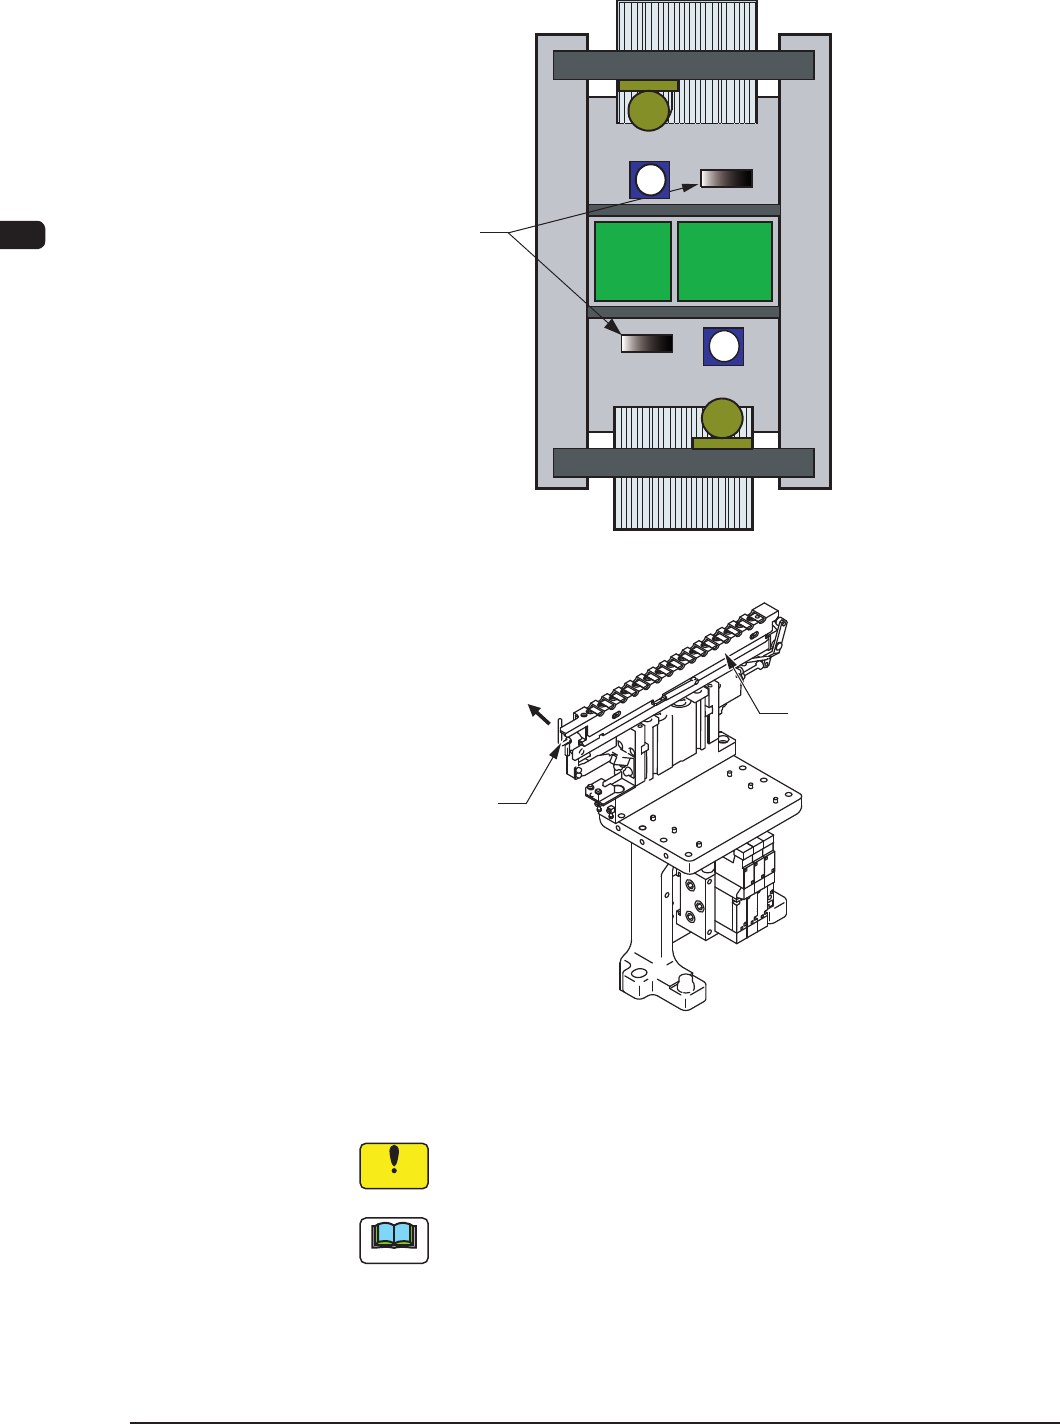
(4) While holding the nozzle stocker by hand, push down the lever of the nozzle
stocker section and detach the nozzle stocker from the nozzle stocker section.
Nozzle
Stocker Section
F1C18
Nozzle Stocker
lever
Push down the lever
F1C18-1
(5) Slide the nozzle stocker shutter and detach all vacuum nozzles.
Notice
Whenever the vacuum nozzles are stored in or picked up from the
nozzle stocker, slide the nozzle stocker shutter.
Note
It is advisable that the vacuum nozzles required after a program change
operation be prepared beforehand in the nozzle stocker change unit
(accessory part) because the time for vacuum nozzle change operation can
be shortened.
1012-005
1OM-1603
3-23
2. Program Change Operation : Chap.3
(6) Slide the nozzle stocker shutter and set all vacuum nozzles to be used in the
nozzle stocker.
If this section is held too strongly,
it might be damaged. Do not give
the force of 200g or more.
Vacuum Nozzle
Slide the nozzle stocker shutter and
attached the vacuum nozzle.
Correct Attachment
Incorrect Attachment
Vacuum nozzle being left
Nozzle Stoker Shutter
F1C18-2
Notice
(a) Attach the vacuum nozzles correctly in the nozzle stockers.
Do not operate the machine with a vacuum nozzle being left on the
nozzle stocker shutter. Otherwise, the machine will break down.
(b) When a middle-size odd-shaped nozzle must be set in a nozzle
stocker, the mark on the nozzle must face the right side (viewed
from the feeder side).
If the nozzle is set in a wrong direction, an "ERROR" window will
openduringthenozzleidentication,causing
themachinetostop
running.
(7) Attach the nozzle stocker to the machine.
(8) Press the [Change] button.
Note
When the machine is provided with an extended nozzle stocker (option)
and vacuum nozzles (to be used after a program change operation) are
prepared in the extended stocker, the nozzles are stored and attached in
succession.
(9) Press the [MOVE] button and then, within 10 seconds, press the [START]
button on the operation panel. Then, attach the vacuum nozzle onto the
placement head.
(10) Select the [Conrm] button in the "NOZ.CHG." window and press the
[START] button on the operation panel to check if the correct nozzles are
attached or not.
1012-004