00191684-01.pdf - 第17页
Retrofit Instructions S-23 HM DLM1 Revolver Hea d for S-23 HM 10/99 edition 4 Extending the vacuum hoses 17 Fig. 4 - 1 Extending the vacuum hoses A TTENTION Check ag ain with r eference to Fig. 4 - 1 that you ha ve co nn…
DLM1 Revolver Head for S-23 HM Retrofit Instructions S-23 HM
4 Extending the vacuum hoses 10/99 edition
16
4 Extending the vacuum hoses
Å Detach the vacuum hoses for the holding circuit, placement circuit and vacuum scanning for
the placement circuit from the vacuum tubes (item 1, 2 and 3 in Fig. 3 - 1) at the back of the
revolver head.
Å From the kit, insert the
– 5 mm Ø steel tube (item 2 in Fig. 4 - 1) half-way into the 40 mm long hose section (item 1
in Fig. 4 - 1).
– 4 mm Ø steel tube (item 4 in Fig. 4 - 1) half-way into the 35 mm long hose section (item 3
in Fig. 4 - 1).
– 2 mm Ø steel tube (item 6 in Fig. 4 - 1) half-way into the 30 mm long hose section (item 5
in Fig. 4 - 1).
– Push the hose extensions onto the vacuum tubes (see Fig. 4 - 1):
Extension (item 1) on item 7
Extension (item 3) on item 8
Extension (item 5) on item 9
– Push the detached hoses onto the steel tubes of the hose extension as shown in Fig. 4 - 1.
– Attach the vacuum hose for the holding circuit vacuum scan (item 11 in Fig. 4 - 1) to the
round cable holder (item 10 in Fig. 4 - 1).

Retrofit Instructions S-23 HM DLM1 Revolver Head for S-23 HM
10/99 edition 4 Extending the vacuum hoses
17
Fig. 4 - 1 Extending the vacuum hoses
ATTENTION
Check again with reference to Fig. 4 - 1 that you have connected the vacuum hoses correctly.
Malfunctions may occur at the revolver head if they are not correctly connected. 4
5
6
9
8
7
3
4
1
2
10
11
4
6
2
DLM1 Revolver Head for S-23 HM Retrofit Instructions S-23 HM
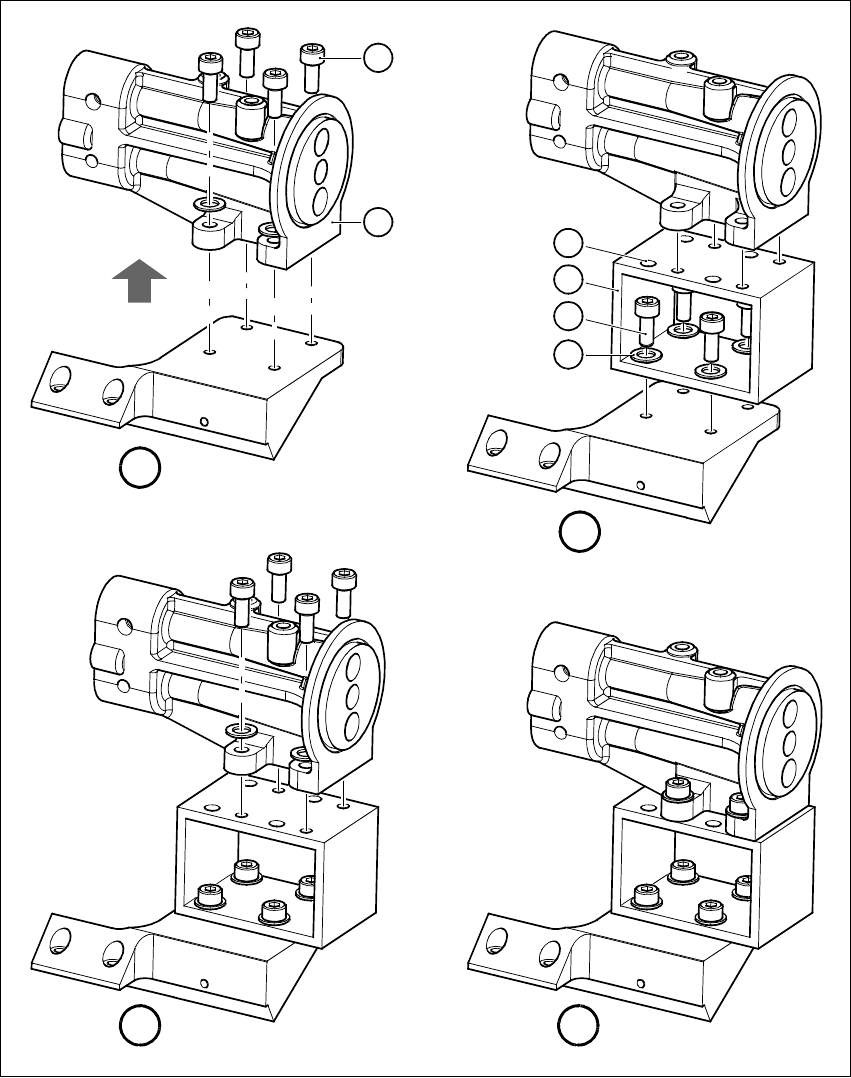
5 Raising the vacuum generator 10/99 edition
18
5 Raising the vacuum generator
5
Fig. 5 - 1 Raising the vacuum generator
1
D
C
B
2
5
3
4
6
A