CP6 series maintenancech45 周保养.pdf - 第46页
Notes: Chapter 5 Replacing Consumable Parts V ersion 1 1.0 5-1-2 CP-6 Series Maintenance
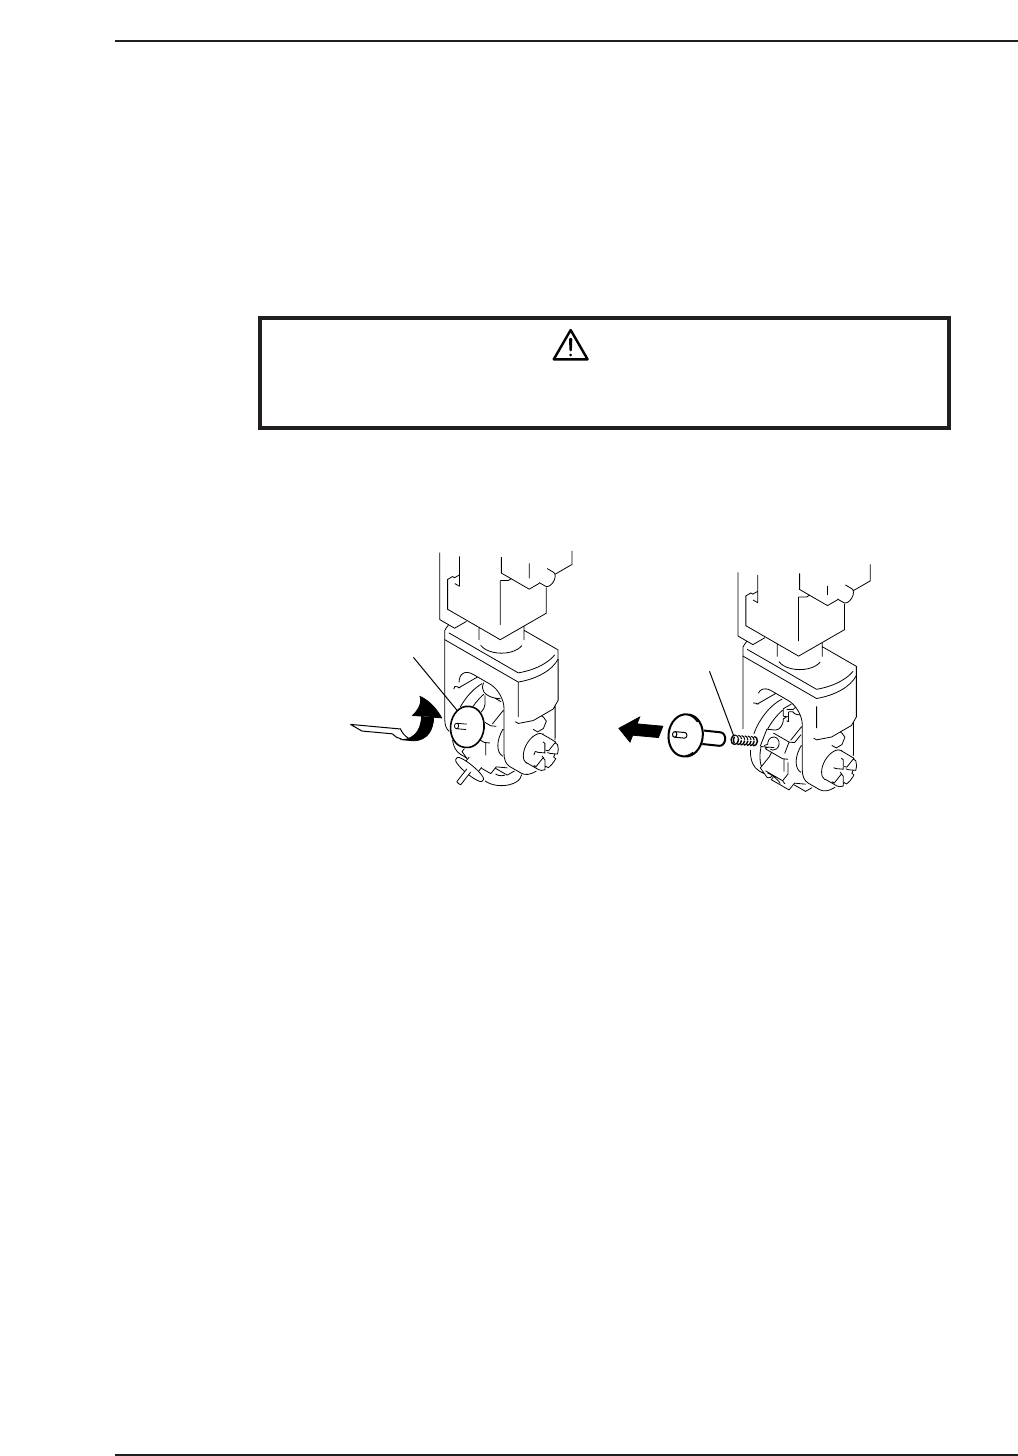
1. Nozzle Replacement
Point
Replace nozzles that become bent, deformed, or blocked. When removing the damaged
nozzle, be careful not to lose the spring loaded under it.
Procedure
Warning
Always be sure to cut out the 200 V power before carrying out any
work.
Nozzle
Spring
Push and turn
Remove slowly
CP6MR001E
Chapter 5 Replacing Consumable Parts
Version 11.0 5-1-1 CP-6 Series Maintenance

Notes:
Chapter 5 Replacing Consumable Parts
Version 11.0 5-1-2 CP-6 Series Maintenance
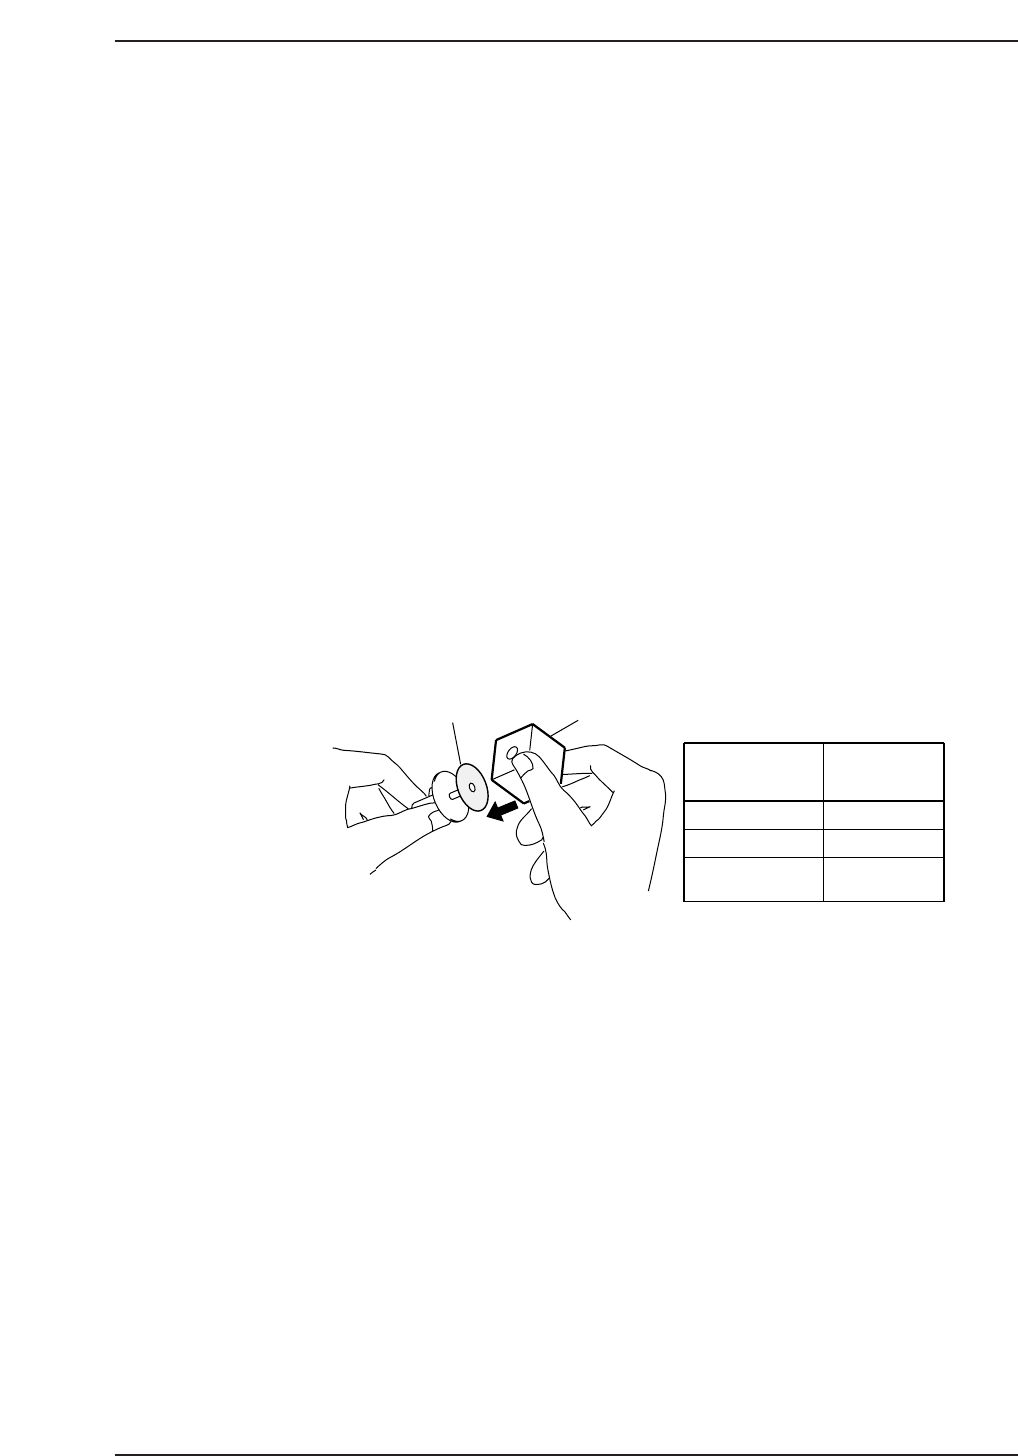
2. Nozzle Reflective Disk Replacement
Point
Replace the nozzle fluorescent seal if the seal becomes dirty and causes vision processing
errors to occur.
Procedure
1. Always wash your hands before handling the seals.
2. Choose the correct disk, referring to table below if necessary.
3. Check that the fluorescent disk is free of deformity and is clean.
4. Peel the fluorescent disk from its paper backing and remove the small circular
cutout at the center of the seal by pushing it out from the side of the seal covered
with fluorescent paint. If the cutout is pushed out from the side covered with
adhesive, some of the fluorescent paint may be torn away when the circular cutout
comes loose from the rest of the disk.
5. Match the center of the disk with the center of the nozzle. Using jig (for reflective
plate), push the disk into the nozzle as shown in figure below. Check that no
space exists between the seal and the nozzle.
6. Use an exacto knife to cut away any excess fluorescent seal.
7. Clean the fluorescent seal with a soft brush.
Reflective disk
Jig
Reflective
disk size
Jig No.
ø12 ~ 20
❒22
❒22, ❒29
(Plane type)
WPJ0770
AWPJ9101
YPJ0700
CP6MR002E
Chapter 5 Replacing Consumable Parts
Version 11.0 5-2-1 CP-6 Series Maintenance