YSH20_Ope_E.pdf - 第91页
2-34 2 asic operation 4.1.3 Installation on the machine Observe the following instructions for installing a tape feeder on the mac hine. e 1 Pr ess the emergency stop button and then open the cover . Press the emergenc…
2-33
2
asic operation
3
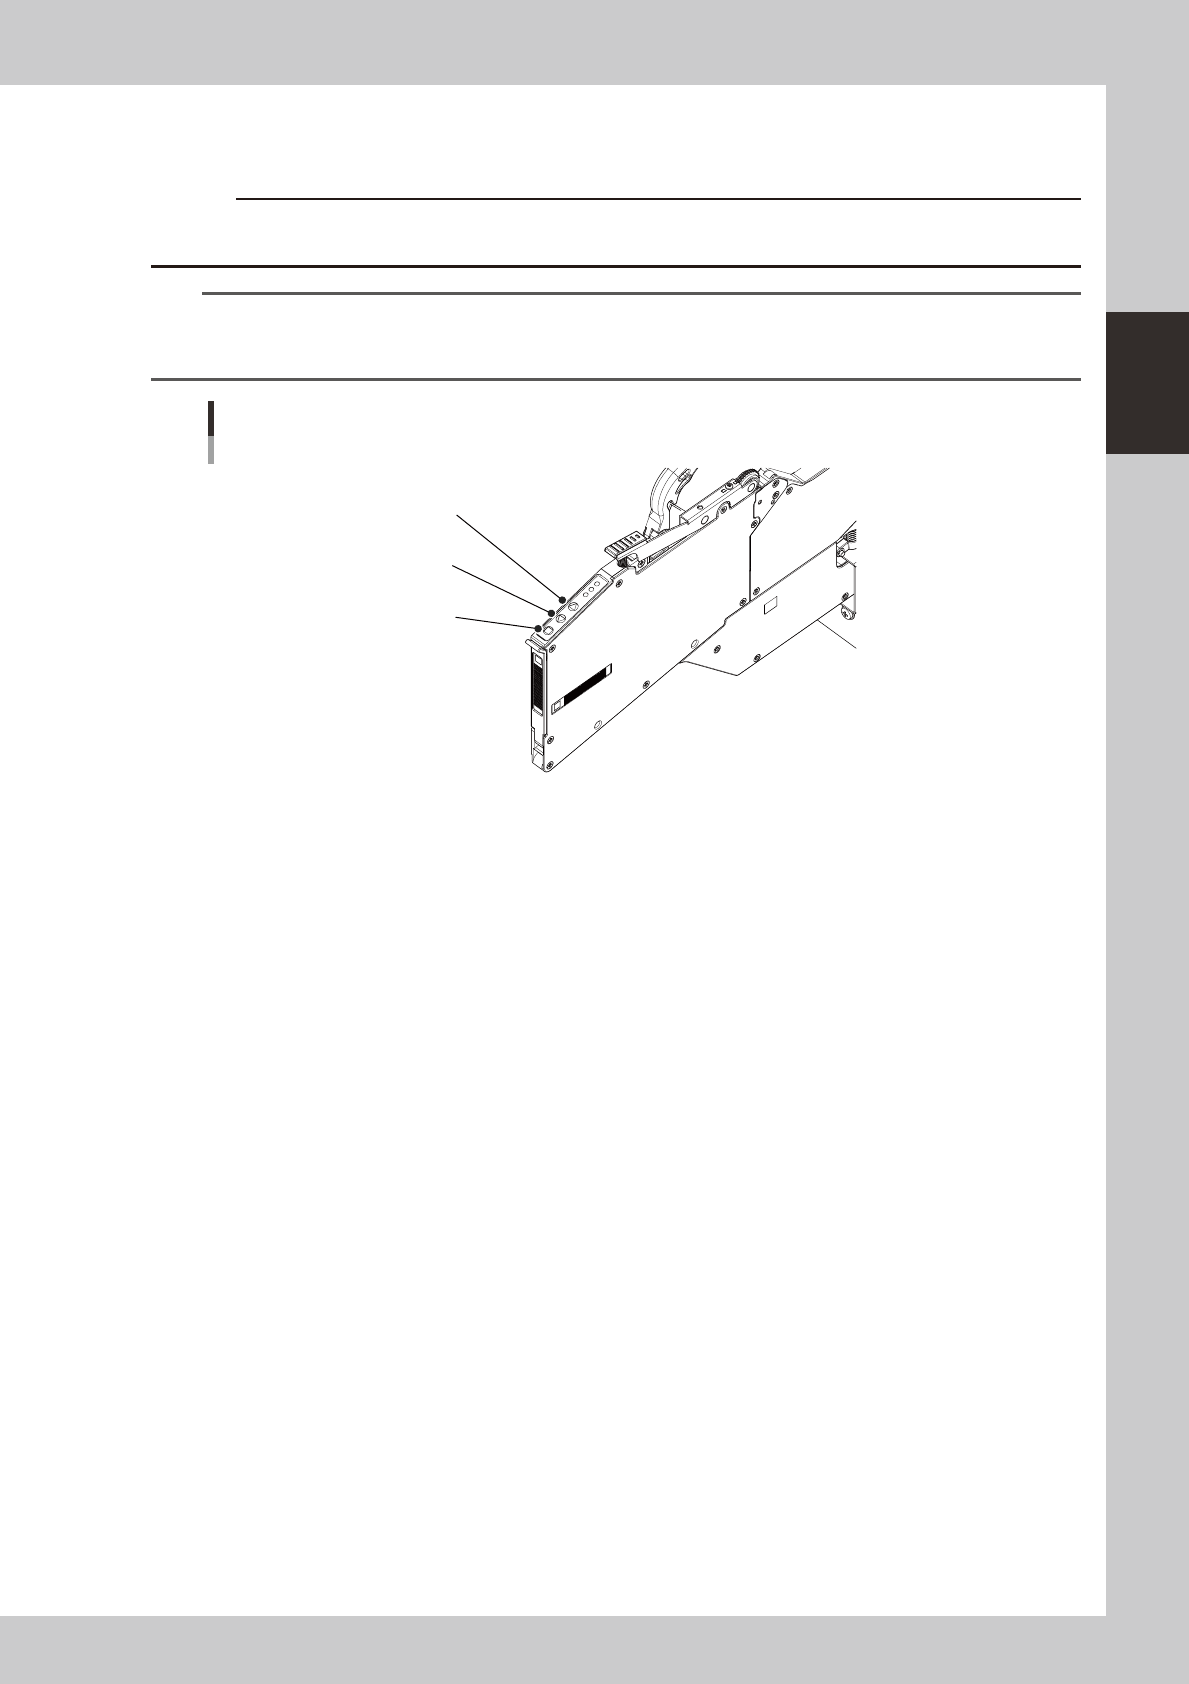
Check the tape feed operation.
Press the [FEED] button on the feeder body to check that the tape is fed at the correct pitch.
c
advance the carrier tape.
TIP
• The feed pitch will always be 2 mm each time the [FEED] or [BACK] button on the feeder body is pressed,
regardless of the pitch setting. Holding down either of these buttons feeds the tape continuously.
• Use the [FUNC]+[FEED] buttons to feed the tape at the feed pitch that was set.
[FEED] button, [BACK] button, [FUNC] button
[BACK] button
[FEED] button
[FUNC] button
23215-H0-00
2-34
2
asic operation
4.1.3 Installation on the machine
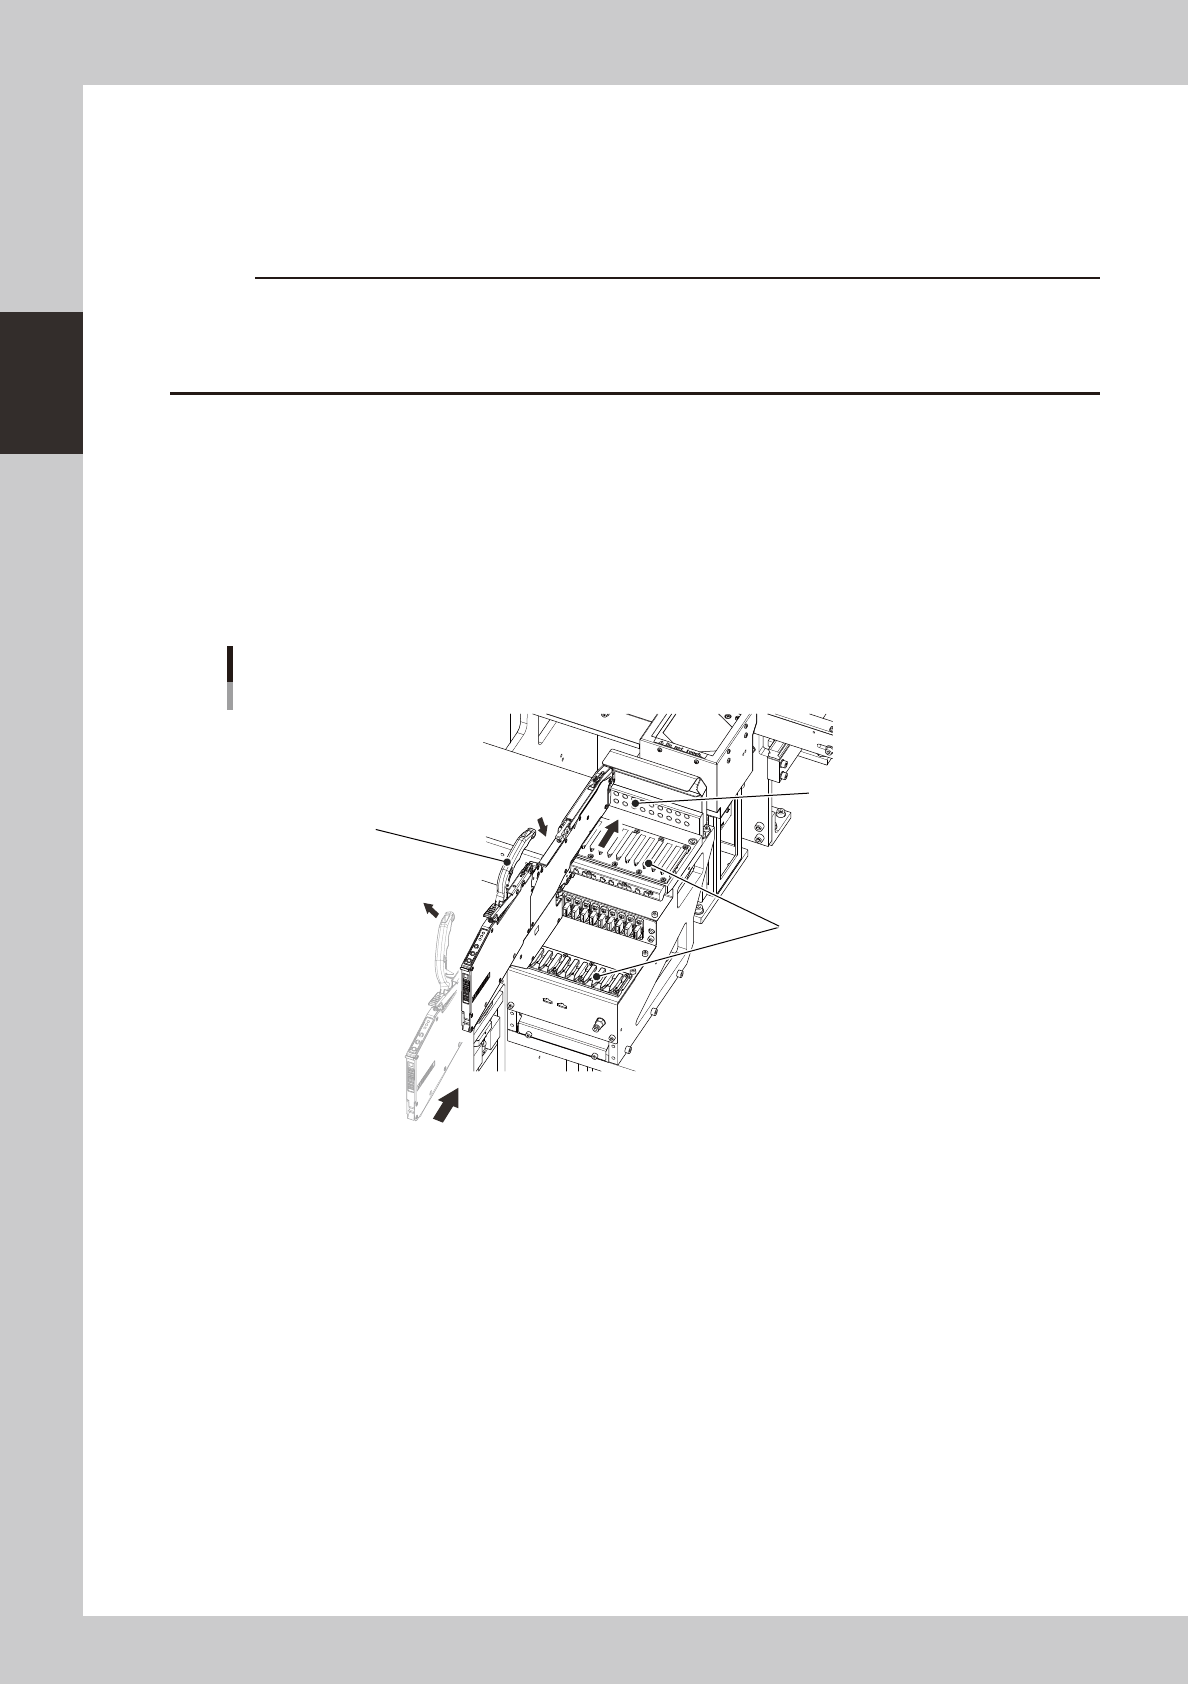
Observe the following instructions for installing a tape feeder on the machine.
e
1
Press the emergency stop button and then open the cover.
Press the emergency stop button on the machine to stop machine operation.
c
it.
2
Clean the surface of the feeder plate.
Parts or debris caught in the machine will tilt the feeder, interfering with stable pickup.
3
Place the tape reel in position of the reel holder.
Tape reels can be placed alternately in the upper and lower reel holders.
4
Set the feeder.
Raise the handle, align the target mark to the feeder installation position, and slide the feeder on the
rail to insert it to the location pin hole.
Installing a feeder
Handle
Locate pin hole
Rail
22226-H0-00
5
Check the following points to make sure that the feeder is properly installed.
• Top tape is no loose.
• Feeder is properly inserted all the way.
2-35
2
asic operation
4.2 Wafer tray changer
n
Precautions when handling pallets and magazines
Observe the following points when handling pallets and magazines.
• Store pallets and magazines in a clean environment where dust, grime and oil will not adhere.
• Take care not to drop pallets and magazines or apply excessive force or impacts. If a pallet or magazine is warped or
deformed by, for example, dropping, do not use it.
• Avoid hurting yourself on the edges of the pallets or magazines.
• When carrying a magazine, use the handles on the upper right/left of the magazine and do not let the magazine tilt.
• Carry the magazine with the stoppers closed (refer to section 4.2.2). If the stoppers are not closed, the pallets stored in
the magazine may slip out while being carried.
• When setting the magazine in the magazine rack, open the stoppers.
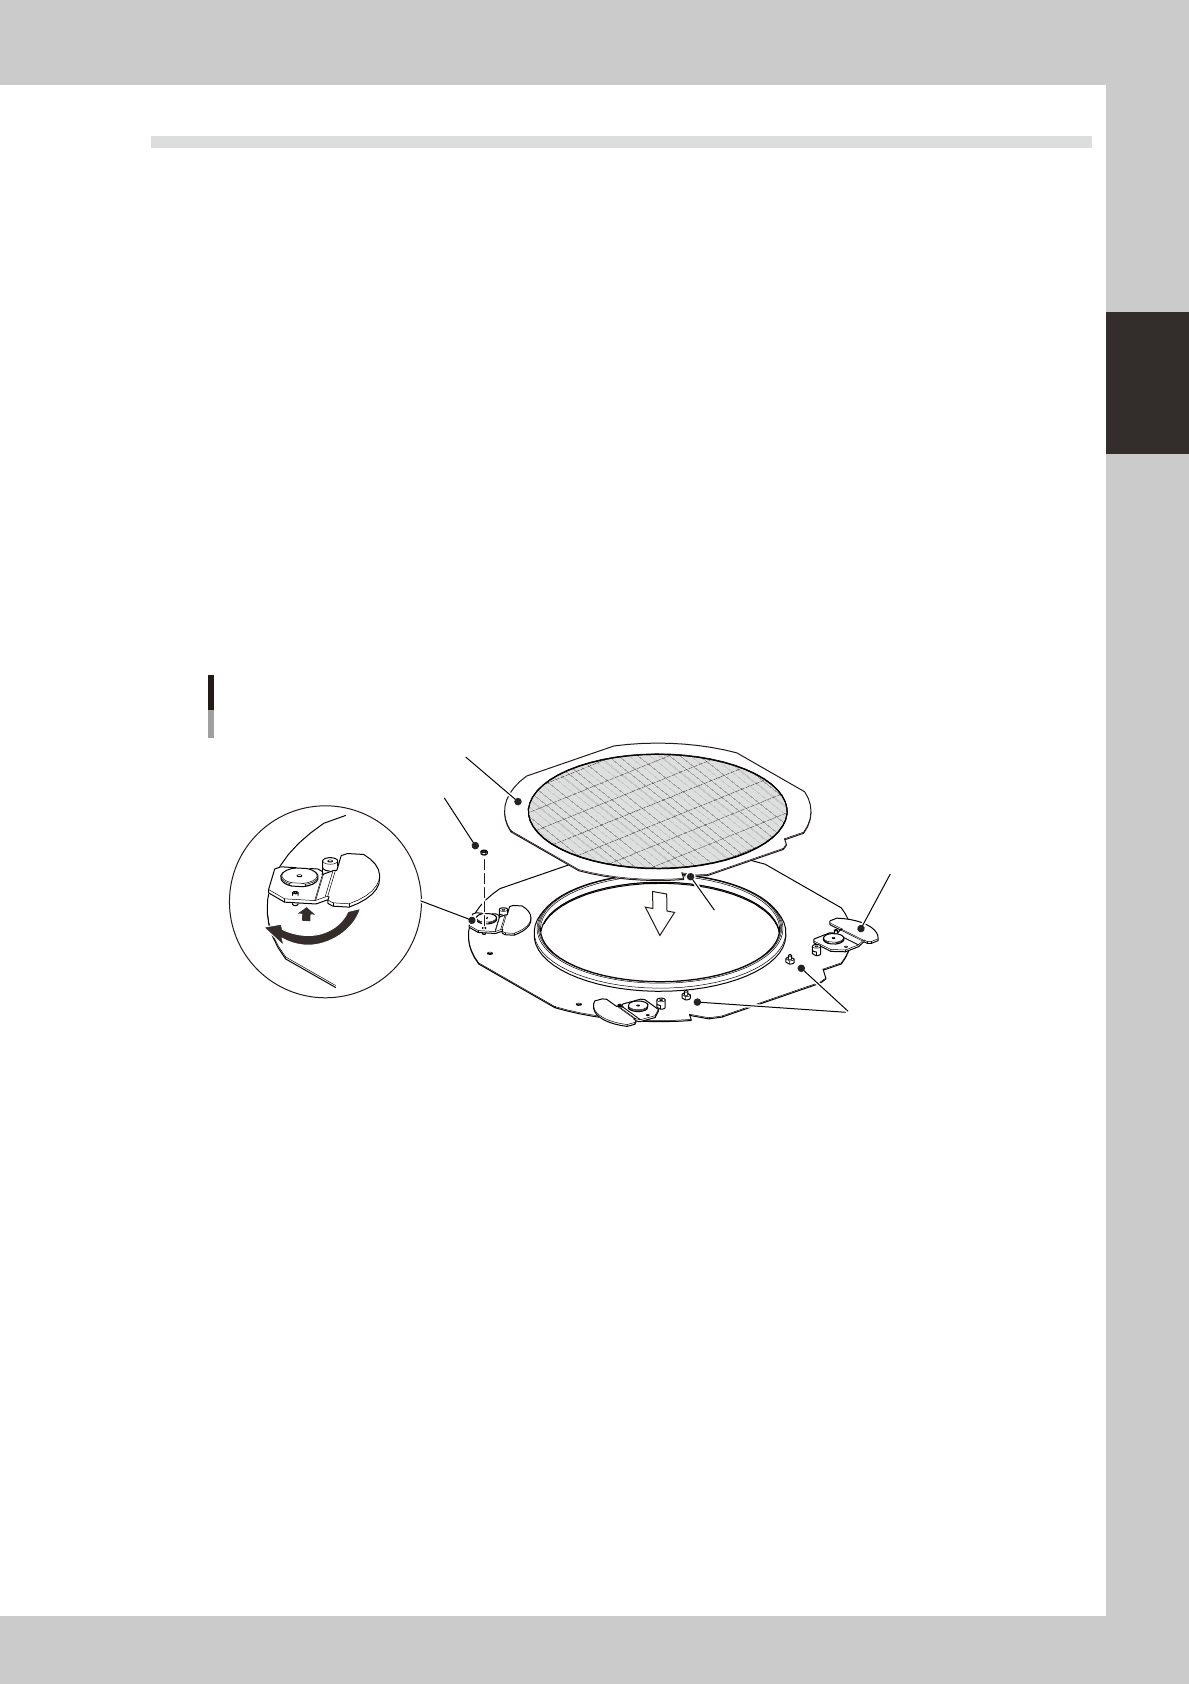
4.2.1 Setting a dicing frame (components) in the tray.
The following describes the method for setting a dicing frame on the wafer pallet.
1
Remove the mounting nuts of the ring holders.
Using a wrench, remove the mounting nuts of the four ring holders.
2
Turn the ring holders.
While raising each ring holder, turn it to a position where it does not touch the ring.
Setting the dicing frame on the wafer pallet
Dicing frame
Mounting nut
Ring holder
Notch
Locate pin
23229-H0-00
3
Set the dicing frame.
Place the dicing frame on the wafer pallet and turn it so that the notch and flat side contact against
the locate pins.
4
Secure the dicing frame.
When the dicing frame is set in position, return the ring holders to the original positions and secure them
with the nuts.