00192211-02_RI_ObliqueLighting - 第24页
Retrofit Instructions Oblique Lighting for SIPLACE 80 S-20 /F4/S-23/ F5 /HS-50/HF 8.3 Installing the Oblique Lighting 05/15 Issue 26 8 Fig. 8.3.5 Locking Screw ► S23/HS50: Fasten the oblique lighting in place wit h the l…
Oblique Lighting for SIPLACE 80 S-20 /F4/S-23/ F5 /HS-50/HF Retrofit Instructions
05/15 Issue 8.3 Installing the Oblique Lighting
25
8
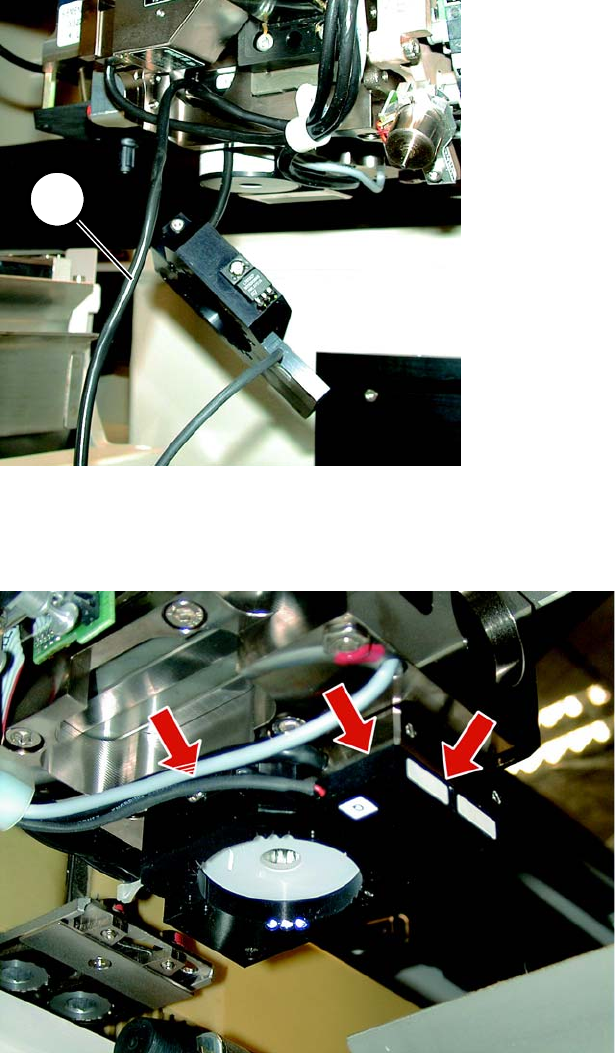
Fig. 8.3.3 2-Core Cable with Oblique Lighting
► S23/HS50: Now push up the oblique lighting. It must rest flush against the head support.
8
Fig. 8.3.4 The oblique lighting must rest flush against the PCB camera
► S23/HS50: Make certain that the oblique lighting is resting flat against the PCB camera at the
top right and against the head support at the front (see Fig. 8.3.4).
1
Retrofit Instructions Oblique Lighting for SIPLACE 80 S-20 /F4/S-23/ F5 /HS-50/HF
8.3 Installing the Oblique Lighting 05/15 Issue
26
8
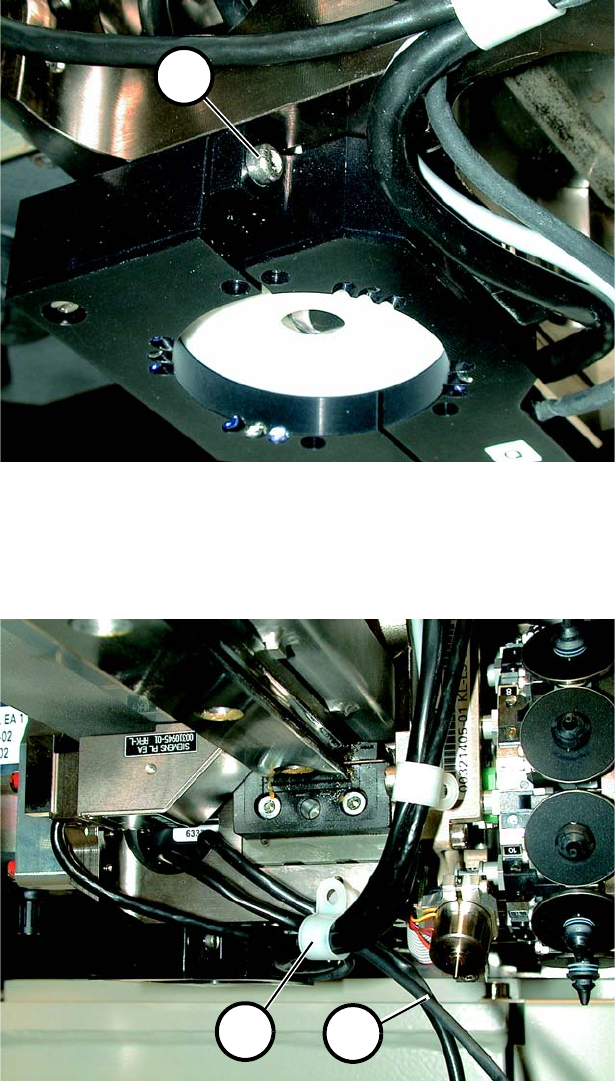
Fig. 8.3.5 Locking Screw
► S23/HS50: Fasten the oblique lighting in place with the locking screw (1 in Fig. 8.3.5). Please
be careful not to damage the label.
8
Fig. 8.3.6 Laying Cable using Cable Clamps
► S23: Unscrew the cable clamp (1 in Fig. 8.3.6) and push in both cables (2 in Fig. 8.3.6). Re-
fasten the cable clamp without pinching a cable. Proceed in the same manner with the other
cable clamps.
1
1
2
Oblique Lighting for SIPLACE 80 S-20 /F4/S-23/ F5 /HS-50/HF Retrofit Instructions
05/15 Issue 8.3 Installing the Oblique Lighting
27
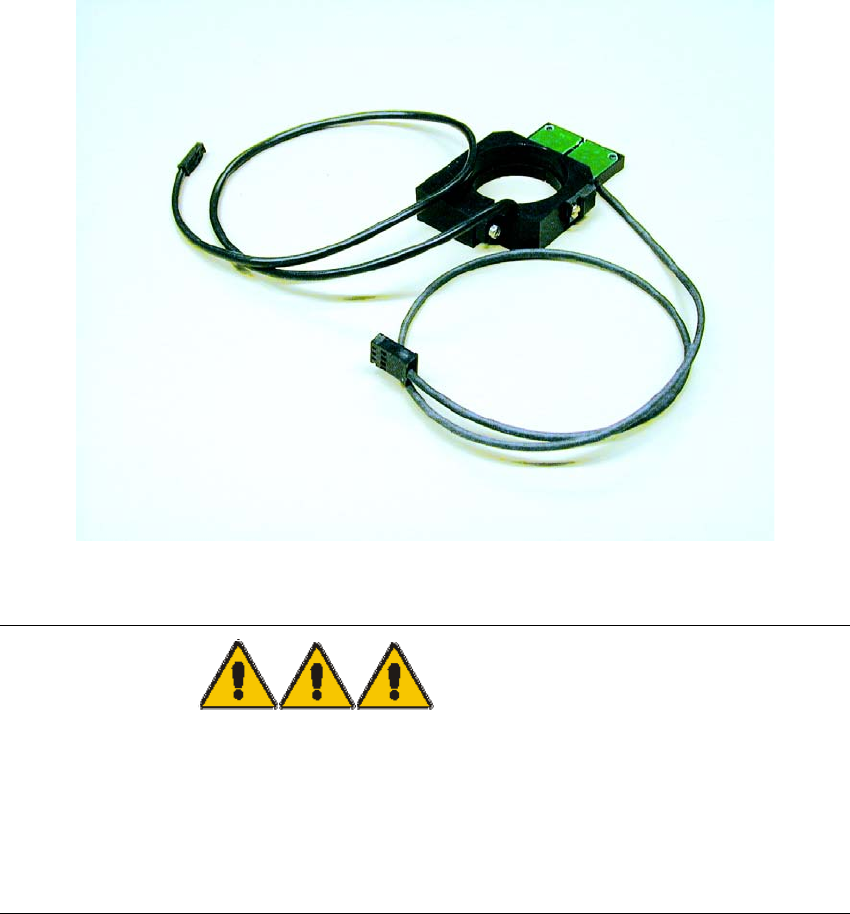
► HS50: Fasten the 2 cables to the existing camera cables and run them upward to the head
PCB.
8
Fig. 8.3.7 Laying Cable Upward
DANGER to eyesight 8
► Invisible LED radiation.
► Do not look directly into the beam, not even with optical instruments. Damage to or loss of eye-
sight may result.
► LED Radiation Class 3b and 2 as per EN 60825-1:94.
8
► S23/HS50: Lay the 2 cables (1+2 in Fig. 8.3.7) upward as shown and also fasten them in place
with cable clamps (3 in Fig. 8.3.7).