00194474-0702_AI_HeadReconfig_X_605_DE+EN.pdf - 第161页
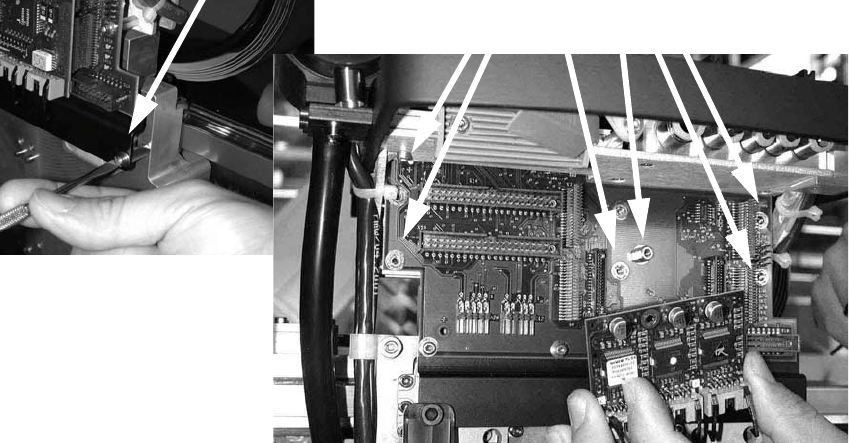
Head Reconfiguration Kits 2 Assemb ly Instructions - SIPLACE X-Series Head Reconfiguration Kits 07/2010 Edition 161 : Loosen the screws on the rail below the head ad apter board and the screws of the head adapter board, …
2 Assembly Instructions - SIPLACE X-Series Head Reconfiguration Kits Head Reconfiguration Kits
07/2010 Edition
160
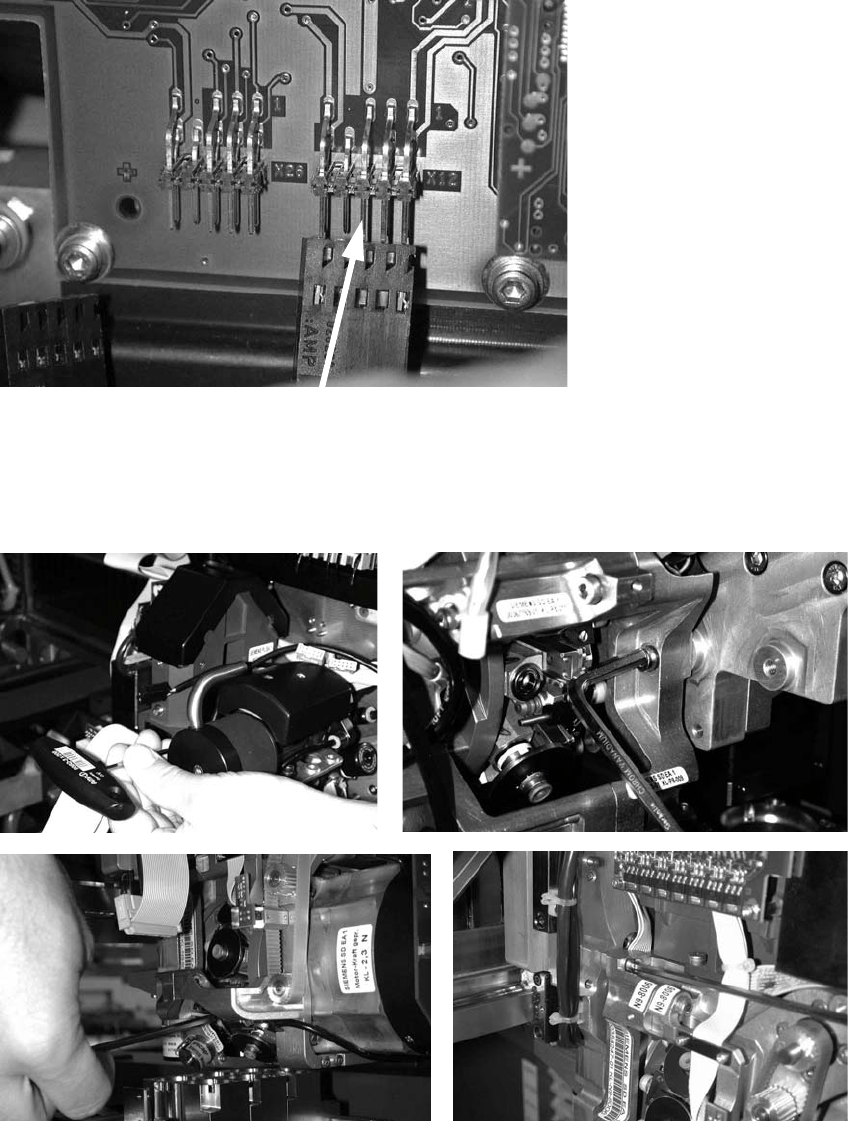
: Unplug the connector for the DP axis (see photograph below).
2
: Loosen the four screws used to fix the placement head.
With screws two and three, you should first remove one sleeve to make the screws more ac-
cessible.
2
2
Head Reconfiguration Kits 2 Assembly Instructions - SIPLACE X-Series Head Reconfiguration Kits
07/2010 Edition
161
: Loosen the screws on the rail below the head adapter board and the screws of the head
adapter board, and then remove both the large (head interface) and the small board (step mo-
tor board).

2 Assembly Instructions - SIPLACE X-Series Head Reconfiguration Kits Head Reconfiguration Kits
07/2010 Edition
162
2.9 Removing the TwinHead
: Switch the placement machine on at the main switch.
2
: Plug a USB stick or another suitable storage medium into the USB slot on the station computer.
2
2
: Save the machine data to the storage medium.
: Run the machine until it is empty and set down the nozzles.
: Remove the component trolley from the location at which the IC camera is accessible.
: Switch the placement machine off at the main power switch.
USB stick
(computer unit)
USB stick
(box PC)