00196428-0102_AI_Reconfig_Kit_X-Serie_CPP_DE EN - 第119页
Head Reconfiguration Kit 2 Assembly Instructions Head Reconfiguration Kit CPP fo r the SIPLACE X Ser ies Issue 03/2010 2.8 Removing the Placement Head 119 2.8.4 Removing the Head Adapter Board X Remove the six screws and…
2 Assembly Instructions Head Reconfiguration Kit CPP for the SIPLACE X Series Head Reconfiguration Kit
2.8 Removing the Placement Head Issue 03/2010
118
2
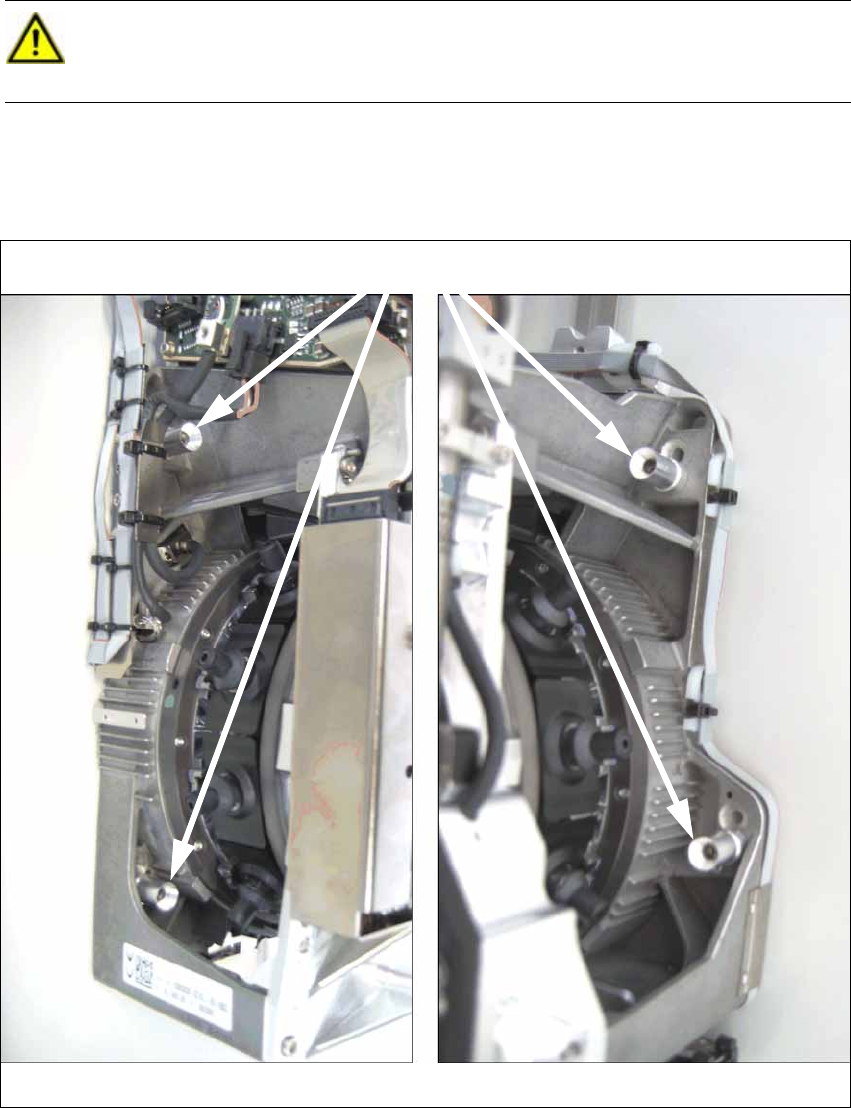
X Loosen and remove the four fixing screws of the placement head and lift the placement head
off.
CAUTION:
Tightly hold the placement head at its handle, when loosening and removing the fixing
screws, to prevent the head from falling down and being damaged! 2
Head screws
on the left on the right
Head Reconfiguration Kit 2 Assembly Instructions Head Reconfiguration Kit CPP for the SIPLACE X Series
Issue 03/2010 2.8 Removing the Placement Head
119
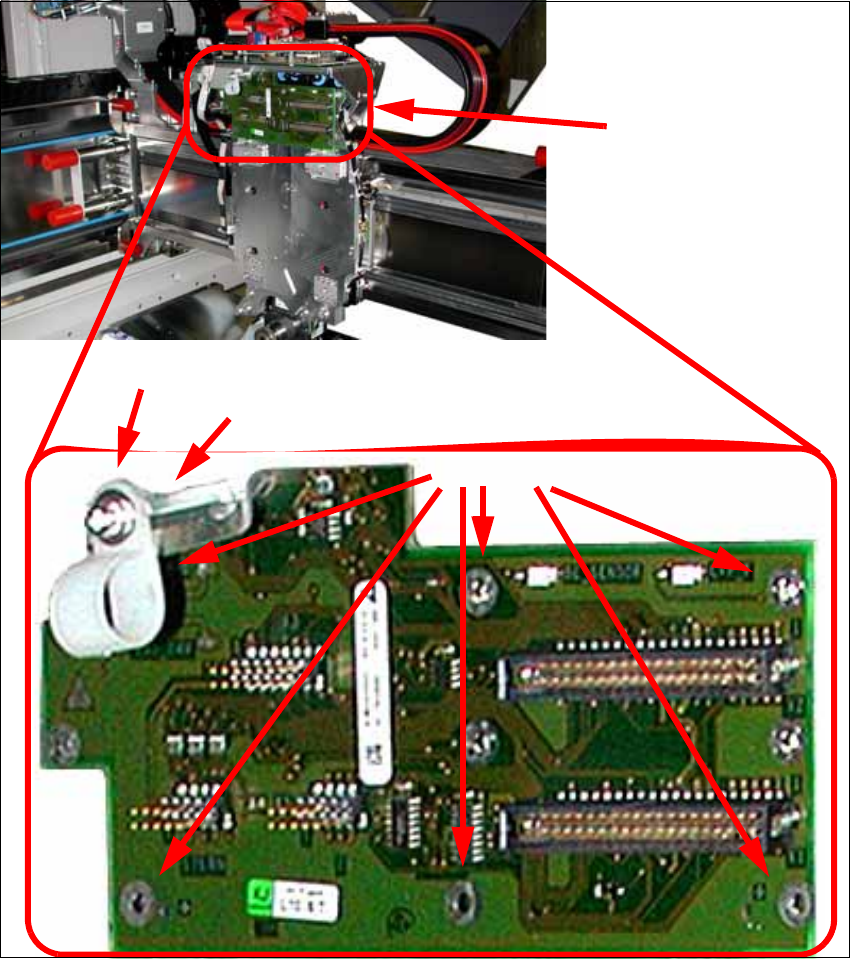
2.8.4 Removing the Head Adapter Board
X Remove the six screws and lift off the head adapter board (see photos below).
When switching to a C&P20 head this step can be omitted. In this case, however, the cable
holder must be reinstalled.
X Also remove the cable clip and the hexagonal bolt.
Head adapter board
6 screws
Cable clip
Hexagonal bolt
2 Assembly Instructions Head Reconfiguration Kit CPP for the SIPLACE X Series Head Reconfiguration Kit
2.8 Removing the Placement Head Issue 03/2010
120
2.8.5 Removing the Servo Cards
X Remove the servo amplifier star, Z axis and the DC/DC converter for the DP drives.
See also Section 2.7.5 "Replacing the Servo Cards" on page 100
When switching to a C&P20 head, the servo card star axis and the DC/DC converter can be
reused.
The servo amplifier of the Z axis must be removed in any case.
2