00194591_02.pdf - 第25页
Installation Manual SIPLACE Setup Center RF 2.1 3 Installation Edition 09/2005 EN 3.3 Installation of SIPLACE Setup Center and Possible Setup Types 25 3.3.2.2 Setup T ype - SIPLACE Setup Center Dat abase This setup type …
3 Installation Installation Manual SIPLACE Setup Center RF 2.1
3.3 Installation of SIPLACE Setup Center and Possible Setup Types Edition 09/2005 EN
24
Step 5
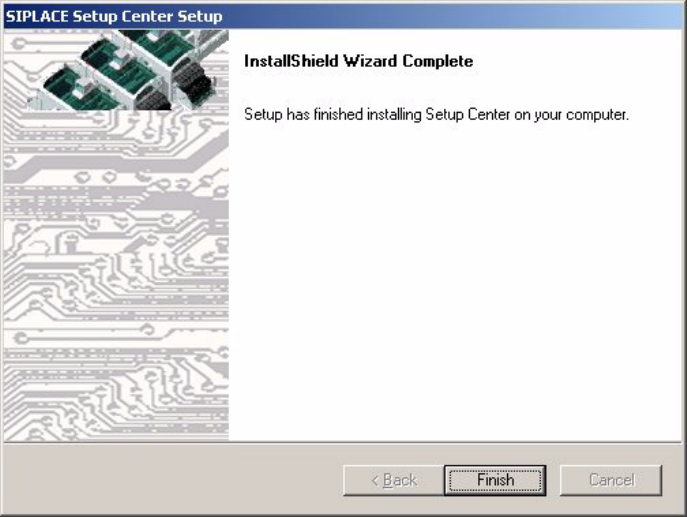
→ The installation routine is now started.
The Installation Complete dialog box confirms that the installation has been completed suc-
cessfully. 3
3
Fig. 3.3 - 12 "InstallShield Wizard Complete" dialog box
→ Click Finish.
Installation Manual SIPLACE Setup Center RF 2.1 3 Installation
Edition 09/2005 EN 3.3 Installation of SIPLACE Setup Center and Possible Setup Types
25
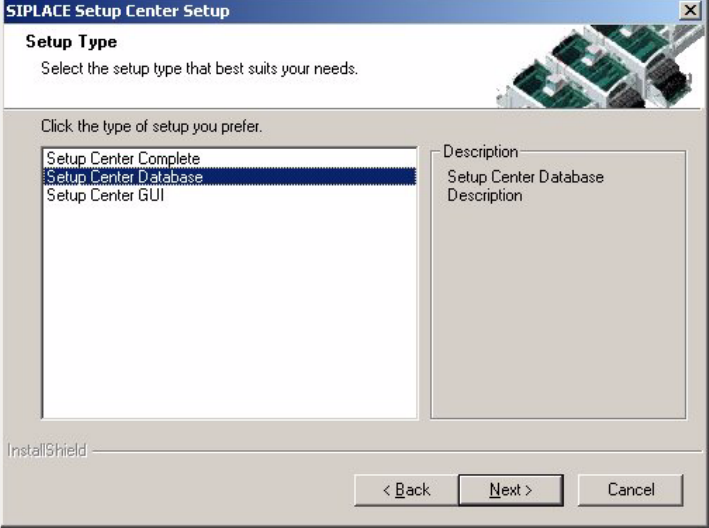
3.3.2.2 Setup Type - SIPLACE Setup Center Database
This setup type contains the database components of the SIPLACE Setup Center. Setup detects
if SQL Server or MSDE (Microsoft Data Desktop Engine) has already been installed. Select this
type to install the SIPLACE Setup Center database to a SQL Server. 3
Step 1
→ Run through the steps in “Starting Installation - First Steps” on page 14.
3
Fig. 3.3 - 13 "Setup Type" dialog box
→ Select the Setup Center Database setup type.
→ Click Next.
3
3 Installation Installation Manual SIPLACE Setup Center RF 2.1
3.3 Installation of SIPLACE Setup Center and Possible Setup Types Edition 09/2005 EN
26
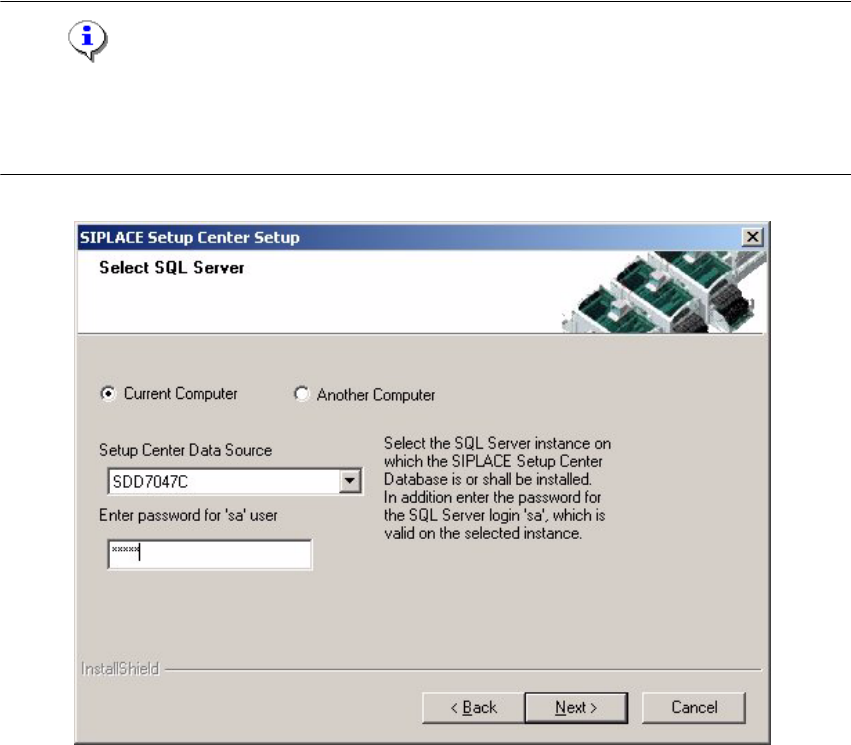
Step 2
→ In the Select SQL-Server dialog box you enter the information required to be connected with
the SQL Server and database.
Note
This password is empty if MSDE has been freshly installed. In this case, erase the displayed de-
fault password. Subsequently, a window will open, prompting you to change this password. You
may accept the Siemens Service default password or choose one of your own. 3
3
Fig. 3.3 - 14 "Select SQL-Server" dialog box
→ Enter the Password for the SQL Server user ’sa’, i.e. the SQL server system administrator.
→ Choose your Another Computer from the pull-down menu to show other computer.
→ Choose your SQL Server Instance from the pull-down menu.
→ Click Next.