00194591_02.pdf - 第29页
Installation Manual SIPLACE Setup Center RF 2.1 3 Installation Edition 09/2005 EN 3.3 Installation of SIPLACE Setup Center and Possible Setup Types 29 Ste p 4 → The S t art Copyin g Files dialog box gives you a last chan…
3 Installation Installation Manual SIPLACE Setup Center RF 2.1
3.3 Installation of SIPLACE Setup Center and Possible Setup Types Edition 09/2005 EN
28
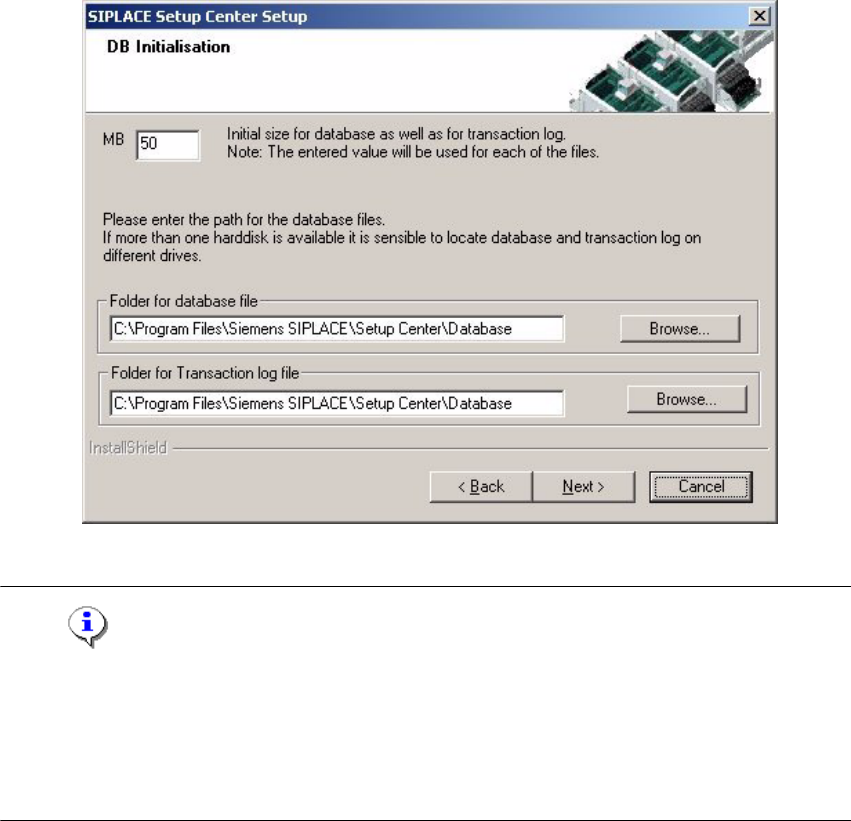
Step 3
→ The figure you enter in the MB text box defines the initial size of the SIPLACE Setup Center
database files (default: 50) which are to be created during the installation.
→ Confirm the default value or enter the size you want in the MB text box.
3
Fig. 3.3 - 16 "DB Initialisation" dialog box
Note
The specified size is only an initial value. The database will grow automatically as required.
However, only intervention by the database administrator is capable of freeing up unused disk
space. In the "database files" edit field, enter the directory in which the SIPLACESetup-
Center.mdf file is to be created. In the transaction log files edit field, enter the name of the di-
rectory in which the SIPLACESetupCenter.mlf database file is to be created. 3
Installation Manual SIPLACE Setup Center RF 2.1 3 Installation
Edition 09/2005 EN 3.3 Installation of SIPLACE Setup Center and Possible Setup Types
29
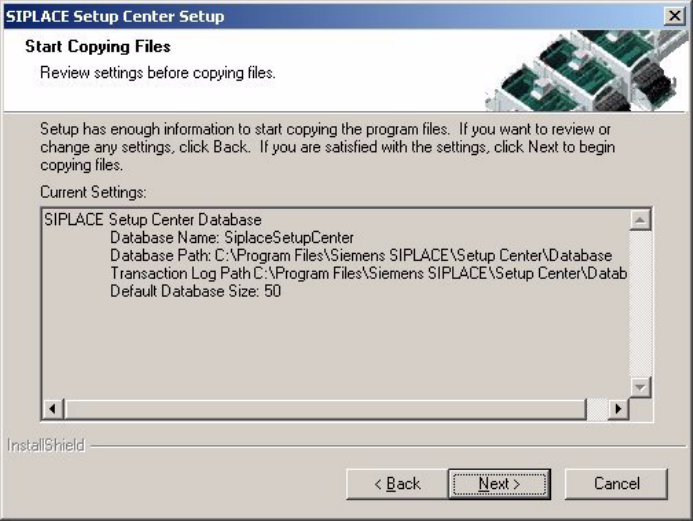
Step 4
→ The Start Copying Files dialog box gives you a last chance to check the information you have
entered during the previous steps.
3
Fig. 3.3 - 17 "Start Copying Files" dialog box

3 Installation Installation Manual SIPLACE Setup Center RF 2.1
3.3 Installation of SIPLACE Setup Center and Possible Setup Types Edition 09/2005 EN
30
Step 5
→ The installation routine is now started.
The Setup Complete dialog box confirms that the installation has been completed success-
fully. 3
3
Fig. 3.3 - 18 "InstallShield Wizard Complete" dialog box