00198051-01_IM_SetupCenter_8.0_EN.pdf - 第40页
Setup Center Application Installation Individual Setup Types and Next Steps 5.2.3 Setup Type – SIPLACE Setup Center Server 40 Installation Manual SIPLACE Setup Center 8.0 Step 4 ► The figure you enter in the MB text b ox…
Setup Center Application Installation
5.2.3 Setup Type – SIPLACE Setup Center Server Individual Setup Types and Next Steps
Installation Manual SIPLACE Setup Center 8.0 39
Step 3a
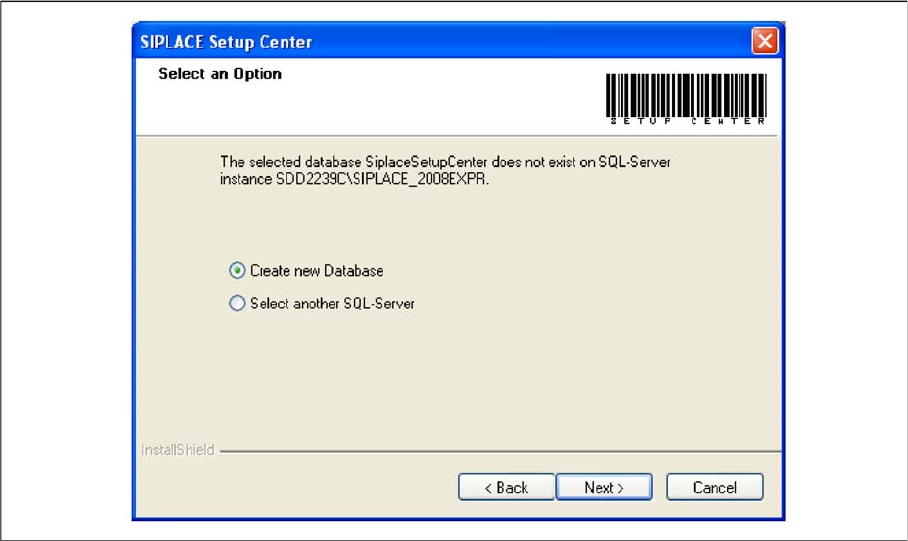
The following dialog appears, in case no database with the name SiplaceSetupCenter exists:
► Choose Select another SQL Server you return to the previous dialog.
► Click Next to create a new database.
Setup Center Application Installation
Individual Setup Types and Next Steps 5.2.3 Setup Type – SIPLACE Setup Center Server
40 Installation Manual SIPLACE Setup Center 8.0
Step 4
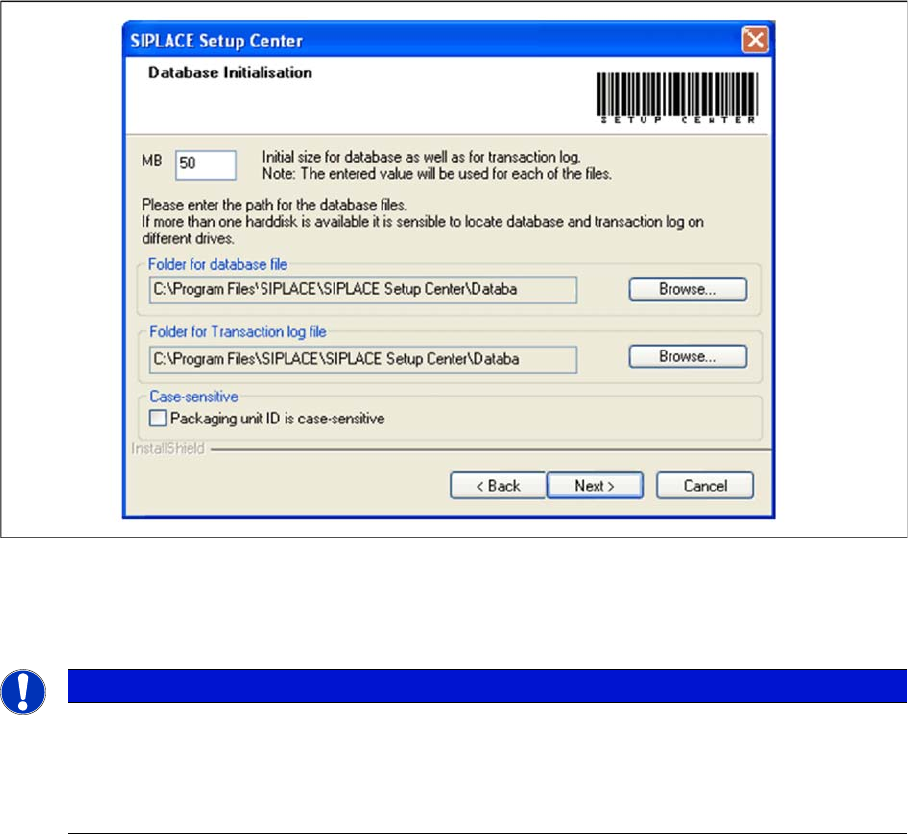
► The figure you enter in the MB text box defines the initial size of the SIPLACE Setup Center database
files (default: 50) which are to be created during the installation.
► Confirm the default value or enter the size you want in the MB text box.
► Case-sensitive means that the upper and lower case for packaging unit identification (Packaging unit
ID) can be evaluated by Setup Center. Activate the checkbox Packaging unit ID is case-sensitive, if
it is necessary to distinguish between upper- case and lower-case in Packaging unit ID. This option
can only be changed during the installation.
NOTICE
The specified size is only an initial value. The database will grow automatically as required.
However, only intervention by the database administrator is capable of freeing up unused disk
space. In the database files edit field, enter the directory in which the SIPLACESetupCent
-
er.mdf file is to be created. In the transaction log file edit field, enter the name of the directory
in which the SIPLACESetupCenter.mlf database file is to be created.
Setup Center Application Installation
5.2.3 Setup Type – SIPLACE Setup Center Server Individual Setup Types and Next Steps
Installation Manual SIPLACE Setup Center 8.0 41
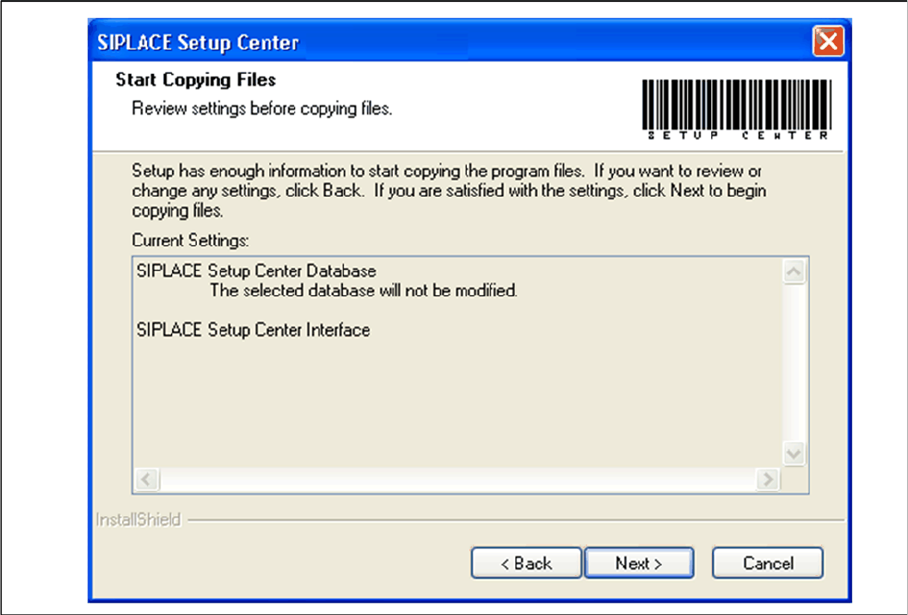
Step 5
► The Start Copying Files dialog box gives you a chance to check the information again, which you
have entered during the previous steps.
► Click Next.
⇨ The installation routine is now started.