00197396-02_AI_Serviceflap_X-Series_S_DE_EN - 第43页
3 Installation 3.1 Preparatory Steps Assembly Instructions / Montageanleitung SIPLACE X-Series S Service Flap Serviceklappe 07/2019 43 3 Installation Installation of the service flap consists in principle of the followin…

2 Brief Description
2.5 Required Working Time
42 Assembly Instructions / Montageanleitung SIPLACE X-Series S Service Flap Serviceklappe 07/2019
3 Installation
3.1 Preparatory Steps
Assembly Instructions / Montageanleitung SIPLACE X-Series S Service Flap Serviceklappe 07/2019 43
3 Installation
Installation of the service flap consists in principle of the following steps:
●
3.2 "Removing the Side Cover" [}43]
●
3.3 "Converting the Side Cover" [}44]
●
3.4 "Fitting Hinges and Sliders" [}45]
●
3.5 "Fitting the Security Switch" [}46]
●
3.6 "Fitting the Service Flap" [}47]
3.1 Preparatory Steps
► Switch off the machine, disconnect it from the power supply and secure it to prevent
unauthorized reactivation.
1.2 "Preparatory work..." [}33]
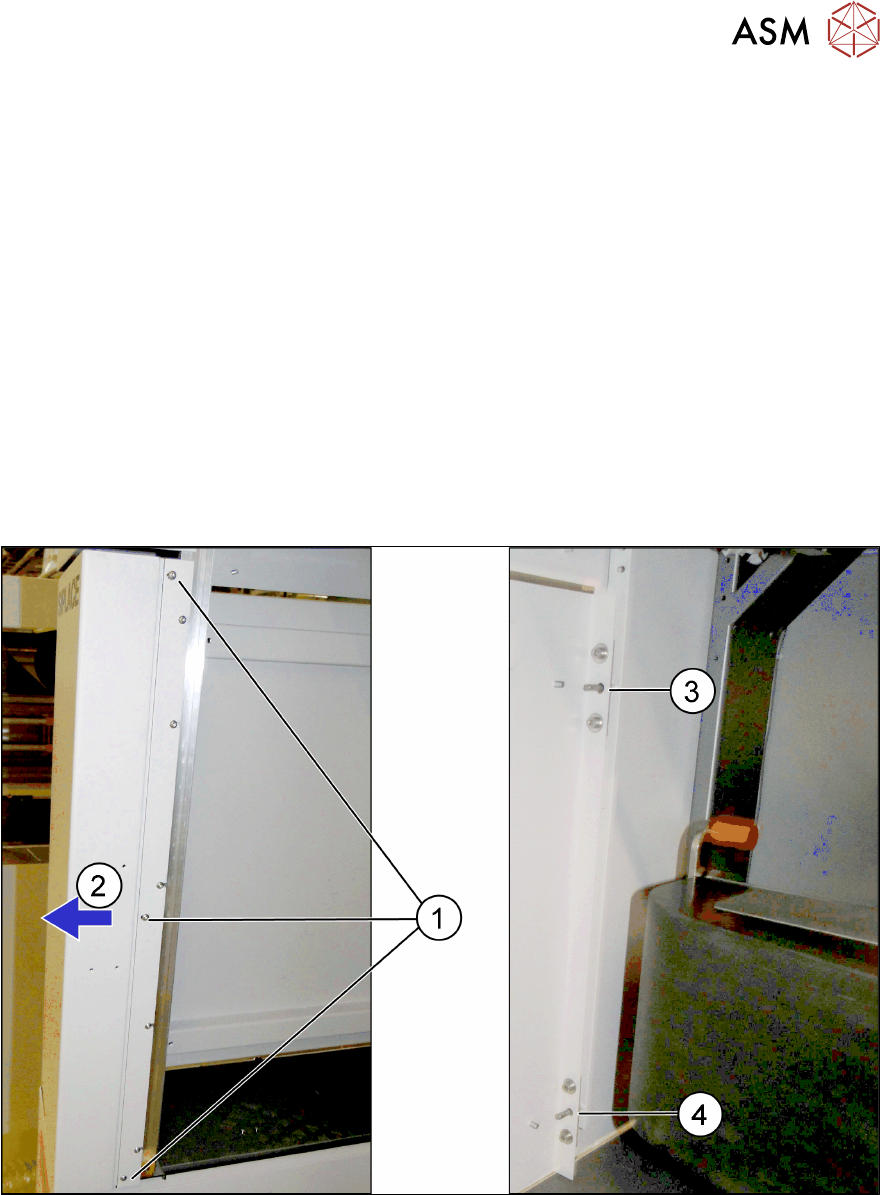
3.2 Removing the Side Cover
Fig.8: Removing the side cover
► Remove the three captive screws (1).
► Pull the side cover forwards and out (2).
► Remove the bolts at (3) and (4).
3 Installation
3.3 Converting the Side Cover
44 Assembly Instructions / Montageanleitung SIPLACE X-Series S Service Flap Serviceklappe 07/2019
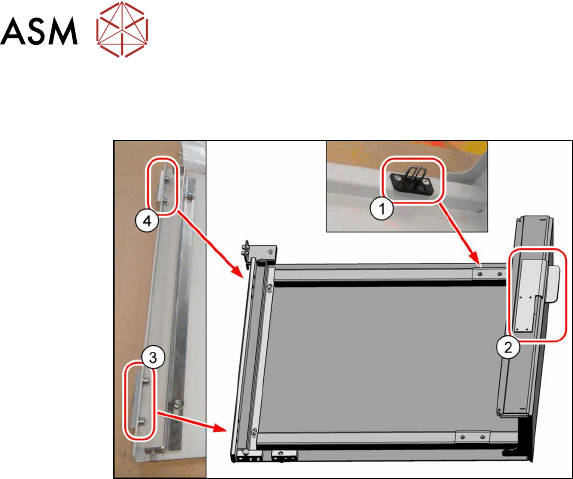
3.3 Converting the Side Cover
Fig.9: Converting the side cover
► Place the side cover down on a suit-
able work surface.
► Fasten the actuating bracket for the
safety switch using two screws(1).
► Fasten the handle with two screws(2).
Handle assy SIPLACE X-Series S
for locations 1 / 3 [03112951‑xx]
for locations 2 / 4 [03112952‑xx]
► Remove the reinforcements at (3)
and (4).