20121120111955_KY8030_2_Maintenance_Manual_Eng_ver1 - 第42页
42 | KY -8030 2 3D Solder Paste Inspec tion System V ersion 1.0 K OH Y OUNG T ECHNOLOGY I NC . 1.2.12. P ROBE C HANGE Figure 1-13. Probe Change 1. Cut the power/the air supply and press emergency …
Maintenance Manual | 41
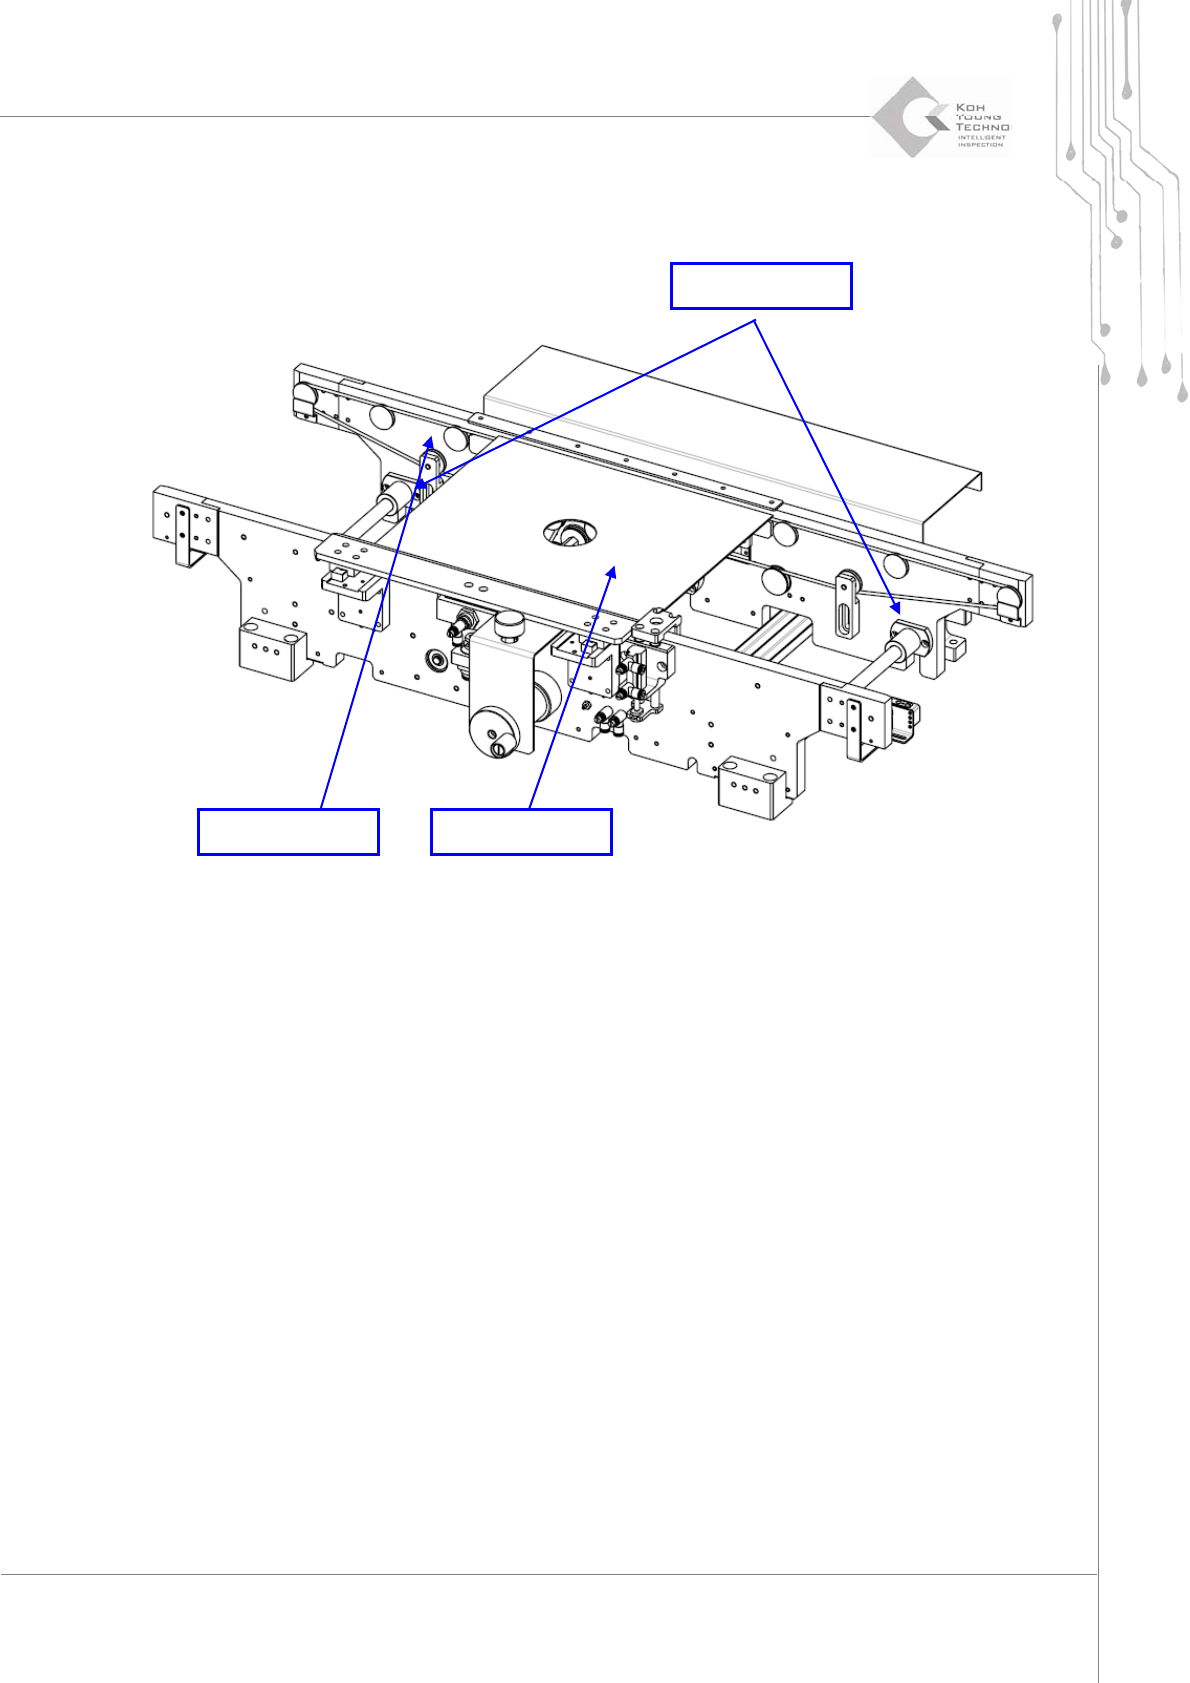
1.2.11. CONVEYOR WIDTH/RAIL SETTING
Figure 1-12. Conveyor Width Setting
1. Cutthepower/theairsupplyandpressemergencyswitch.
2. OpentheFrontDoor/WindowanddisassembleRearCover/RightSideCover.
3. DisengageboltstosettheSlideBushofMovingRail.
4. Insert PCB or Plate to Conveyor, move the Moving Rail to contact PCB or Plate to
MovingRail.
5. WhenPlatecontactsMovingRail,fixtheSlideBushwithbolts.
6. ConfirmthelengthoftheConveyorbycontrollingconveyormanually.
Moving Rail PCB or Plate
Slide Bush
42 | KY-8030 2
3DSolderPasteInspectionSystem
Version 1.0
KOH YOUNG TECHNOLOGY INC.
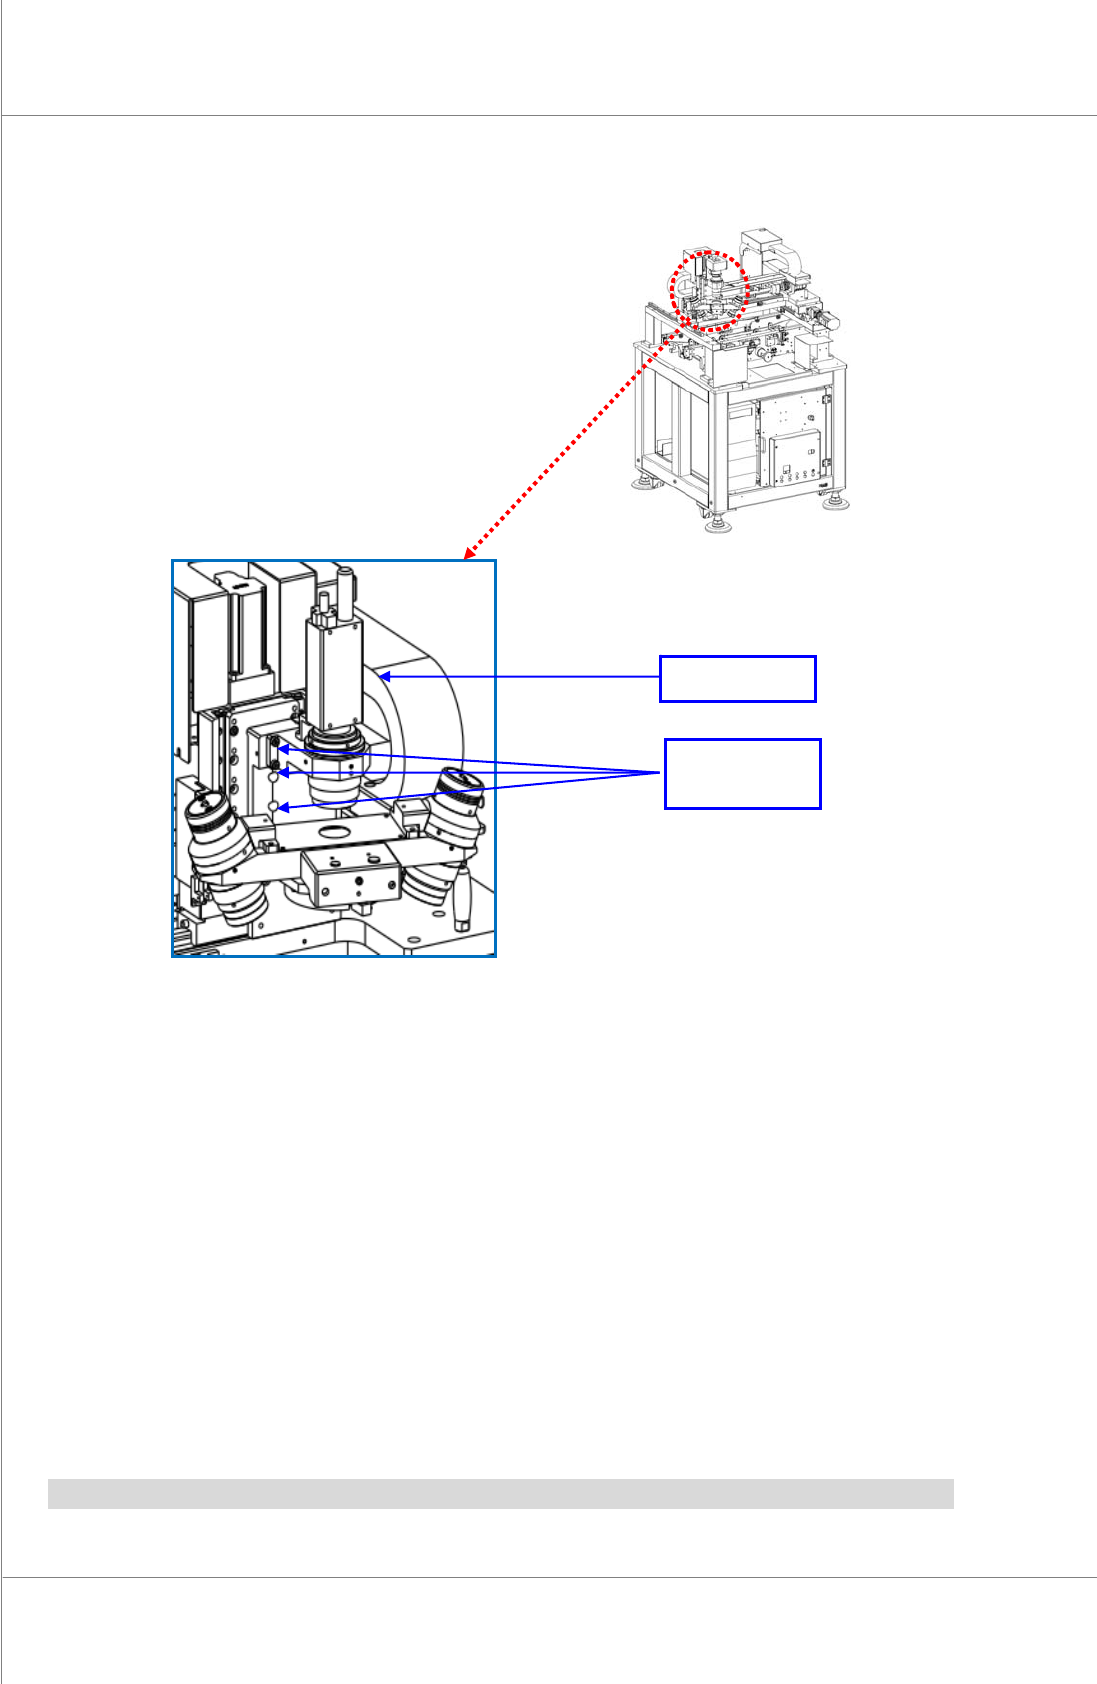
1.2.12. PROBE CHANGE
Figure 1-13. Probe Change
1. Cutthepower/theairsupplyandpressemergencyswitch.
2. Openthe FrontDoor/WindowanddisassembleRearCover/RightSideCover.
3. DisassembleProbeUnitfromX‐Axis(eliminateConnector)
4. AssemblenewProbeUnittoX‐Axis(connecttheConnector)
5. SupplypowerandcheckiftheilluminationandPZT
isoperatingproperlyatthemanual
mode.
6. ExecuteCalibrationoftheProbe(refertoProbeCalibrationmanualforthis)
Note:PZTAmpshouldbechangedwhenchangingProbe.
Probe Fixing
Position
Probe
Maintenance Manual | 43
②
①
④
③
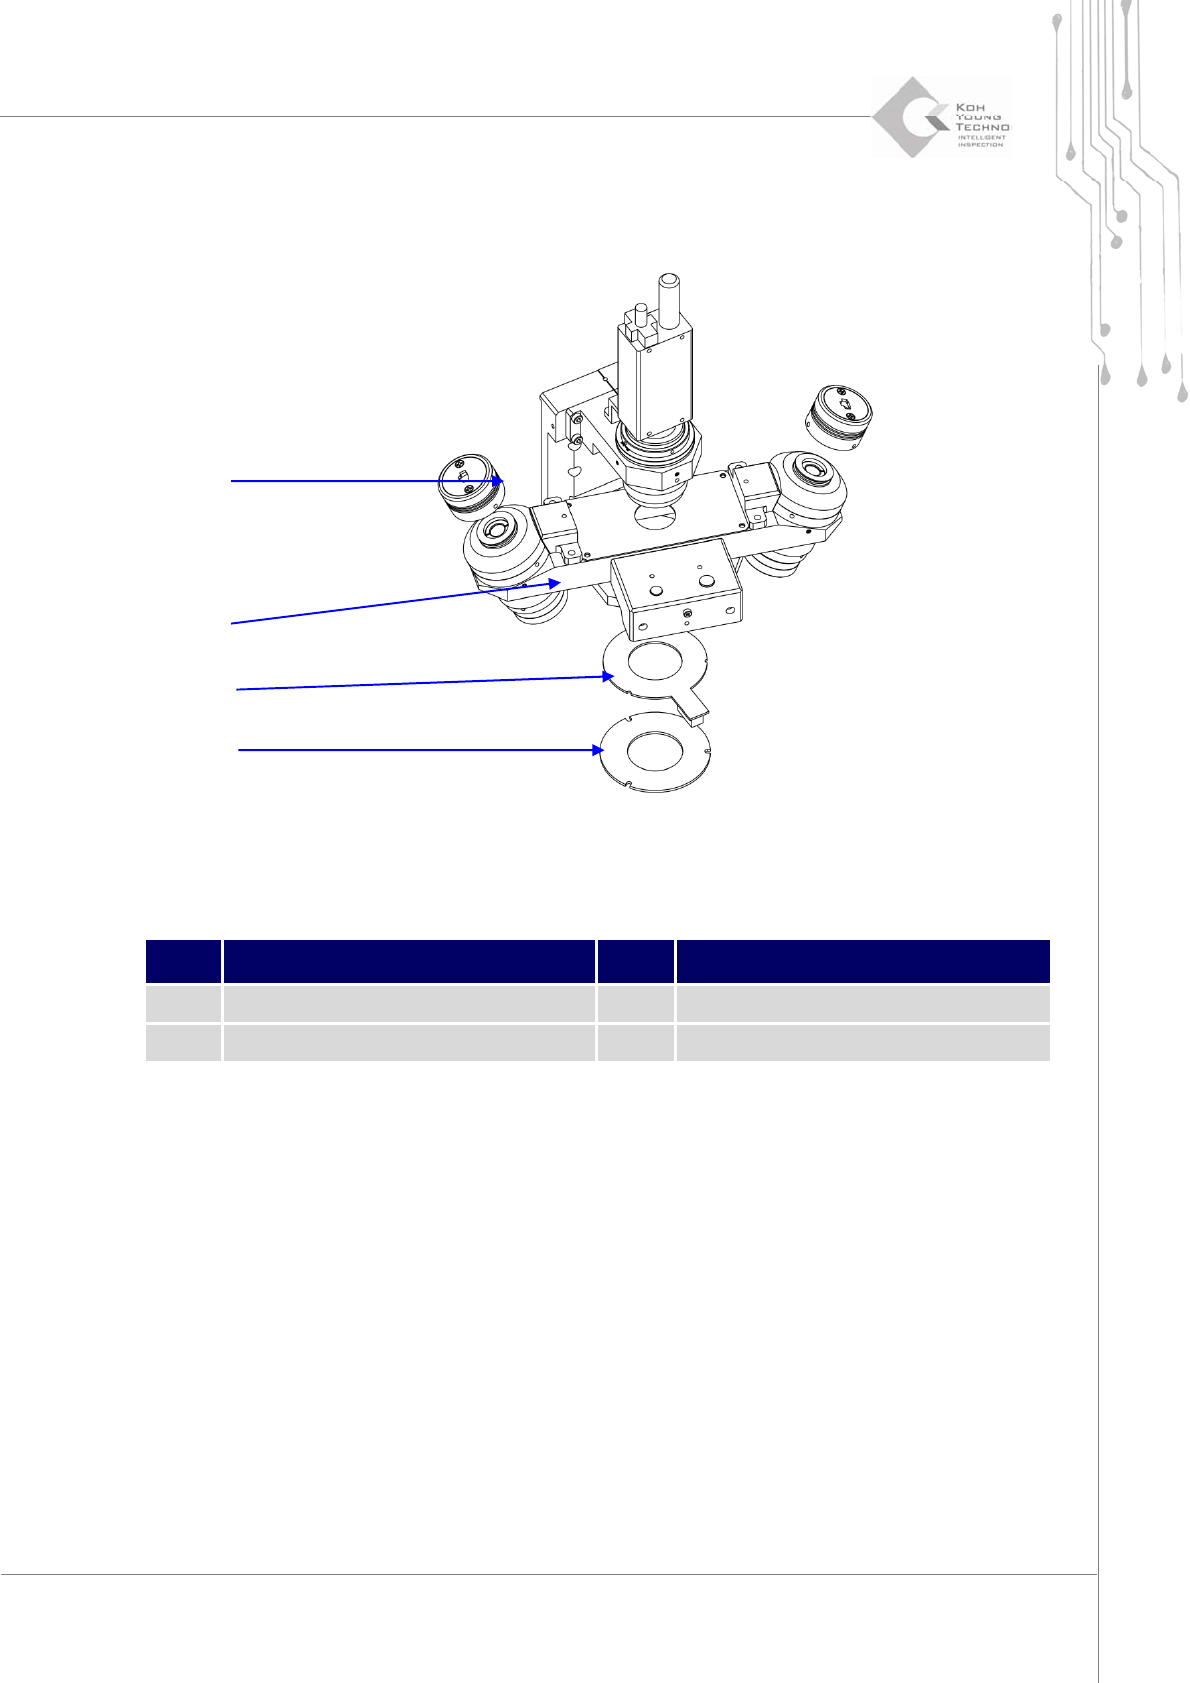
1.2.13. 2D/3D LED CHANGE AND CLEANING
Figure 1-14. 2D/3D LED change and cleaning
Item Description Item Description
1 3D LED Light 3 2D LED Light
2 Projection Lens 4 Diffuser
1. Cutthepower/theairsupplyandpressemergencyswitch.
2. OpentheFrontDoor/WindowanddisassembleRearCover/RightSideCover.
3. DisassembletheConnectorofProbe.
4. Disassemblethe3DLEDLight.
5. Likewise,disassemble2DLEDLight.
6. Assemblyisinreverseorderofdisassembly.
7. Supplypowerand
checkiftheilluminationisoperatingproperlyatthemanualmode.
8. Settheilluminationatthemanualmode(refertotheProbeCalibrationmanualforthis)
9. Moistcleanpaperwithlenscleaningsolvent.